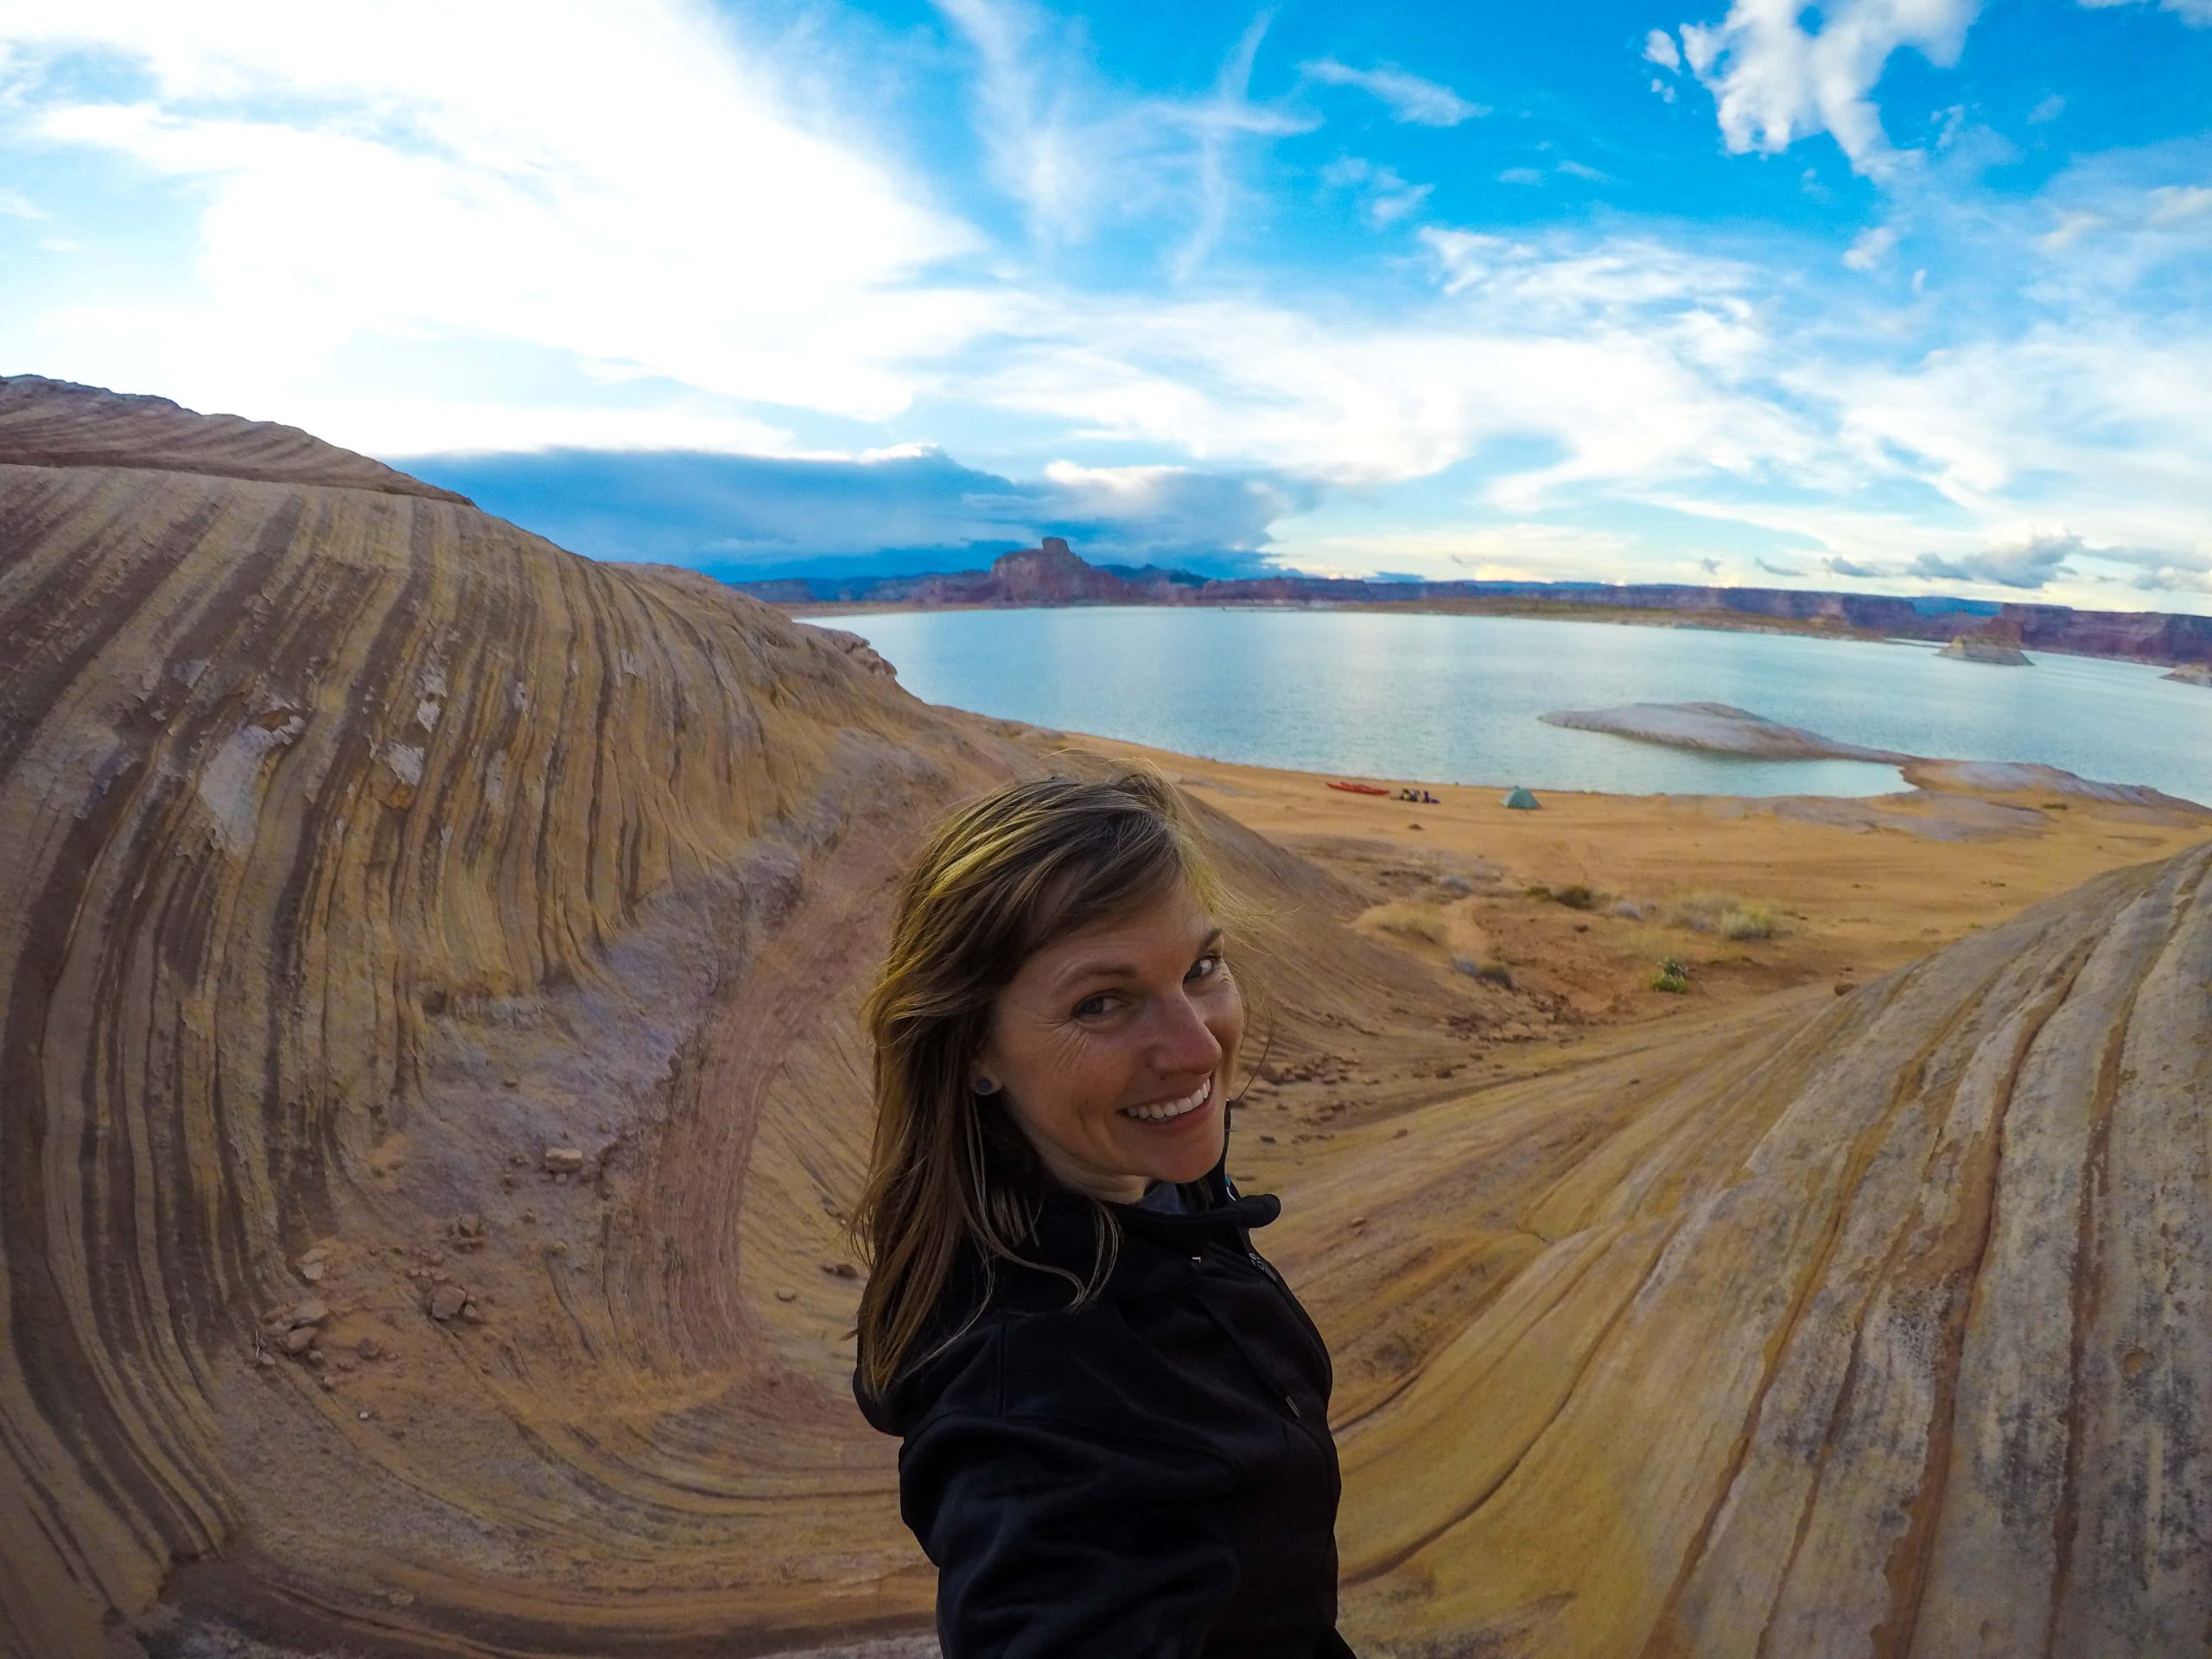
As a van lifer who works from the road, having reliable internet in my van is crucial. A typical work day in my van might include Zoom calls with my van coaching clients, sending dozens of emails, updating my website, and uploading photos to my blog and videos to Instagram. These are data-heavy activities, and a slow internet connection means glitchy video calls and a lot of wasted time while I sit around waiting for pages to load.
I have a Starlink for when I’m camping in my van and out of cell range, but the Starlink dish isn’t permanently installed on the roof of my van. So unless I’m parked somewhere for an extended period and take the time to set up my Starlink, it means that I’m more often than not using my cell phone as my primary source of internet.
I’ve been a Verizon customer for nearly 20 years. When comparing service while camping with my van life friends, it’s clear that Verizon has the best coverage, especially in remote areas around the US. However, a few years ago, one of my Bearfoot Theory contributors (Courtney Stephenson) switched to a carrier I’d never heard of: Visible. As a full-time van lifer who was working remotely (including from down in Baja), Courtney was so happy with the service that she wrote a Visible review here on the blog.
This year as my contract with Verizon was up, I decided to switch to Visible too. With Verizon, I was paying $115 a month, and now with Visible+, my plan is only $45 a month (or $395 for an entire year when paid annually). Switching to Visible was a lot easier than I expected, and I’m sooooo happy to be saving nearly $1,000 a year on my phone bill, especially when the service is comparable.
Visible is actually owned by Verizon and operates on Verizon’s 5G and 4G LTE networks. Apart from having the same coverage as Verizon, Visible also offers unlimited data, talk, text, and mobile hotspot usage. It almost seemed too good to be true, but I had nothing to lose giving Visible a try. Visible requires no annual contract, so I knew if I didn’t like it as much as Courtney did, I could easily switch back to Verizon or another carrier.
I’ve been testing Visible for a few months now – and I’m convinced it’s the best cell phone carrier on the market for van lifers. It was so simple to switch over, billing is straightforward, and there are no hidden taxes or fees. Also in comparing my service to my partner Ryan’s (who is still with Verizon), I haven’t noticed any difference in speed or coverage, and I’ve done speed tests to prove it.
In this updated Visible review, I break down Visible plan options and pricing, the pros and cons of Visible, and my personal experience using Visible to work remotely on the road.
Sponsored by Visible
This blog post is sponsored by Visible. Visible plans start as low as $25 a month, and if you want to give Visible a try without committing, they are offering Bearfoot Theory readers $10 off any Visible monthly plan for the first 3 months. Use code MOOLAH for a limited time to claim. As always, I only recommend products and services I love and think you will love too!
What Is Visible?
Visible is a low-cost cell phone carrier that is owned by Verizon and runs off of Verizon’s 5G/4G LTE network so anytime there is Verizon coverage, Visible should also have coverage. Even if you’re not a van lifer, Visible could be a great carrier option if you live in an area with strong Verizon coverage.
I mentioned above that Ryan is still on Verizon. This has given us the opportunity to test Visible against Verizon both at home and on a recent road trip to Arizona. There hasn’t been anywhere where Ryan has had coverage with Verizon that I didn’t have the same number of bars with Visible.
Visible has two simple plans – the Visible plan ($25/month) and the Visible+ plan ($45/month). Both plans offer unlimited data, talk, text, and mobile hotspot usage. I’ll get into the details and differences between the two plans below.
Visible is a pre-paid service that requires no credit check unless you’re financing a new phone. There are no required annual contracts or activation fees, so there’s greater flexibility than other phone companies. Billing is handled through their app where you can easily set up monthly auto-pay or manage your payments. You can also pay annually for even greater savings.
Visible’s plans are designed for single-line users instead of families, and there are no multi-line discounts. This makes it especially good for solo van lifers and travelers. Even with Ryan and I, if we both had the most expensive Visible+ plan ($45/month), it would still be cheaper than if we were on a family plan with another carrier.
Visible Pros
Low cost: Visible offers an unlimited data plan at a much lower cost compared to other major carriers.
No hidden fees or contracts: Visible is more transparent and you can switch carriers at any time without paying any penalties.
Use of Verizon’s 5G / 4G LTE network: Visible operates on Verizon’s 5G and 4G LTE network, which is known for its strong coverage and reliability across the country.
Unlimited mobile hotspot: this is a huge benefit for van lifers who use a hotspot to work from their laptop on the road
Flexible plans: Visible users can upgrade or downgrade their plan at any time, with upgrades taking place immediately and downgrades taking place during the next billing cycle.
Visible Cons
Not all devices are compatible with Visible: you may need to purchase a new device if your current phone falls into that category. Use Visible’s compatibility checker to ensure your device is supported.
App-only customer service: Visible has no physical stores or an 800 number to call, rather, they provide customer service and support via a chat feature in the app. This helps keep the costs of their plans down.
Potentially slower data speeds in congested areas: On the Visible plan only, your data speeds could be slower, or “deprioritized” in busy areas compared to Verizon customers or those on the Visible+ plan
Limited international roaming: If you plan to go to Mexico, Canada, Puerto Rico, or Virgin Islands international data is only included on the Visible+ plan. Neither plan offers included international coverage in other countries.
Visible Pricing and Plan Comparisons
There are currently two plans available, Visible ($25/month) and Visible+ ($45/month). There are some obvious benefits of the Visible+ plan and some key differences to consider when choosing a plan.
Visible vs Visible+
The biggest differences between Visible vs Visible+ are:
On the Visible+ plan, you get unlimited data on Verizon’s 5G Ultra Wideband network, which is the fastest network currently available in metropolitan areas across the US. On the Visible plan, you have access to the 5G / 4G LTE network which is slower than the 5G Ultrawide network.
On the Visible+ plan, your premium data is never throttled – meaning your connection never slows down even in congested areas where there are lots of other users. On the Visible plan, you may experience slower speeds when there is a lot of demand on the network.
The Visible+ plan also offers unlimited talk and text and unlimited data when you’re in Mexico, Canada, Puerto Rico, and Virgin Islands. Data speeds are reduced after 2 GB/day. The Visible plan doesn’t include any service in Mexico or Canada but can be added by enabling Global Pass.
I personally chose Visible+ because high speeds are important to me, especially when I’m working remotely, so my Visible review is focused on the Visible+ plan. Even when I’m not working on the blog, I rely on my phone for so many things. I use my phone to find campsites, potable water, hiking trails, directions, grocery stores, and more. To minimize my frustrations with daily planning on my phone, I wanted the fastest network available.
What I love about Visible is that I’m not locked into a plan and can change my service at any time. For example, if there is a stretch of time when I’m not traveling, I can downgrade to the Visible plan with the click of a button, saving myself $20 a month. Or if I’m on the Visible plan and am headed to Baja or Canada, I can instantly upgrade to the Visible+ plan.
Plan Pricing and Comparison
Below is a breakdown of what each plan provides and the cost when paying monthly. You can check out the details of the two Visible plans on their website. The final price is what you see here. There are no hidden taxes or fees tacked on to your bill.
Visible Plan $25/mo
inc. taxes and fees
5G & 4G LTE
Unlimited talk, text, and data
Unlimited mobile hotspot data (speed capped at 5 MBPS)
Spam Protection
Unlimited talk and text to Canada, Mexico, Puerto Rico, and Virgin Islands
Save $5/month on Verizon Home Internet
Visible+ $45/mo
inc. taxes and fees
5G Ultra Wideband, 5G & 4G LTE
Unlimited talk, text, and 5G Ultra Wideband data
Includes 50GB of premium data on 5G & 4G LTE
Unlimited mobile hotspot data (speed capped at 10 MBPS)
Spam Protection
Unlimited talk and text to Mexico, Canada, Puerto Rico, and Virgin Islands
Unlimited talk, text, and 2 GB/day of high-speed data in Mexico, Canada, Puerto Rico, and Virgin Islands
International calling from the U.S. to 30+ countries
International texting from the U.S. to 200+ countries
Save $10/month on Verizon Home Internet
Paying Annually
Recently, Visible started offering the ability to pay annually which comes with additional savings. When see the annual cost compared to what you’d pay for a year with another carrier, it really puts it into perspective.
visible
$275/year
Save $25 compared to paying monthly
visible +
$395/year
Save $145 compared to paying monthly
My Experience Switching to Visible
I was a bit nervous about switching from Verizon to Visible. It seems like whenever I get a new phone, it’s always a hassle dealing with my cell phone provider. I didn’t expect this experience to be any different.
I was pleasantly surprised by how easy it was. All I had to do was sign up on their website, download the Visible app to my phone, pop out my old SIM card, and enter some information like my phone’s IMEI number (which can be found in your settings). The app walks you through the step-by-step process that in general was pretty easy to follow.
There were a couple of times during the process when I had questions, and I was able to start an online chat. It took a minute to go from the bot assistant to getting a real person in the chat. After that, the person stayed in the chat to walk me through the entire process, making sure my phone number was transferred properly, and I was able to receive and send texts and calls before we said goodbye.
One of the reasons Visible is so inexpensive compared to other carriers is they don’t have a phone number you can call or brick-and-mortar stores. Instead, you can start an online chat with a Visible Rep any time of the day or week either on their website or right in the app.
All customer service is provided via online chat (with a real person) that you start in the app 24/7
One thing you’ll need to do before you switch over is to make sure your phone is compatible. You can use Visible’s compatibility checker to ensure your device is supported, and if it’s not, you can get a new phone through Visible. In addition, if you want to bring your current phone with you, you’ll need to make sure your phone is unlocked. You can usually find that info in your phone’s settings or you can call your current provider to find out.
If you’re feeling skeptical, you can also try Visible for free for 15 days. I did this to make sure I liked it before making the switch. Basically, they set you up with a trial phone number that you can use to make calls, text, and surf the net using your existing phone.
It doesn’t affect your existing service or phone number, and it was mostly easy to set up. It took about an hour, and I did need some assistance from the Visible Rep in the chat, but it made me feel more confident about switching and was also a chance to see what their customer service is like.
The biggest difference between the Visible plan and the Visible+ plan is data speeds. Here is what you can expect:
5G Ultra Wideband Network (Visible+ only): Typical download speeds are between 215-702 Mbps, and upload speeds are 14-75 Mbps. The 5G Ultra Wideband is currently only available in metropolitan areas. If it’s not available, Visible+ customers will move to the next best network.
5G: Typical download speeds are between 34-149 Mbps, and upload speeds are 6-37 Mbps. Visible+ customers get 50 GB of premium data that isn’t subject to data slowdowns. Visible plan customers get unlimited 5G data but are subject to data slowdowns in congested areas.
4G/LTE: Typical download speeds are between 9-69 Mbps and upload speeds are 1-13 Mbps.
To see just how fast Visible+ is in practice, I ran a speed test on my iPhone 12 Pro max with Visible+, as well as on Ryan’s iPhone 13 Pro with Verizon. Here are the results.
I ran the test multiple times on both phones and got pretty similar results every time. You can see that the Verizon phone had slightly higher download speeds, but the Visible+ phone had higher upload speeds. Overall though, there isn’t too much difference in data speeds between Verizon and Visible+.
The 306 Mbps download speed on the Visible+ phone is very fast. For a Zoom meeting at 1080p resolution, you need 3.8 Mbps (upload speed) and 3.0 Mbps (download speed). For 720p resolution, this requirement drops to 1.2 Mbps. For Netflix 1080p streaming (which is all you really need if you are watching on an iPad), Netflix recommends a minimum of 5 Mbps download speed.
I did this speed test at my home in the mountains outside of Park City. Obviously in a more remote area where there isn’t a 5G network available, data speeds are going to be slower. The point of this speed test though is to show there there is a negligible difference in data speeds between Verizon and Visible+.
While on the Visible plan, BFT Contributor Courtney Stephenson reported that she rarely had any issues with slow internet speeds in areas with coverage. In her original Visible review, she wrote, “When running internet speed tests from my phone, my download speeds with the Visible plan are often 60Mbps or greater, sometimes even topping 100Mbps. With these speeds, I’m able to browse the internet, stream Netflix, and use my phone without lag or much thought at all about data speeds.”
Courtney added, “I’ve only noticed slower service twice – once at a music festival in San Francisco and once having no cell reception in the small town of Stanley, Idaho while my friends with Verizon had a slow connection. I chalked this up to the town itself having super spotty coverage, and to date, that’s the only time I’ve ever not had any reception when Verizon customers had signal.”
Visible Mobile Hotspot
What sets Visible apart from other carriers is its unlimited mobile hotspot. Using a phone as a hotspot is a very common way for van lifers to get internet on the road, but it’s pretty uncommon to have a plan that offers truly unlimited mobile hotspot data usage. Most other carriers will cap data usage and severely slow down your internet speeds once you’ve hit your data limit for the month, making your hotspot unreliable and unusable once you’ve hit the cap.
Instead of capping data allowance, Visible caps your data speeds. Using your phone as a hotspot, the Visible plan offers unlimited data at 5 Mbps and 10 Mbps on the Visible+ plan. This means you’ll always be able to use your phone as a reliable hotspot, no matter how much data you’ve used each month.
For the average person, this shouldn’t cause many issues. Courtney used Visible’s mobile hotspot as her primary internet source for working on the road for 2+ years with no complaints. She was able to do all of her computer work with no issues and join our BFT team video calls with minimal to no disruption.
I also used my Visible+ plan as a hotspot while in Arizona recently and found it more than adequate for basic tasks. I was able to write my weekly newsletter, upload photos, and make some updates on my website without any frustrations.
However, if you are someone who frequently downloads/uploads large files, is on video calls all day, or requires incredibly fast internet speeds, you may find 5-10 Mbps hotspot speeds limiting. However this would be the case whether it’s Visible, Verizon, T-mobile, or some other cell phone provider. On days when I need to do data-heavy work (like uploading a YouTube video), I will either set up my Starlink or I’ll head to the nearest town with a coffee shop or library.
Visible International Service
If you want to go to Mexico or Canada in your van, you’ll need the Visible+ plan since the Visible plan doesn’t include any international service. On the Visible+ plan, you get unlimited talk, text, and roaming in Mexico and Canada (as well as Puerto Rico and Virgin Islands).
This allows you to make local calls or to call back to the US or a number of other countries. It also includes 2 GB of high-speed data per day. After you use the 2 GB, speeds are reduced to 3G, which if I’m being honest is frustratingly slow.
In order to make the 2 GB last, you’ll want to go to your settings and turn off “background app refresh” for all of your apps. That way apps like Instagram and Facebook aren’t refreshing in the background wasting your data. You can also turn off cellular data for all of your apps that you aren’t using regularly (like Zillow, Amazon, or whatever they may be), so those apps won’t work unless you’re on wi-fi.
Courtney using Visible down in Baja to work remotely
While I haven’t gone to Mexico in my van, BFT Contributor Courtney made an annual van life trip to the Baja Peninsula every winter. She relied on the Visible+ plan to keep in touch with people in the States, as well as to work remotely.
Courtney upgraded her plan to Visible+ right before crossing the border. The upgrade took less than 10 minutes and could be done right in the Visible app without any assistance. The change took place immediately, and she didn’t have to wait for another billing cycle.
After using Visible+ in Baja for an entire winter, in her Visible review she reported, “I’ve been really impressed with Visible’s service down here. In areas with cell coverage, I’ve been able to call and text family and friends back in the US as normal and use my phone minimally for Google Maps, social media, and light internet browsing. The speeds are fastest in the morning and slow down over the course of the day, as data usage is capped at 2 GB a day and slows down significantly after that. As long as you manage your expectations (you’re not going to see the same internet speeds roaming in Mexico as in the US), it’s a great perk and the service is comparable to other major carriers’ international services.”
Now, there are limitations to Visible’s international capabilities – most notably that international talk, text, and data are limited to Mexico, Canada, Puerto Rico, and Virgin Islands, unless you purchase a Global Pass which works in over 140 countries.
Visible+ Members get 1 free Global Pass per month. Otherwise, the Global Pass is $5/day in Canada, Mexico, Puerto Rico, and Virigin Islands or $10/day for coverage in over 140 countries. Global Pass includes unlimited talk and text and 2 GB of high-speed data per day before it’s reduced to 3G speeds.
If you’re only traveling for a week, that’s fine, but if you are going abroad for any extended period of time and relying on Global Pass, $10/day can really add up. Alternatively, if you have Visible and your phone is unlocked, you can buy a prepaid local SIM card in the country you are traveling in which is generally cheaper than paying for international service on any carrier.
Conclusion
Overall, I’ve been super happy with Visible+. I honestly can’t believe how much cheaper it is than the competition while providing a majority of the same benefits. It’s plenty fast, I don’t have to worry about any extra fees or charges, and it’s month to month, so there is no long-term commitment.
Despite having no customer service number, in the few online chats I’ve had during the sign-up process, I’ve found the customer service agents to be helpful, responsive, and genuinely interested in finding solutions.
The unlimited mobile hotspot data is a huge perk, and since most of the travel I’m doing right now is domestic I’m not too worried by the lack of international coverage. I am hopeful that Visible will expand its international roaming coverage in the future, and the fact that it’s month-to-month means I can always switch to another carrier if need be.
When I got pregnant in May 2022, I had been doing van life on and off for 6 years. I loved the lifestyle and was determined to continue doing van life with our baby after he was born. I even declared in this Instagram post that “Kids are adaptable, and I have the philosophy that our baby will adapt to our unconventional lifestyle. We certainly don’t have to give up everything we love just because we have a kid in tow.”
Our little guy was born in February 2023 and the day he turned 4 months old in June, we hit the road in our 170″ Sprinter Van that I had designed to accommodate our growing family. Instead of packing our mountain bikes, we packed bins of diapers, baby clothes, and other baby gear that I had read or thought would be useful for doing van life with a newborn.
Our plan was to go all the way up to Tofino, a beach town on the northwestern edge of Vancouver Island. Maybe it was a little ambitious going so far, but the beach (with a mild climate) sounded like the perfect adventure for having a little one in tow.
Things started fairly smoothly, just as they had been at home. In the beginning, our baby was sleeping and traveling ok. But then as soon as we got up to Tofino (over 1,100 miles from home), just like a light switch, things started to change. Constant night wakings, difficulty with naps, hysteria anytime we were driving anywhere.
But I thought babies were adaptable, right? All of the blog posts I read about doing van life with a baby made it seem easy and fun. Was our baby just more difficult than these other van life babies? Were Ryan and I doing it wrong?
After two months on the road with our baby, it started to become clear that we needed a break from the van. Not only was the baby relatively unhappy compared to what he had been prior at home, but I was delirious and nearly sick from lack of sleep. Of course, there were some good times, and we made memories that I’ll cherish forever, but the ever-changing environment and close quarters were not working for any of us.
We spent a lot of time hanging out at our campsites to make life easier on us
Now that I’ve had some time to reflect on the experience, I’m realizing that most of what I observed online about van life with a baby was very one-sided. The few blogs and social media posts I read about doing van life with a babyonly talked about the good parts and led me to have an unrealistic, incomplete picture of what doing van life with an infant is really like. Also, every baby is different and they are constantly changing so what works one week may not work the next.
The good news is this: because babies are ever-evolving, our experience when he was an infant doesn’t mean that van life won’t be a good fit for us as a family once he’s a bit older. In fact, we’re planning to take everything we learned and try again when he’s in the toddler stage.
If you’re a van lifer (or aspiring van lifer) hoping to introduce your little one to the wonders of van life, this blog post is for you. I share my story not to discourage you, but instead to make sure you have realistic expectations and to share the things I would have done differently if I could do it all over again.
In this comprehensive guide, I’ll explore the essential aspects of van life with a baby younger than 1 year old. I cover tips for your van’s layout and sleeping arrangements, the gear you need, feeding, safety considerations, ways to keep your little one entertained, and other things to expect. By following these tips and advice, you’ll be giving yourself the best chance of having it be an enjoyable experience for your family.
Van Conversion Tips for Traveling with a Baby
One of the first considerations when embarking on van life with a baby is choosing the right van and layout for your family’s needs. Safety, space, and are crucial factors to consider when selecting a van that can accommodate your growing family.
Safe seating for your baby
Forward-facing seats
As your family expands, you’ll need to ensure that your van provides enough space to comfortably and safely seat everyone. The primary consideration is you need a seat installed in your van that can accommodate a rear-facing infant car seat. In most cases, this is going to be a forward-facing captain’s chair or bench seat directly behind the driver and/or passenger.
The chair you install your carseat on will need to be forward facing
Because of the rear-facing requirement for your car seat, infant car seats cannot be safely installed on a chair that is facing sideways. For example, if you have a bench seat that faces out towards the van’s slider door, this is not a safe place for a car seat. Unfortunately, I’ve seen a lot of DIY vans with car seats facing sideways, and this is not safe!
Additionally, the seat itself that the infant car seat is placed on must be properly installed in the van, meeting National Highway Traffic Safety Administration (NHTSA) requirements.
If you are retrofitting your van to add additional seating for your baby, you can’t just slap a seat in the van with some bolts and call it good. To truly be a safe place for the baby, the seat must be affixed to the van’s frame in a way that meets NHTSA regulations. This ensures that if you get in an accident, the chair where your infant car seat is installed can withstand the minimum forces and torques that might be expected in a crash.
Safe seat installation
Once you’re sure that the seat itself is safe for a car seat, you need to make sure your car seat is properly installed. If you’re unsure, you can go to a car seat inspection station (just google one near you), and they can help you make sure your car seat is securely installed.
While there are many different types of car seats, I highly recommend an infant car seat with a handle that can easily be removed from its base. That way you can take the baby in the car seat into a restaurant or snap it into your stroller if it’s compatible with your car seat. I personally chose a carseat made by Clek, as they perform crash testing beyond the normal requirements, and since we planned to spend so much time in the van, I wanted the carseat with the highest safety ratings.
Number of seats
One other thing to keep in mind is whether you want to be able to sit in the back of the van with your baby. Our baby had gotten very used to me riding next to him in the backseat of our 4Runner. So once we got in the van and he was in the backseat alone, he didn’t like that very much. A van is also much noisier and bumpier than a car, which I think contributed to his unhappiness.
We only have one captain’s chair so the baby has to ride by himself
We set up a car seat mirror so he could see us. We also taped photographs of Ryan and I to the back of the headrest. Neither of those worked to keep him content. As a result, I ended up spending a lot of time standing up next to him in the aisle while the van was in motion, which is obviously not a safe way for me to ride in a van.
Of course, this phase will pass and eventually he’ll be comfortable riding back there by himself, but for the infant phase, this posed a serious challenge.
Adding another chair back there for me to ride in is impossible now. If I could start all over with my van conversion, I would at least consider putting two seatbelts in the back, although that further limits your layout options.
Storage for baby items
With a baby on board, you’re going to need storage for all of the small things you need – diapers, wipes, burp cloths, clothes, toys, bottles, pump parts, etc. I designed my van with this in mind, and we have lots of convenient cubbies and cabinets to put all of this baby stuff in. However, the more cabinets you have, the less room you have to move around in your van. And with two dogs, two adults, and a baby, there is a lot of shuffling around.
As you plan your layout, you’ll need to carefully balance your need for storage with having enough space to move comfortably throughout the van.
We got off the road before we needed to consider any serious babyproofing, but babyproofing in a van is going to look different than in a house. You likely already have cabinet locks on all of your drawers and cabinets, so you probably won’t need to worry about that too much.
The biggest things to be concerned about once your baby is crawling is the baby falling off a tall platform bed or crawling right out the slider door when it’s open. If your van isn’t built yet, you can consider ways to address these issues.
If you have a platform bed and your baby is starting to crawl, you need to be very careful that they aren’t unattended on your bed
Some people opt for a platform bed that is lower to the ground or a dinette that converts to a bed. In these cases, you’ll lose storage space underneath your bed. You can also put some sort of gate in the doorway to prevent the baby from falling out the door. Either way, doing van life with a baby means you have to keep an eye on them at all times.
Sleeping Arrangements
There are a number of van layouts that work for families with multiple kids, but the need for additional seatbelts will limit your layout options. There’s no way around it.
When I was designing my third Sprinter Van, I wasn’t yet pregnant and wasn’t sure if I was going to be successful. So I added a third seat and planned to figure out a sleeping solution later if a baby did come along. That means we don’t have a permanent bed set-up for the baby. Instead, he sleeps in a travel crib that fits between the driver’s seat and the second-row passenger chair where the car seat goes.
This is where our baby sleeps in our Sprinter van
At night, we first have to remove the car seat and stash that up front, and then we set up our Bugaboo Stardust travel crib. I chose this specific crib because it’s one of the more compact travel cribs and also is very slim when packed away. It also has a bassinet conversion so the baby can be higher up in the crib when they are little.
While I like how compact it is and how well it fits in our space, the downside is at one year old, it’s already pretty small for him. He doesn’t have a lot of room to roll over or move around. Once he turns 2, we plan to try the Cabbunk, which is a hammock system that goes across the two front seats.
In hindsight, I might have considered a seat that folds down into a bed, like those found in the Storyteller Vans or the Scopema RIB Bench Seat. This way we could have set our travel crib on top while he was still an infant. Then eventually once he’s transitioned out of a crib, he could sleep directly on that bed.
Either way, our sleeping arrangement worked ok and no matter what you choose for your baby’s sleep, it’s something that is going to consume space in your van that you will have to work around.
Here are some additional things to consider when it comes to your baby’s sleep in your camper van:
Sleeping placement: Having the baby’s sleeping area right next to the slider door is not ideal. The noise of us going in and out of the van (and shutting the door) once the baby was asleep was usually enough to wake him up. That meant that after 8:00 pm, we and our dogs were generally stuck inside the van.
Bring a monitor: If you want to hang out outside at night after the baby is asleep, I suggest you bring a baby monitor that doesn’t require wi-fi or a phone connection. We have the Infant Optics DXR-8.
Make it dark: Most babies need it to be very dark for the best sleep. We were able to jimmy rig a setup using some curtains and towels that created a dark cave-like atmosphere for his crib. That way I was able to stay up and pump without causing him to wake up.
We also used a piece of cardboard to cover up the ceiling fan where ambient light was entering the van. When you’re figuring out where the baby will sleep, see if you can find a way to partition off that area so it’s dark and doesn’t affect your ability to move throughout the van.
Use white noise: I highly recommend bringing a small portable white noise sound machine to block out background noise. Make sure you get one that doesn’t need wi-fi.
Pack a nightlight: We brought this portable nightlight and it came in very handy. I used it for my middle-of-the-night pumping sessions and to be able to see at night in the van without waking him up.
We created a makeshift system to make it darker in. ourbaby’s crib
Travel crib tips
1. Measure where it will go
Before you choose a travel crib, you’ll want to measure out the space in your van where you plan to set it up to make sure it will fit. As I said, we have the Bugaboo Stardust travel crib.
Apart from how compact it is, I chose this crip because the bottom is elevated off of the ground. Since we set it up over our table mount, if the mattress was flat on the ground, there would be a big bump in the middle. If we didn’t have the table mount to worry about, I’d probably have gone with the Guava Lotus which has a attachable cover you can purchase for making it darker.
2. Think about where you will store it
For storing your travel crib, some travel cribs fold flat, while others collapse-accordion style, and you’ll need to figure out a good place to put it every day when you’re driving. The Bugaboo Stardust stores flat, so we were able to fit it between the captain’s chair and the wall for easy access.
3. Bring extra sheets
I also recommend bringing an extra set of sheets in case you have a middle-of-the-night blowout and there is no laundromat nearby.
Prior to us leaving in our van with the baby, I had gotten some advice for other van lifer moms to co-sleep (meaning having the baby sleep in the bed with us). This way we wouldn’t have to take up room in the van with the baby’s crib. While I know co-sleeping is a hot topic and in many cultures, co-sleeping is the norm. But, co-sleeping is not recommended by the American Academy of Pediatrics.
With that said, we did end up resorting to co-sleeping about one month into our road trip. His night wakings became so frequent that the only way I could get him to stop crying and fall back asleep was to bring him into our bed with us.
We resorted to co-sleeping when our baby started teething
I will say that I thought I would enjoy co-sleeping, but I was so hyper-aware of the baby’s presence and position, that my quality of sleep was very poor. I also had to sleep without the covers on and with two adults and the baby (and sometimes the dogs who were accustomed to sleeping in our bed), it was very cramped.
Ultimately, I did what I had to do, but co-sleeping in a small van bed was not a sleeping arrangement that worked well for us.
Incorporating nap and bedtime routines
Maintaining consistent nap and bedtime routines is crucial for your baby’s sleep schedule, and this is much harder to do in the van than it is at home. Wake windows are hard to abide by when every day is different.
Since our baby was only 4 months old when we first started van life, we didn’t have him on any sort of a schedule yet. In fact, before we left, besides the times he napped in the car, 100% of his naps were in my lap after breastfeeding (known as contact napping), and he had never napped independently in a crib.
While at 4 months old, he was still too young for any kind of sleeping training, I didn’t have an understanding of proper wake windows or what an ideal nap routine looked like. Most of his naps in the van were either while we were driving (until he decided he hated his car seat) or in the carrier while we were on a hike.
Our baby only napped in the carrier once we were on the road
We did the best we could, but looking back, I would have waited to try van life with our baby until he had a more predictable 2-naps-per-day routine (or maybe even 1 nap per day).
The lesson for me was that you need to plan your activities and travel around your baby’s sleep schedule to ensure they get the rest they need. That can be difficult considering babies younger than one year old need anywhere from 2-4 hours of napping per day. If you can plan your drives around their naptime, that is ideal!
Consider incorporating familiar sleep cues, such as reading a bedtime story, turning on white noise, and creating a dark environment to help your baby transition into sleep mode.
Temperature control
It is recommended the temperature be kept at 68-72 degrees Fahrenheit for babies to safely sleep at night. Cooler than that, and your baby could be uncomfortably cold, and hotter is said to increase the risk of SIDs.
Keeping the temperature in such a tight range in your van is more difficult than it is in a home. We do not have a rooftop AC unit in our van, and there were many nights in our van when the temperature inside was above 72 degrees.
On those nights, we had both fans running and windows open, and I made sure that the baby was lightly dressed. However, I still felt pretty paranoid about it being too hot. Then sometimes in the middle of the night, the temperature would drop and it would be too cold. It was a constant game of adjusting fans and opening and closing windows.
If you plan to do van life with a baby in the middle of summer, I suggest you plan your route carefully to avoid unsafe evening temperatures or you’ll need to have a rooftop AC and the power to run it. I’ll talk more about route planning below.
Planning your routes
When doing van life with a baby, you need to put the baby’s needs first. By carefully planning your van life itinerary with your baby’s needs in mind, you can create a well-balanced and enjoyable experience for your family.
Here are some tips for planning your itinerary:
Consider the weather and don’t go anywhere too hot
Minimize your driving time by choosing destinations that are close to home
Plan for rest and stops during your long drives
Drive during nap time
Choose family-friendly destinations
Tips for choosing your destinations
1. Determine what kind of trip you want (and can) do
When I was planning our summer route in our van with our baby, there were a few things I took into account. While normally we spend our summers hiking in the mountains, we would not be able to hike the kind of trails we like while carrying an infant. So instead we wanted to go somewhere mellow where we could chill. That narrowed it down to the beach.
2. Look at the weather
Second, we needed to go somewhere where the temperatures wouldn’t be too extreme. Ryan and I had never been to Vancouver Island and with my newly granted dual Citizenship, I’ve been interested in spending more time in Canada. The climate sounded perfect with dozens of beaches we could explore. So we got our little guy a passport and headed north.
Chilling out with our little guy on the beach in Tofino
3. Choose someplace closer to home
In hindsight, traveling so far away on our first van adventure with the baby was too ambitious. Technically an infant should only be in a carseat two hours a day. While we definitely pushed the limits of that rule on a couple of days, this meant that we could only cover a short distance most days.
We did enjoy our time on Vancouver Island, but it took forever to get there and it also put us very far away from home in case things went awry….which they did.
On our drive home, our poor little guy had his first two teeth break through and he was so miserable. Once we got down to Seattle and realized that driving back to Salt Lake was going to take a week at the pace we were going, I decided to fly home with the baby while Ryan cruised home with the van.
The big lesson here is to take a test run in your van closer to home before you plan a big trip to somewhere far away. The purpose of van life with a baby isn’t to have some big grand adventure. Instead, it’s an opportunity to slow down and reconnect with nature in a new chapter with your little one, and you don’t need to be super far from home to do that.
We traveled to Vancouver Island for our first van life road trip with our baby. In hindsight, I would have chosen a destination much closer to home
Planning for rest and play stops
Make sure your itinerary includes regular rest and play stops. Babies require frequent breaks for feeding, diaper changes, and playtime. Research rest areas, parks, or recreational spots along your route where you can safely stop and allow your baby to stretch, crawl, or play.
I kept my camping chair handy, and we always tried to plan our stops somewhere we had a nice place to sit outside where our dogs could also stretch their legs.
Taking a break from driving so our baby could be out of his car seat
Where to camp with a baby
While we prefer free, dispersed camping, in some ways paid campgrounds made life with a baby a lot easier.
First, with a baby, you have limited time to search for that perfect campsite. If the baby has already been in the car seat for half the day and is starting to get fussy, you are not going to drive down some unknown dirt road in hopes of finding a spot you saw on iOverlander. Knowing you have a guaranteed spot at a paid campground makes this whole process a lot less stressful.
Second, having access to water, laundry and other amenities that you need access to with a baby also makes life easier. Rather than having to find a water fill station every couple of days, you can fill up right at your campground. Same with doing laundry (usually available at private campgrounds), since you’ll be doing that more often with a baby, too. And let’s be honest. Having regular showers is pretty nice as well.
Staying in paid campgrounds was easier than searching for free dispersed sites with our baby
Besides the obvious downsides of paid campgrounds – like closer neighbors, leash requirements for pets, the cost, etc – when staying at a paid campground with a baby, I worried more about bothering my neighbors when my baby was crying, especially in the middle of the night. When that happened, I closed the windows to try to insulate others from our noise, but there were some things I just couldn’t control.
I suggest you mix it up. A few nights at free campsites followed by a night or two at a paid campground will allow you to take advantage of the amenities while still enjoying some solitude.
Slowing down and resetting expectations
When I first started van life back in 2016, I gave up my apartment, sold my car, got rid of my stuff, and moved into the van full-time. It was great back then but not something I’d recommend if you have a baby.
Having somewhere to go if you need a break from van life with your baby is very important. In our case, it was clear that our little guy needed more routine, and I’m so grateful we have a home base that we were able to come back to so we could give him a more stable environment.
If having a home base isn’t possible, then I’d recommend having some money set aside for the occasional week at an Airbnb or planning to crash with family.
We got an Airbnb near Whistler out of desperation at the end of our two month trip
Feeding your baby on the road
Breastfeeding
Everyone’s feeding routine will look a bit different. If you have adequate milk supply, breastfeeding is the easiest way to feed your baby on the road. It doesn’t require any dishes or extra time and you can do it anywhere without having to prepare. I highly recommend bringing a nursing pillow. I have the Luna Lullaby (far better than the popular Boppy!) and it made it so much easier to feed him in my camping chair and while sitting in the passenger seat of our van.
This nursing pillow made it so much easier to feed the baby at campsites
If your baby is like mine, they like to breastfeed while in a baby carrier. If so, you should bring along a few button-up shirts. This makes it much easier to feed your baby more discreetly in the carrier. I basically lived in the Outdoor Research Astroman shirt as it was lightweight and moisture-wicking so I didn’t get too hot while carrying the baby.
I lived in this button up shirt because it made it easier to feed my baby on the go
I also packed a nursing cover so I could feel a bit more comfortable (and he could be less distracted) if I needed to nurse in a restaurant or a crowded area.
One final thing I say about breastfeeding is you may experience more clogs than normal when you first take off in your van due to your changing routine. At home, I use the Legendairy Milk Sunflower Lecithin capsules and the Wishgarden Happy Ducts to clear up my clogs, and it works amazingly well. I forgot these and the only thing I found on the road seriously upset my stomach, so make sure you pack whatever you need to deal with these situations.
Pumping
While we were in the van, we did a combination of breastfeeding and bottle-feeding with pumped breast milk. Out of all of the ways you can feed a baby in a camper van, I think pumping breast milk is the most difficult. I used the Pumpable Genie Advanced which is a portable pump and doesn’t need to be plugged into the wall while you are using it. It is compact, very effective, and was perfect for van life.
My breastfeeding journey was very challenging at the beginning, so when we left in the van, I was still pumping 3 times a day to keep up my milk supply. A lot of moms, myself included, produce the most milk in the middle of the night, so I continued to get up for a middle-of-the-night pumping session just like I had been before we left.
Pumping in the middle of the night in a van in the pitch black when you are trying not to disturb your partner or the baby is no fun at all. It’s even more challenging if you don’t have wi-fi to help pass the time. At home, when I got up in the middle of the night to pump, I made a snack, scrolled my phone, and watched TV. In the van, I sat in the dark, just trying to stay upright so the milk wouldn’t spill.
Pumping and bottle feeding also create a lot of dishes to deal with every day between the pump parts and dirty bottles. I used the fridge hack to minimize how many sets of pump parts I had to wash each day. But still, every morning, on top of all of the other things we had to do to get the van and baby ready for the day, I now had to spend 30 minutes washing pump parts and bottles from the day before.
To wash all of this stuff, I filled up a small dish bucket that was only used for bottles and pump parts with warm soapy water. I also had a set of bottle brushes that weren’t used for our food dishes. After I was done washing everything, I left the bucket and leftover water in the sink, and any dirty bottles that accumulated throughout the day could go in there to soak.
I also brought a compact UV Sterilizer since it sterilizes and dries all of the parts without having to let them sit out on the counter all day. You have to sacrifice some storage space, but I thought it was well worth it as long as you have enough battery power to run the thing.
The other thing is if you plan to pump while you are in the van, you will need a safe place to store the milk. I didn’t feel comfortable putting my pumped milk in the same fridge with our food. In our food fridge, everything is crammed in there super tight, and the door is frequently opened and closed throughout the day. I ended up buying a separate National Luna 12V fridge/freezer that we used solely for my milk (and vegan ice cream since when else have we had room for ice cream in the van).
The Luna National Fridge I used to store fresh and frozen breastmilk
Finally, I suggest bringing some of these small Icepacks to keep bottled milk cold on hikes and outings. They are compact and stay cold for a long time.
Formula feeding
If you plan to use formula, things to think about include:
Where will you store the cans of formula
How will you sterilize the water before mixing it
How will you wash and sterilize the bottles
I recommend bringing however many baby bottles you typically go through in a day so you don’t have to wash each one immediately after using it.
Feeding solids
Our little guy wasn’t on solids yet at the time of our first van trip, but since then we’ve been making all of our own baby food. It’s certainly easier to just buy food as you go, but if you are intent on making your own baby food like we are, you’ll need the ability to steam vegetables and a blender or food processor to blend everything up. You can also bring a baby food maker if you want an all-in-one solution.
A portable high chair is also a necessity. We have this lightweight, collapsible high chair that can easily be stored with our camp chairs. There are also portable high chairs that can be attached to picnic tables, but if you plan on dispersed camping (where there are no picnic tables), I wouldn’t recommend this option.
Diapers and Hygiene
Packing enough diaper supplies
If you aren’t picky about the brand of diapers and wipes you use, you can restock as you travel. We use Honest Diapers and Healthy Baby Wipes, which are non-toxic products, and unfortunately, you can really only buy these online. To avoid having to receive lots of packages on the road, we packed a 2 month supply of diapers and wipes.
We have had very few leaks and accidents with Honest Diapers
Changing diapers
You will be changing diapers a lot in your van, so you’ll want to figure out an efficient system. When it was time for us to change our son’s diaper, I set up a portable changing pad right on our bed, and all of my diaper-changing supplies – portable changing pad, diapers, wipes, and diaper balm – were within immediate reach.
Dirty diaper storage
If you plan to camp at dispersed campsites, you won’t always have direct access to a dumpster. That means you’ll have to hold on to those stinky dirty diapers for a bit. I didn’t want to keep them inside of the van, so I got the Overland Gear Guy Spare Tire Trash Bag that hangs off the back of your van. Inside of that, I put a small trash can (for structure) lined with a trash bag, and all of the dirty diapers went in there.
We put our dirty diapers in a trash bag inside this trash carrier
Then when we found a dumpster, I could just toss out the entire trash bag with diapers. This system worked great and prevented our small living space from getting smelly.
Diaper bag
You likely always have a couple of backpacks in your van for hiking and other outdoor activities. If you don’t feel like packing a dedicated diaper bag, you can always just use one of your normal backpacks. If you do bring a diaper bag, I don’t think it’s worth buying anything fancy. This is the diaper backpack I have, and it’s been more than fine.
The bag I used most as a diaper bag was the Dakine Hot Laps 2L hip pack. Unlike a backpack, I could comfortably wear a hip pack while carrying the baby in a carrier. This one in particular is plenty big for diapers, a portable changing pad, wipes, snacks for myself, and my wallet.
If we were hiking, Ryan would also bring a backpack with water and other hiking essentials that we needed for the day.
I also used the Dakine Hot Laps fanny pack when I was pregnant and didn’t like wearing a heavy backpack
Bathing your baby
We have a portable, collapsible baby bathtub that we brought along. You could probably figure out something that takes up even less room, like a collapsible dish bucket, but I liked how this bathtub propped the baby up since he couldn’t yet sit up on his own. We’d set it up on the counter, and it made it very easy to bathe him.
This collapsible bathtub made it very easy to bathe our little guy in our van
While you don’t need too much water for a baby bath, the more often you bathe your baby, the quicker you’ll blow through your water supply. If you’re staying at paid sites with hookups or you’re only bathing your baby 1-2 times per week, this isn’t a problem. But if you’re boondocking and doing daily baths, you will need to fill up your water more frequently than you did pre-baby.
You’ll also want to pack plenty of baby soap or shampoo that you like, especially if you use a brand that’s not available in normal grocery stores.
Toys and Entertainment
Keeping your baby entertained and engaged during van life is essential for their overall happiness and well-being. Luckily, you don’t need a lot of toys for an infant, but there are a few things you’ll want to bring to keep them stimulated.
Teething toys are essential for a baby, and you’ll want to bring a variety of things the baby can chew on. I also recommend bringing a few toys the baby can play with in the car seat while you’re driving.
Other than that, a few lightweight, compact toys that are engaging, age-appropriate, and encourage sensory exploration should be enough until your baby is a bit older. Also, focus on things that are ok if they get a bit dirty.
We hung some toys from our ipad holder that he liked to play with
Van life is a great way to introduce your baby to the wonders of the outdoors. Take nature walks, visit parks, and explore easier hiking trails suitable for a baby carrier or stroller.
Exploring the family-friendly activities on Vancouver Island
If driving is difficult for your baby, you can consider putting on some baby-friendly music. We discovered Rockabye Baby and Twinkle Twinkle Little Rock Star on Spotify which are lullaby renditions of everyone from Phish and Tom Petty to Snoop Dog. Our baby seemed to like them, and they were more fun for us to listen to than traditional lullaby music.
Baby Clothing
It was so hot in Utah when we took off in our van that we underestimated the cold-weather clothing we would need for the baby. We packed plenty of lightweight footies that are great for covering up their skin, but we didn’t bring any warm layers for the evenings which we realized we absolutely needed once we got to the beach. MAJOR FAIL!
I ended up finding one fleece footie at Walmart and another at a baby store on Vancouver Island. We learned that in summer, it’s very hard to find warm baby clothes even in colder places. So the key is to leave home with a variety of layers.
Make sure you pack a few warm things even for summer
Now I’ll preface my recommendations by sharing that we aren’t the kind of people who dress our baby in cute clothes. We are all about practical clothing that is easy to get on and off, and he usually wears the same outfit many days in a row, just like Ryan and I do.
For summer travel, you’re going to want lightweight, breathable clothing that offers protection from the sun since they can’t wear sunscreen yet. This is what I recommend packing:
7-10 long-sleeve zippered footies
7 onesies (or whatever your baby wears to bed under their sleep sack)
A sunhat is a must since you shouldn’t use sunscreen on your infant
You may also want to pack a couple of swim diapers and a swim outfit. Remember, though, that oceans and lakes are typically too cold for babies, so unless you plan to go to a heated pool or the coast of Florida, you probably don’t need swimwear.
You also don’t need shoes until your baby is standing up and starting to walk which is typically 9 months at the earliest.
Outdoor Baby Gear to Pack in Your Van
We brought a bunch of gear that we never ended up using and it just took up room in our van. The items below are the gear we used regularly that I consider to be essential for doing van life with a baby.
Stroller
We have a compact travel stroller (the Babyzen Yoyo) and a bulky all-terrain stroller with full suspension (Bumbleride Indie), and we debated which one to bring with us. Ultimately we decided on the all-terrain. It’s so much more comfortable for him, has a bigger canopy for shade, and offers more storage for carrying other baby necessities during our excursions.
It took up a ton of room in our van garage, but we were very happy with our decision. We were able to use our stroller on gravel paths and campground trails which would have been very bumpy with our compact travel stroller.
We were so happy we brought an all-terrain stroller!
Baby carrier
A baby carrier is a must if you want to hike and go places that your stroller can’t. I recommend a carrier that has both inward and outward-facing options, so as your baby grows, you can carry them in either position.
I tried a few different carriers. My favorite was the Happy Baby OG in the Tencel fabric. I found it to be a bit cooler than the linen and the carrier itself isn’t bulky. I also like the Happy Baby Revolution which allows the baby to be facing in or out. This is the one we brought since the forward facing option makes it more versatile.
The Happy Baby carriers are pretty streamlined without a lot of padding or extra features. If you want something more structured, I’ve also tried and like the Ergo Baby Breeze and the Kinderpack.
Our baby liked the Happy Baby Revolution carrier
No matter the material, baby carriers do get hot in the summer, so you’ll want to dress your baby in lightweight, breathable clothing so they don’t get too sweaty. Make sure to cover up their legs and feet so they don’t get sunburnt.
Baby backpack
Once your baby is a bit older, you can transition them from a carrier to a backpack. This makes it so much easier to hike and adventure with your baby.
Once your baby is big enough for a hiking backpack, it’s a game changer!
Deuter Kid Comfort Pro
We have the Deuter Kid Comfort Pro (minimum age is 9 months) and our baby loves riding around in it. It’s comfortable with adjustable, supportive straps so both Ryan and I can wear it, and it has plenty of pockets to store water, snacks, and layers.
Bouncer
The Baby Bjorn Bliss bouncer was so handy. Our baby loved bouncing in it, and it gave us somewhere to safely put him if both Ryan and I were occupied. This bouncer in particular is great because it’s mesh, so it breathes well, and it folds completely flat making it easy to store.
Shade tent
Because babies can’t wear sunscreen, you’ll want something you can quickly set up at camp that provides shade for your baby. We used the Veer Basecamp. I chose this one specifically because it zips up completely, so it also protects against mosquitoes and other bugs. It’s so quick to set up or take down, it has a removable UPF 50 sun/rain cover and only weighs 7 pounds.
We used ours at camp and also took it to the beach. I did buy the Airpad to go underneath it to provide some cushion from the ground which made it a lot more comfortable for the baby to lay in. You could also just use a yoga mat or a sleeping pad if you don’t want to buy this.
Our Veer Basecamp provides nice shade and protection against mosquitos
Portable playmat
We brought this portable playmat, and it fit perfectly inside the Veer Basecamp tent. We hung different toys from it to entertain the baby. It was also good for tummy time. It packs up really small, so it didn’t require too much room in the van.
Conclusion
Van life with a baby is an incredible opportunity to introduce your child to the wonders of the outdoors and create lasting memories as a family. By carefully considering your van choice, implementing safety measures, and packing the right gear, you can ensure a safe and comfortable experience for your baby.
Remember to plan your itinerary with family-friendly destinations, incorporate nap and bedtime routines, and manage daily routines and chores effectively. By staying connected with the outdoor community and seeking support when needed, you can navigate the challenges and embrace the joys of van life with a baby.
So, pack your bags, hit the road, and embark on an unforgettable adventure with your little one!
Save this post to Pinterest
Have you done van life with your baby or child? What has your experience been? What tips can you add? What questions do you still have? Leave a comment below!
During our last camping trip, we enjoyed a lovely 3 mile circular walk taking in 3 Hampshire villages. It is largely flat and so suitable for the whole family. The route mostly follows footpaths which may get muddy in the winter, there is also a couple of stretches along roads.
I asked at the campsite if they knew of any local walks, and they gave me a printout of this lovely Hampshire pub walk, which starts and finishes at the Abbots Mitre in Chilbolton. I noticed that there were copies at the pub, and the route is also available to be downloaded from the pub’s website. (Hence I am not going to offer step by step instructions here, rather just some nice photos of the route.)
We parked up at the Abbots Mitre and turned left out of the car park, heading out of the village. As the road bent to the right, we turned left and followed Drove Road. After passing the last house, we followed the road to the right, Little Drove Road, and continued straight ahead.
As we followed the lane we were able to see the antenna dish of Chilbolton Observatory. We carried on until we reached Test Valley Farm, taking the footpath on the left hand side and following the narrow path.
We reached the edge of the West Down Nature Reserve, and enjoyed this relaxing stretch through the chalk downland. It is home to many different habitats, but is especially noted for its butterflies.
We kept walking towards the great views across the Test Valley, and finally came out the other side of the reserve and headed down to the road.
As we reached the road, we crossed over and picked up the Test Way. This is a 44 mile route, which follows the River Test from the chalk downs of Inkpen to Eling, where it flows into Southampton Water.
We took the path heading towards Andover. The route here follows a disused railway line, and was flat and shady, offering a nice easy stretch towards the village of Cottonworth.
Once we reached the end of the path, we turned right at the road, and then right again to head towards the village of Wherwell. This stretch was the worst bit as it followed the road into the village. For some bits there was no pavement. Luckily the road was quiet, but it’s never easy shepherding young children when you’re keeping one eye on them and another on the road.
Once we reached the village we continued until we came to the pretty cottage Westmill on the right hand side. Here we took the bridleway and followed the boardwalk over the River Test.
Once we had crossed the river we reached Chilbolton Common. The common is a Site of Special Scientific Interest and is home to over 100 different plants and grasses, and many species of bird.
It is also a good spot for a paddle (outside of nesting season) on a warm day.
From the common we were able to follow the path back to Chilbolton, coming out opposite the pub and all very eager for a well earned pub lunch!
This is an area that we will definitely be returning to, and we will definitely explore some more of the Test Valley.
Have you ever walked in this area? Let me know if you have any recommendations for walks in Hampshire.
Interested in kayaking but don’t have a lot of experience? Kayaking can be a great way to get out on the water, whether for a leisurely morning paddle or a more rigorous overnight adventure.
The Bearfoot Theory team and I have done a number of day and overnight kayaking trips across the U.S. In this post, we share some basic beginner kayaking tips so you can get out there, give it a try, and have fun as well!
From kayaking gear to your paddling technique to common questions about what to wear kayaking and where to go, these beginner kayaking tips will have you out on the water with confidence in no time.
Sponsored by REI Co-op
REI Co-op is my favorite outdoor gear retailer and a long-time supporter of my work here at Bearfoot Theory. Their 1-year return policy for Members is hands-down the best in the industry, and Members also get 10% back on their purchases every year.
Types of Kayaks
Sit-On-Top vs. Sit-Inside Kayaks
There are two main types of kayaks – sit-on-top and sit-inside kayaks.
Sit-on-top kayakstend to be the easiest for beginners. They are very stable and easy to get in and out of, and for those of you who might feel nervous, a sit-on-top kayak won’t leave you feeling trapped.
Sit-on-top kayaks are great for warm water, especially if you think you might want to swim from your kayak. On the other hand, if it’s cold, you will get wet on a sit-on-top kayak, which is something to keep in mind.
Sit-on-top kayaks are easier to get in/out of and a little more stable
Sit-inside kayakshave a “cockpit” where your legs go inside the hull of the kayak. For beginners, a sit-inside kayak may feel a little more confining until you get the hang of it.
However, sit-inside kayaks are a lot more efficient and if you are paddling a long distance, sit-inside kayaks will be more comfortable for the long haul.
Sit-inside kayaks aren’t as easy to get in and out of, but if you are kayaking in colder water and want to stay dry, sit-in kayaks can be adapted with a “spray-skirt” to prevent water from getting inside the hull.
Sit-inside kayaks have a “cockpit” and are better for paddling longer distances or in cold water
Single Kayaks vs. Double Kayaks
If you don’t have a partner, then a single kayak it is. Single kayaks are lighter and quicker on the water.
Double kayaks, also known as tandem kayaks, have two seats. Double kayaks are heavier than single kayaks and take a bit of synchronization between the two paddlers to maneuver. Once you get into your groove, however, a double kayak can be very efficient.
Double kayaks are a great choice for pairs where one person might not have the strength to power a kayak on their own. If you are on an overnight kayaking trip, double kayaks often have bigger hulls for storage too.
I took my parents and my Dutch relatives on their first kayaking trip. They opted for double kayaks since it gives you twice the manpower.
What to Wear Kayaking
When kayaking, it’s good to have clothing that you can easily move around in, dries quickly, and will help protect you from the sun.
Since you’ll likely be getting wet, you want to stay away from anything cotton which will leave you dripping and soggy all day (and could cause chafing).
Assuming it’s warm and you don’t need a wetsuit or drysuit of any kind, you’ll want lightweight, quick-drying layers – like a rash guard or sun protection shirt and boardshorts.
Below are a few of my favorite pieces of clothing and accessories for kayaking (and really any water activity):
Essential Clothing for Kayaking
Carve Designs Cruz Rashguard
I prefer wearing a rashguard over sunscreen these days. I own the Cruz in 2 colors and it’s a staple for any water activity because it dries quickly but also keeps you cool, plus the cut is flattering.
Sandals that stay on your feet and can get wet are essential. I like these because they have good grip and can be worn hiking as well, plus they can easily be strapped to your kayak when not in use.
You’ll want a wide-brim hat that can get wet and has a chin strap so it stays on in the wind. This Outdoor Research hat is quick-drying, will float if it falls in the water, and comes in a variety of colors.
Polarized glasses are best for the reflection of the water. I like to wear budget-friendly sunglasses paddling and I always wear a retainer so I don’t lose them in the water.
If it’s chilly or windy it can be helpful to have a lightweight rain jacket or windbreaker out on the water with you. I usually pack a jacket like this just in case!
You’ll want a comfortable swimsuit that you can be active in. I like to avoid swimsuits that pull on my neck (like halters) and have been loving Nani Swimwear lately.
As a beginner kayaker, you don’t need to go out and throw down a ton of money on fancy gear right off the bat. Renting’s likely the way to go as you get started, and once you know what kind of kayaking you enjoy you can invest in the right gear for you.
If you’re renting kayaks, the life vest and paddle are usually included and other “nice-to-haves”, like paddling gloves and drybags, may be available for rent.
If you’re ready to hit the water regularly and are looking to invest in kayaking gear, here are our top picks:
Kayak
If you’re looking to purchase a kayak of your own, the Perception Joyride Kayak is a great pick. It gets rave reviews from both beginner kayakers and experienced paddlers. Plus it has everything you’d want in a kayak like secure storage space, a bungee for quick access storage, a padded, adjustable seating system, drink holders, and even a “Selfie Slot” to hold your smartphone.
Look for a paddle that is durable and budget-friendly like this entry-level paddle when you’re just starting out (no need for an expensive carbon fiber paddle right away unless you have the budget for it). You might also want a paddle that breaks down into pieces if you want something more compact that you can easily travel with.
Always wear a PFD or have one with you when out on the water
Paddling Gloves
If you’re paddling for a long distance, a pair of paddling gloves, like the NRS Boater’s Gloves, can help prevent blisters and callouses. We also like wearing them for added sun protection on our hands.
A drybag is essential for keeping your clothes, towel, phone, wallet, and any other essentials dry. The inside of your boat will get wet! 10-15 liters is a good size for a day trip. The SealLine Discovery 10L bag has a valve to let air out for easier compression which we love.
I love packing a small quick dry towel in my drybag in case I need to wipe down my seat or want to go for a dip while paddling. I’d also recommend keeping a quick dry towel and set of dry clothes on shore or in your car to ensure you can dry yourself (and the kayak) off before hopping in the car.
Camera – A GoPro is an awesome choice for kayaking because it’s waterproof, great for POV shots, and can easily mount to different spots on your kayak.
Binoculars – bring along a waterproof pair to spot wildlife right from your kayak!
Paracord – Bring along a compact rope to tie up your kayak in case you want to leave it on shore to explore.
Carabiner – you can use this to clip your dry bag or water bottle to your kayak.
Garmin Mini – if you are out of cell reach, I always advocate bringing an emergency communication device just in case.
Tip:Check REI’s Used Gear Shop to snag great deals on gently used (often like new) clothing and kayaking gear.
Dogs can go kayaking too! Just make sure they’re comfortable on the water and wear a PFD, like this Ruffwear Dog Life Jacket
How to Transport a Kayak
This is likely one of the trickiest things for first-time kayakers. How the heck do you get the boat from the rental shop to the water?
For your first time, I’d recommend renting a kayak from somewhere on the water so you can bypass this step, but if you do need to load a kayak on the top of your vehicle, this video gives you step-by-step instructions:
If securing a kayak to your roof seems like too much work, there are more portable kayak options to consider that are good for flatwater paddling.
Inflatable Sit-Inside Kayak: This Aquaglide Deschutes Inflatable Kayak packs down into a bag for a very reasonable price. Simply unpack it at your launch point, hook it up to an air pump (not included), and you’re ready to go. If you’re looking for a two-person option, check out this Advanced Elements Tandem Inflatable Kayak.
Inflatable Sit-On-Top Kayak: We’ve seen a number of inflatable sit-on-top kayaks out there, and some are even made to double as stand up paddleboards. You can check out a few inflatable sit-on-top kayaks here.
Folding Sit-Inside Kayak: Oru Kayak makes a variety of lightweight, folding kayaks that make transportation and storage easier. This Oru Kayak Lake Kayak is a good option for lakes and other calm, protected waterways with minimal current.
When you sit in a kayak, you want to be sitting with a straight back and your legs out in front of you, but you don’t want to be tense or uncomfortable.
Slightly bend your knees and place them against the side of the kayak. This contact gives you more stability and power in your strokes.
Most kayaks have a backrest that you can pull tighter or make looser to help you sit up straighter and relieve lower back strain. Make sure to adjust your backrest to your personal comfort.
Foot Position in a Kayak
If you’re in a sit-in kayak, there will be a pair of footpegs at the front of your kayak near your feet. When you place your feet on the footpegs and slightly bend your legs, your knees should move outward and touch the side of the kayak comfortably.
If your legs are fully extended or bent too close to your body, adjust the footpegs as needed.
You can see how my knees are slightly bent in my kayak and pushed up against the sides
How to Paddle a Kayak
How to Hold a Kayak Paddle
You’ll want to hold a kayak paddle similar to how you hold the handlebars on a bicycle with your hands gripping down on the paddle.
If you rest the paddle on top of your head, your elbows should make a 90-degree angle. This is called a paddler’s box and tells you how far apart your hands should be spaced.
You’re going to want to also make sure the scooped sides of your paddle blades are facing you.
Remember you don’t need to have a death grip on your paddle, most paddles float if you drop it. You want to have a relaxed grip that is in the shape of an “o”.
Engage your core and twist your torso to lean forward and put the paddle blade fully into the water near your feet. Then pull back to your seat with the blade and remove it from the water.
Just remember, long strokes from your feet to your seat is the way to go. Don’t forget to paddle on both sides or you’ll just paddle yourself in a circle!
How to Paddle Backwards
To paddle backwards in a kayak, do the forward stroke in reverse. Put the paddle in the water at your seat and push it towards your feet then remove the paddle from the water and switch sides doing the same motion.
Paddling in a kayak can feel awkward at first, but it gets easier the more you do it (I promise!)
How to Stop a Kayak
Put your paddle in the water like you are doing a backstroke and hold it there, dragging it against the water. This will slow and then halt any movement you were making in the water.
How to Turn a Kayak
If you want to turn LEFT, then paddle only on your right. If you want to turn RIGHT, then paddle only on your left.
Tips For Your First Kayaking Excursion
When you are planning your first kayaking trip, there are a few considerations you’ll want to make:
Trip Length: For your first-time kayaking, plan a trip that is less than three hours. You don’t want to exhaust yourself or bite off more than you’re ready for. 2-3 hours gives you enough time to get a feel for kayaking and decide if you like it.
Wind/Water Conditions: If it’s really windy, you might opt for another day. Wind poses an additional challenge that sometimes is unavoidable, but we recommend trying kayaking for the first time when it’s calm out. Also, lake, calm river, or bay conditions tend to be easier than the ocean for new paddlers.
Take a class or go on a guided tour: If you’re nervous, consider taking a class or joining a guided tour for your first trip. Use REI’s Class Finder to see if there’s a class near you. You’ll build a foundation, familiarity with the gear, and the confidence to go on your own next time. Or who knows? Maybe you’ll meet a new paddling partner in the class.
First, know that it takes a lot to flip a kayak over and tandem kayaks are even harder to flip. With that said, it’s important that you know how to get yourself back in the boat in that unlikely event.
We actually recommend that you practice falling in so that you have experience re-entering a kayak from the water. And you should always wear your PFD.
If you capsize, hold onto your paddle and your kayak. If you can’t re-enter the kayak, use your whistle to signal for help.
If you’re going with an outfitter or rental company, listen to their safety talk and ask any questions you have prior to heading out.
Kayaking in the morning is usually better than in the afternoon as winds can pick up in the afternoon making kayaking more difficult.
For the first half of your trip, head into the wind, if possible. That way when you’re tired later on, you can then kayak downwind and get a little boost.
Know that seeing sharks while kayaking is rare, but it’s something many people are afraid of.
If you’re with a tour operator or renting from a business, it’s okay to ask them if they have frequent experience with sharks or if this is something you should be aware of.
While we strongly recommend knowing how to swim for your safety, it’s not absolutely necessary for kayaking. Always wear a lifejacket or personal floatation device (PFD) while kayaking and never kayak alone if you’re not a strong swimmer.
We hope these beginner kayaking tips inspire you to try paddling for the first time this summer or to get back out there if it’s been a while. What questions or tips do you have? Leave them in the comments below!
I was determined not to let outdoor adventures cease when my husband and I decided to become parents. Five months into my pregnancy, I learned about the fairly flat, family-friendly Ruby-Horsethief canyon section of the Colorado River and decided to try for a permit.
I was intimidated but intrigued by an overnight river trip. I had many hesitations (especially being seven months pregnant!), but this trip is doable for a first-time rafter or family, and, more importantly, it’s worth it!
This blog post will prepare you for how to get a permit, choose the perfect watercraft, pack the right gear, coordinate a shuttle, and more. Start planning your float of the Ruby-Horsethief canyon section of the Colorado River with this complete guide!
Important Reminder: As outdoor recreationists, it’s our responsibility to know how to recreate responsibly on the water whether we’re kayaking, paddleboarding, canoeing, rafting, or boating. Learn how to prevent the spread of aquatic invasive species with 3 easy steps that have a huge impact on our ecosystems.
Ruby-Horsethief Canyon Basics
Location: Loma, CO to Westwater, Utah
Closest major airport: Salt Lake City International Airport (SLC) or Denver International Airport (DEN). They are nearly equidistance from Loma, CO (4 hours driving)
Length: 25 miles
Days needed: 2 days/1 night (or 3 days/2 nights if you have more time)
River difficulty: Class I/II Rapids
Dog-friendly? Yes, no more than two dogs per party
Permitneeded? Required, more info below
Motors? Allowed
Flow requirement: Family floats are best done when the river drops to below 5,000 CFS, max flow 30,000 CFS
Best time of year to float: May – October
The Ruby-Horsethief section of the Colorado River is amazingly scenic with towering canyon walls on either side.
This 25-mile stretch flows between Loma, Colorado and Westwater, Utah (yes, you get to cross the Utah border on watercraft!).
It is fairly flat with class I/II rapids, perfect for first-time rafters, families, or those looking for a relaxing and fun adventure.
It is a very popular float area, so you will likely run into other groups, but campsites are spread out so you should have plenty of space.
We made the trip one night, but some people stretch it to multiple nights or do it in one day.
Permits are not required if completing the 25-mile stretch in one day, but I highly recommend soaking in the sights and making it an overnighter. There is an abundance of wildlife including bald eagles, bighorn sheep, mule deer, great blue herons, and more not to mention the incredible scenery!
Mellow Class I/II rapids are the only rapids you’ll find on the Ruby-Horsethief section of the Colorado River
Best Time of Year to Float Ruby-Horsethief Canyon
The best time to float Ruby-Horsethief Canyon is from May through October for optimal water levels and temperatures. Permits are required all year long.
Fall
Fall provides the most consistently warm days, cool nights, less likelihood of thunderstorms, and lower flows for mellower rapids.
We floated Ruby-Horsethief Canyon in early September which provided the perfect weather. The highs were in the upper 80F and nights were in the 70s F.
Photo credit: Leah Montera
However, even in September, we encountered cool mornings, hot days, bugs, and strong headwinds at times.
In the morning we wore lightweight long-sleeve shirts to warm up. When it warmed up throughout the day we jumped in and out of the water to stay cool.
In the afternoon we hit terrible headwinds that slowed the pace considerably.
Lastly, at camp, the bugs were very bad and were constantly buzzing us, so that’s something to be prepared for.
Spring
Spring weather can vary greatly with hot days, cold nights, snow, and rain.
Summer
Because of the lack of shade, summer days can be very hot and buggy and prone to thunderstorms. However, summertime is quite popular for floating this section.
Winter
It is not ideal to float this section in the winter or early spring as cold weather and high runoff are dangerous factors.
No matter when you go, it is essential to be prepared and aware of the weather and natural elements. This section of the river is remote with very limited cell service and no takeout points until Westwater.
Tip: The water levels of the Ruby-Horsethief Canyon change throughout the year. Floating the river is best done when flows are below 5,000 CFS. Check water flow levels on the SnoFlow website.
Types of Watercraft to Use on Your Ruby-Horsethief Canyon Float
There are many different types of watercraft you can take on this section of the Colorado River. Here’s a breakdown of the pros/cons of each:
Stand-Up Paddleboard
I floated the two-day trip on an inflatable stand-up paddleboard. In the rapids, I would drop down to my knees as my balance was compromised at seven months pregnant. The others in my group rarely had to drop to their knees and could navigate the rapids on their SUPs easily.
The inflatable paddleboards were great for transporting to the put-in and from the take-out. Being able to deflate the paddleboards allowed us to all squeeze into a large SUV on the shuttle back to the Loma boat launch.
The paddleboards were convenient for travel, but they left minimal room for storage for our overnight supplies. Anything stored on the paddleboards had to be waterproofed as everything was constantly getting wet.
Two people in our group were in a tandem inflatable kayak rented from Rimrock Adventures. The kayak was dropped off by Rimrock Adventures and picked up for us at the Westwater take-out ramp.
Kayaks and canoes provide a much more laidback trip and a lot of storage. The kayak passengers weren’t exposed to as much water splashing. However, there were fewer opportunities to casually jump in and out when trying to cool off than those of us on paddleboards.
Hardshell kayaks would work well and provide storage that isn’t constantly exposed to water versus a SUP. Hardshell kayaks are also easier to control, especially in the afternoon wind.
Canoes are not recommended for streamflow above 20,000 CFS. Between 10,000-20,000 CFS is only recommended for highly experienced canoeists. Canoes are best used when water is below 5,000 CFS.
Canoes can also be hard to control, especially with the afternoon winds. They provide ample storage but be sure everything is waterproofed in case of tipping!
By and large, rafts are the most popular form of watercraft to float Ruby-Horsethief. Rafts provide room for big groups and many supplies. Rafts can also be rented from multiple retailers in Grand Junction, CO, or Fruita, CO, with delivery and pick up.
Rafts will allow the space to bring luxury camping items like coolers, umbrellas, yard games, and more. However, rafts are large and make shuttling without a commercial rental company much harder. Additionally, most rafts require only one paddler, which leaves others to lounge and not get the full-paddling experience.
BFT team member Linda rafted Ruby-Horsethief Canyon and loved the space and relaxation the raft provided. Her group brought their own rafts and had two vehicles and a trailer so they were able to self-shuttle.
Packrafts allow you to bring more luxuries like sun umbrellas!
What to Pack for a Ruby-Horsethief Canyon Float
Below are a few gear recommendations specific to an overnight trip on the Ruby-Horsethief section of the Colorado River:
Drinking water: This portion of the Colorado River is too silty to filter, so you must pack in all of your drinking water. Bring plenty of water as there is little shade and the summer days are hot!
Tip: If bringing a cooler for food, freeze water in plastic gallon jugs to use as ice, then drink the water as it melts.
Toilet system: You must have a hard-sided toilet system that is big enough to accommodate everyone in the group. Wag bags alone are not permitted. You can find detailed toilet regulations on the permit website. Several outfitters rent out toilet systems.
Repair kits: The type of watercraft your group has will determine the repair kits you need. Make sure to have enough to accommodate the entire trip. In addition to the repair kit, make sure to have an air pump to inflate the watercraft after repairs.
Metal fire pan: A fire pan is required to be carried on all trips, even if stoves are being used for cooking. The pan needs to be at least 12” in diameter with a 2-inch lip around the outer edge.
Personal Floatation Device (PFD): The rental company should provide an appropriate life jacket if you rent a watercraft. If not, you are required by law to have a PFD approved for whitewater type I, III, or V. Children under 13 must be wearing a PFD at all times.
Spare paddle: Your group needs one spare paddle for every three low-capacity vessels, including kayaks or inflatable kayaks.
Throw rope: Each boat 12 feet or longer must have a throwable device or commercially made rescue rope with at least 40 feet of line and a horn or whistle for emergencies
Bug spray: The bugs at the campsite during our trip in September were terrible! This will vary by time of year, but it’s best to be prepared.
For a comprehensive guide on what to pack for an overnight river trip, check out our guide to kayak camping.
4-Steps to Planning an Overnight Ruby-Horsethief Canyon Float Trip
1. Reserve a camping permit
The entry point for this river trip is in Loma, CO, and the endpoint is Westwater, UT. Beyond the takeout is the Westwater Canyon, which requires an additional permit and advanced skill.
Permits are available year-round and can be made two months in advance
2. Choose a campsite
All the campsites along the 25-mile stretch are fantastic. They each offer something unique.
At mile 13, Mee Corner is the first of several campsites that can access Mee Canyon trailhead, which offers hiking and exploring opportunities.
The most popular campsites are Dog Island for a private island feel and sites in the amazing Vishnu schist Black Rocks section.
Your permit is specific to the campsite you choose, so you can’t just decide when you’re on the river.
BFT team member Linda camped at Cottonwood Camp during her trip
3. Reserve a rental
There are multiple places to rent watercraft from in Grand Junction, CO, and Fruita, CO if you don’t have your own.
Some of the rental companies will provide drop off to the Loma boat launch and pick up at the end of the trip in addition to shuttle services.
4. Book a shuttle
This is a very popular float trip with easy point-to-point logistics. We had two cars and dropped one at Westwater the morning of the start of our float.
Loma boat ramp and Westwater boat ramp are roughly 40 minutes from each other.
Local shuttles are available if you don’t have two cars available.
My Ruby-Horsethief Canyon Trip Report
Day 0: Drive to Fruita, CO
After driving 4 hours from Denver and getting to Fruita, CO we ate dinner at the famous Hot Tomato Pizza and fueled up for the next day’s adventure.
Day 1: Loma put-in to Fault Line 2 Campsite
In the morning, we set off at 6 am to drop off one of the cars at the Westwater takeout boat ramp. Luckily the drive between put-in and take-out locations is only about 40 minutes one-way.
We drove to Loma put-in boat ramp and met Rimrock Adventures, who dropped the inflatable kayak and toilet system our group rented. Many groups were getting their boats ready, so it was nice to chat with people about the adventure ahead!
We loaded up our SUPs and kayak with our gear and started the trip. The views are fantastic right from the start!
The trip was very casual. The river stays nice and wide, and everyone can take the trip at their own speed. Since it was hot, we jumped in and out of the river to stay cool. A few hours in, we decided to stop for lunch on one of the sandy shores. We brought dehydrated meals since they were the easiest and lightest for us to pack.
After lunch, we returned to our boats and enjoyed the leisurely float to our campsite. At about 2 pm, the wind picked up significantly, which made the SUPs hard to steer and move forward. By then, we were glad we were almost to our campsite, Fault Line 2.
I recommend getting an early start and being prepared for strong afternoon winds most days.
The campsites are well-marked and easy to pull into. We got on shore and were able to set up tents, eat, lounge, and relax before nightfall.
While Fault Line 2 didn’t have any established trails, many of the campsites offer side hikes and exploration. We camped on the sandy beach and there were a few cottonwood trees that provided shade during the afternoon.
The bugs were terrible – be sure to bring bug spray!
Day 2: Fault Line 2 Campsite to Takeout
The next morning we set off reasonably early, which provided solitude on the river. It was still a bit chilly in the shade but warmed up quickly.
We pulled onto the shore to explore black rocks, which was amazing to see. There were a lot of people exploring, cliff diving, and packing up campsites. Shortly after the black rocks section (mile 18.1), on river right, is a hike to petroglyphs. I wish we would have saved enough time to see them!
Floating past the Black Rocks on day 2 | Photo credit: Leah Montara
Because we explored, ate lunch, and took our time on the second day, we hit the afternoon wind again. We all found it hard to continuously paddle and steer our lightweight watercraft in the headwind.
It wasn’t long before we were watching for the Westwater takeout. It was very crowded, so we had to be strategic in where we pulled up. Everyone was unloading their watercraft and getting things packed up and into cars or vans for the shuttle back to Loma.
Final Thoughts
The Ruby-Horsethief Canyon float is a fantastic adventure for families or those looking for a relaxing few days out on the river. If you can, I recommend doing a 3-day / 2-night float so you can spend some time exploring the trails, petroglyphs, and other cool sights along the canyon.
Have a great float!
READ NEXT
Interested in more floating and paddling adventures? Check out these related blog posts:
I was not much of a theme park fan when I was younger, I went to a few smaller ones but I had never been to the big daddy, Alton Towers, until recently. Then, due to various circumstances I have been to Alton Towers three times in the last year!
The First Trip
I’m not going to lie, the first time we went as a family in June 2021 it was a bit of a disaster. We turned up without a plan, it was a hot, busy day and we ended up leaving early after going on just a couple of rides. An expensive way to spend a rubbish day out.
Ollie is a big fan of CBeebies Land
We vowed we wouldn’t go back until the kids were older, able to queue more patiently and tall enough to go on more rides.
Finally Cracked It
Since then I have managed to get cheap tickets through my work that were just too good an opportunity to miss, so we’ve been a couple of times in the last few months and I think we’ve finally cracked it!
The last trip to Alton Towers in particular was a great day out, we were helped by the fact that it was quieter than usual, but also for the first time I made a plan and it actually worked!
Top Tips
So this brings me on to my top tips to make the most of your trip to Alton Towers. These hacks come from hard earned experience, and will definitely be how we tackle any future trips.
Have a plan! Alton Towers is HUGE, so you won’t get to everything in one day, particularly if you have kids, so decide which rides you really want to do and work from there. Make a note of where they are and any height restrictions etc so you know what you’re doing.
Go against the flow. Most people start from the entrance and make their way down the park. On our latest trip we did the opposite, we headed to the farthest part of Alton Towers first and managed to get on 2 big rides (Thirteen and Rita) with just a few minutes queuing at each
Do CBeebies Land later in the day. Following on from my last point: CBeebies Land is the first place you come to when entering Alton Towers, so many people head straight there. It tends to be a little quieter later on in the day when everyone has moved on.
Get your timings right. If you’ve identified your must-do rides, the quietest times tend to be first thing in the morning and the last hour, so you can plan accordingly
Download the app. The Alton Towers app is great for planning a visit, buying extras (like parking or fastrack) and keeping an eye on the queue times.
Conserve your energy. If you have small children, the Sky Ride is a great way to move around the park with ease, it’s also a very scenic ride that the whole family can enjoy. Likewise, the monorail to and from the car park makes life easier-particularly at the end of a tiring day.
Get some wheels. Even if you don’t usually need a buggy, it can be a good idea to bring one (or hire one at the park) as Alton Towers is very big and a day there involves a lot of walking. On our latest trip we took along our festival wagon, which proved to be a hit, both for transporting tired children and carrying all of our stuff.
The Sky Ride is a great way to see Alton Towers
Must dos with kids
Obviously if you have young children, CBeebies Land is a must do at Alton Towers. There are lots of rides there and plenty for the whole family to enjoy together. The new Hey Duggee Big Adventure Badge, was a hit on our last trip. It’s a great opportunity for the kids to run around and the adults can take a well earned break.
Other attractions that are suitable for young children, and tested and loved by Finn and Ollie, include The Blade (a pirate ship next to Nemesis), Heave Ho (another pirate ship type ride) and The Runaway Mine Train. These all have height restrictions of 0.9m, you can see the full list here.
Ollie loved spotting the sharks at Sharkbait Reef
Sharkbait Reef by SEALIFE is also perfect for young children and is a nice calm place to wander round if you need a bit of quiet time.
Have you been to Alton Towers? Do you have any tips to make your trip more successful?
If you’re looking for accommodation near Alton Towers, check out these campsites:
A few years back, my partner Ryan and I rented kayaks, hired a boat taxi to drop us off, and camped on a secluded beach near the entrance of Labyrinth Cayon, a gorgeous slot canyon in a remote area of Lake Powell.
In this blog post, I share a step-by-step guide on planning an overnight kayak trip to Lake Powell’s Labyrinth Canyon. From what gear to bring to where to camp, this post will cover everything you need to know for a successful and enjoyable trip. So whether you’re a seasoned paddler or totally new to the sport, read on for all the info you need for an unforgettable adventure in one of Arizona’s most beautiful places.
Start planning your Lake Powell kayak trip with this complete guide!
Why Kayak Lake Powell?
Lake Powell is a super scenic 200-mile long reservoir on the Utah/Arizona border filled with remote canyons and many secluded beaches.
The lake is commonly enjoyed by houseboat or motorboat, but these can be expensive to rent and they don’t allow you to get into the quieter and more remote areas of the reservoir like Labyrinth Canyon. This is why we recommend kayaking Lake Powell if you really want to explore all this area has to offer. You’ll also get a little exercise, to boot!
The prime (and free) beach camping, mysterious canyons, and quiet paddling made my Labyrinth Canyon kayaking trip on Lake Powell one of my favorite southwest adventures to date.
Lake Powell Map
Lake Powell is located on the Utah / Arizona border in the Glen Canyon National Recreation Area. The area covers 254 square miles and has dozens of tributaries, canyons, and waterways to explore.
There are several Visitor Centers and launching points on Lake Powell, but if you plan on kayaking Labyrinth Canyon, I recommend starting in Page, Arizona. The closest international airports to Page are Las Vegas and Phoenix, both 280 miles away.
Lake Powell covers over 250 square miles within the Glen Canyon National Recreational Area
How to Plan an Overnight Labyrinth Canyon Kayak Trip
1. Choose your starting point
There are several marinas and launching points located around Lake Powell. We started our trip out of Page, Arizona where there are two large marinas, a couple of kayak rental companies, and other services that made it a convenient launching point.
The two biggest marinas near Page are Wahweap (where we launched from) and Antelope Point. We chose to launch at Wahweap because it was the most convenient for us and we could hire a water taxi to get us to Labyrinth Canyon to start our trip (more on water shuttles below).
If you are coming from Salt Lake City, you might also consider accessing the lake from the Utah side at Bullfrog or Hite Marinas. However, services at these marinas are more limited and it’s a much longer boat ride down to Labyrinth Canyon.
No matter where you enter Glen Canyon National Recreation Area, you must pay the $30 entrance fee per car, which grants you 7-day admission and overnight parking. However, if you have an annual National Park Pass, the fee is waived.
2. Reserve a Lake Powell Kayak Rental
If you don’t have your own kayak, you’re in luck! There are several places to rent kayaks in Page, Arizona. We rented two single touring kayaks from Kayak Lake Powell and the price was very reasonable. Each kayak had plenty of room to store gear, including tents, sleeping bags, clothes, water, and food.
Kayak Lake Powell also offers sit-on-top kayaks, but I don’t recommend these for an overnight kayaking trip since they aren’t as efficient to paddle and they don’t have storage compartments for gear.
Kayak rentals include a life jacket, a paddle, and free delivery to the Antelope Point Marina if you choose to start from there. Reservations can be made online or by calling their shop.
Kayak Lake Powell also offers guided kayaking trips to Labyrinth Canyon if you prefer a package trip. During our trip, we ran into one other group who was on a guided tour and they seemed to be having a great time.
Opt for touring kayaks since they are more efficient in the water and will keep your gear dry
3. Book a Water Shuttle to Labyrinth Canyon
In order to get to Labyrinth Canyon for a quick overnighter, you must be transported to the mouth of the canyon by a motorboat. On our trip, we hired a local fisherman to shuttle us out there. Unfortunately when it came time to pick us up for our return, he ended up being pretty unreliable. So this is not the method of transportation I’d recommend.
Instead, there are two licensed water shuttles to Labyrinth Canyon: Aramark Executive Services out of Wahweap Marina (928-645-1037) and Antelope Point Marina (928-645-5900). The best way to line up your shuttle is to give one of these a call.
The ride from Wahweap to the mouth of Labyrinth Canyon, which is what we did, is just under 20 miles and takes about an hour. The ride from Antelope Point Marina to the mouth of Labyrinth Canyon is about 12 miles and 30-45 minutes.
Expect to pay around $150-$200 per hour for a water taxi. Yes, it’s pricey, but if you have a large group, it could be worth it! It’s also the only feasible way to get to Labyrinth, unless you have your own boat or are renting a houseboat.
For the strongest paddlers, it may be possible to kayak to the mouth of Labyrinth Canyon from Antelope Point, but I don’t really recommend doing this because the water can be very choppy/windy and there can be a lot of boat traffic along the way. You’ll also need more than one night for your trip if you paddle there and back. It’s much safer to hire a motorboat to shuttle you and your gear.
I’ve included several alternative overnight kayaking routes below if you don’t want to book a water shuttle to Labyrinth Canyon.
4. Choose your Camping Spot
Once you are out on Lake Powell, you are allowed to camp anywhere along the shoreline. Most of the camping is primitive in undeveloped sites, meaning there are no services of any kind and camping is free. You also don’t need a permit or reservation.
You are, however, required to carry out all of your waste, including poop and toilet paper. You can do this with a National Park-approved Waste Bag Containment System – otherwise known as a wag bag which you carry out and later throw in the trash.
You’re also allowed to have a campfire, but you must bring your own wood. Just dig a pit in the sand below the high water line, and make sure your fire doesn’t get bigger than 4 feet tall x 4 feet wide. Read more about primitive camping rules and regulations at Lake Powell here.
We camped on the beach at the mouth of Labyrinth Canyon. It was stunning and we had the place to ourselves!
The beach at the mouth of Labyrinth Canyon is the perfect place to camp
My Labyrinth Canyon Overnight Kayak Trip Report
After getting shuttled to the mouth of Labyrinth Canyon, we had an awesome night sitting on the beach by the campfire and woke up early-ish the next day so we’d have plenty of time to explore Labyrinth Canyon.
In the morning, we loaded up the kayaks with lunch, water, and gear, and set off. Finding the entrance to Labyrinth Canyon was pretty easy. If you just hug the south side of the lake, you’ll spill right into it.
As we made our way towards the back of the canyon, the canyon walls closed in and got very tight and It wasn’t long before the canyon was too narrow for most boats. We didn’t encounter any other paddlers until we reached the very end of the canyon where a few other kayakers had pulled their kayaks onto a beach and were off exploring.
At the back of the canyon, we beached our kayaks, threw on some hiking shoes, and started hiking back into the narrows. The walls in some places were more than 200 feet tall and less than 2 feet wide. Eventually, we hit some pools of water. We probed a little deeper, but the water was freezing and some other folks told us that it got quite deep. Not being ready for a canyon swim, we turned around and headed back to our kayaks.
It took us about 6 hours in all to get to the back of the canyon, hike, and return to our campsite at a very leisurely pace with a few stops along the way.
Best Time to Visit Lake Powell
No matter when you visit, keep an eye on the weather prior to your trip. You’ll want to watch out for winds and thunderstorms. The lake can get incredibly choppy and not only would it not be fun to kayak in super rough conditions, but it can also be dangerous.
Spring: I visited Lake Powell in mid-May and got perfect weather. No wind, warm daytime temps, and the water was warm enough to take a quick dip in. That said, you would not want to tip over and if you did, you’d want to be wearing a wet suit. Hypothermia does happen and it is serious.
In spring, the water level is also lower which allows you better access to the back of the canyons and the chance of rain is lower than later in summer.
Summer: Summers tend to be scorching at Lake Powell. Swimming is comfortable, but paddling not so much, at least in the heat of the day. If you plan a Lake Powell kayaking trip in summer, plan to paddle in the early morning and late afternoon and spend the hottest part of the day on the beach swimming. I’d also want to pack some sort of tarp/shade structure for hanging out on the beach.
Other things to keep in mind are that flash floods are highest in July through September and the beginning of summer through Labor Day is the busiest time on the lake.
Fall: Fall is a great time to explore Lake Powell. You can expect very pleasant air and water temps and fewer people.
Winter: Exploring Lake Powell during the winter months is only recommended for experienced paddlers and you should wear a wet suit even when you are in your boat. Days are short, temps are cold, and swimming isn’t possible. However, with the right weather window, Lake Powell can be a very special place in the winter.
If you don’t want to pay for the pricey water taxi to Labyrinth Canyon, you can still enjoy an overnight kayak trip on Lake Powell without a water shuttle. The easiest and most economical option is to drive from Page, launch at Lone Rock Campground or Wahweap Marina and then paddle across the lake to Wiregrass Canyon and Lone Rock Canyon. Both of these areas have a ton of options for camping and cool geological features to explore.
Another popular overnight option is to launch at Antelope Point and then kayak over to the mouth of Navajo Canyon. You can camp at the mouth and then explore Navajo Canyon as a day trip.
If you’re still unsure about route options, the staff at Kayak Lake Powell are very knowledgeable and provided us with a lot of advice about where to go on Lake Powell and what to check out. Depending on your time and financial constraints, I’d suggest discussing the different kayaking route options when you call to reserve your kayaks.
Kayak camping gear is very similar to what you would take with you on a backpacking trip, but you’ll want to take extra precautions to keep everything dry and secure. For a detailed guide on what to pack for your Lake Powell kayak trip, check out our comprehensive guide on kayak camping.
Below are a few recommendations specific to an overnight kayaking trip to Lake Powell.
Water purifier: The nice thing about kayaking on Lake Powell is that it’s fresh water, so you don’t need to carry a ton of water – you can simply filter water when you need it. My go-to filter is the Playtpus GravityWorks Filter. It’s fast, easy to use, and doesn’t take up much space.
Wag bags: If you are doing primitive camping along Lake Powell’s shoreline, you are required to carry out all human waste (and toilet paper) in a National Park approved waste contamination system. Basically, that means you have to go poop in a bag. No one likes to do it, but it helps keep the beaches and the water clean of (toxic) waste. So bring a couple of these wag bags.
GPS communication device: It’s a good idea to carry a GPS communication device anytime you’re in the backcountry. Once you get away from the marina, there is no cell phone service.
Life jacket: If you are renting a kayak, the kayak company should provide a life jacket. If not, you are required by law to have a life jacket with you on your kayak. I purchased this Stohlquist PFD for a week-long rafting trip and find it to be relatively comfortable to paddle in.
Lake Powell Map: This waterproof NatGeo map shows all of the side canyons, camping areas, and beaches.
Dry suit: If you’re paddling on Lake Powell during the winter months, it’s recommended that you wear a drysuit even when paddling.
Two nights was barely enough to scratch the surface of this magical place, but even so, it was worth the effort to get to Labyrinth Canyon. I’m officially hooked on Lake Powell, and I can’t wait to go back to explore more.
Have you kayaked on Lake Powell? What did your trip look like? What questions do you still have? Leave a comment below!
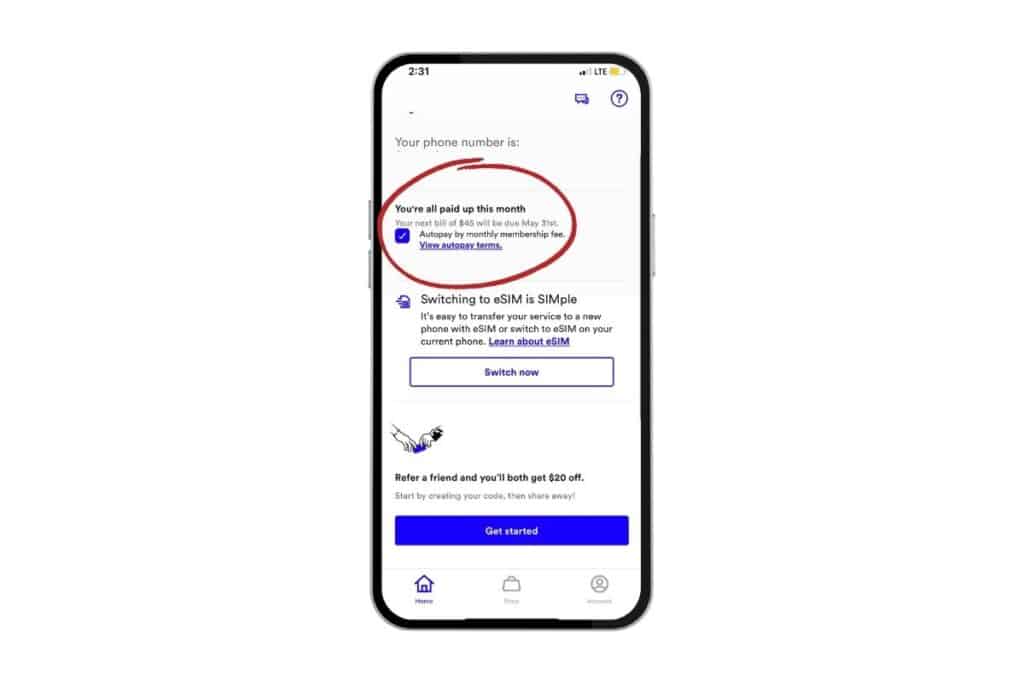
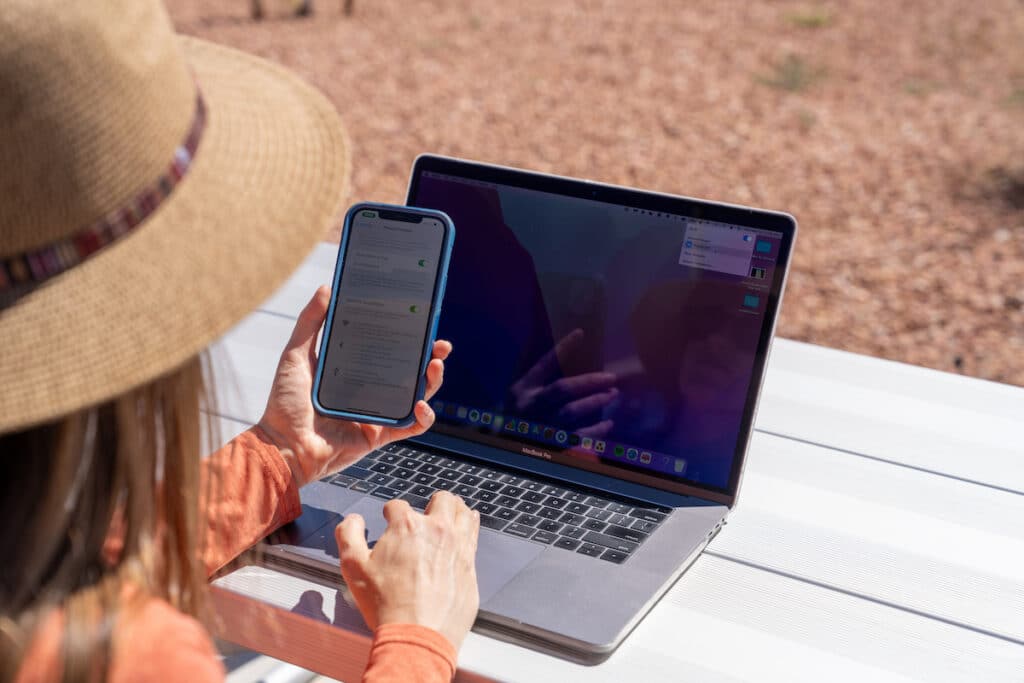
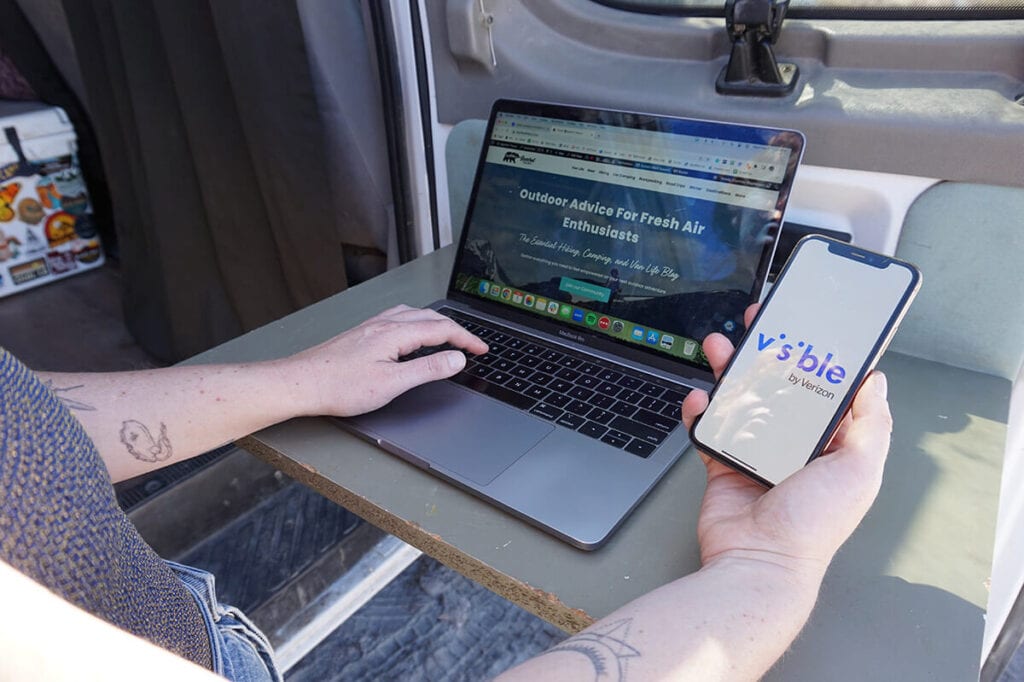

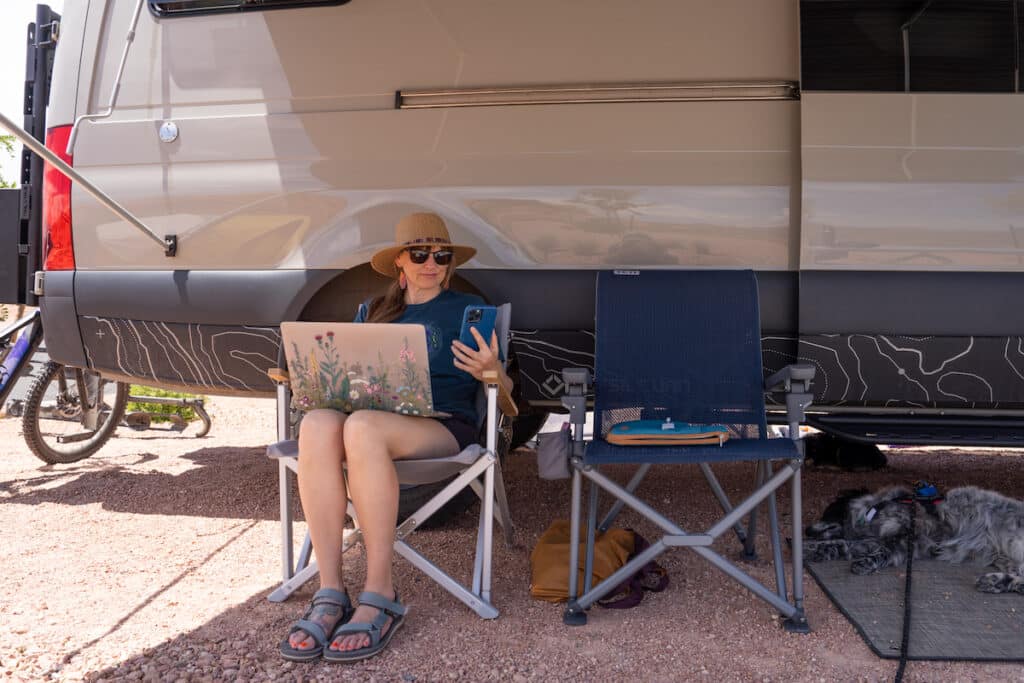
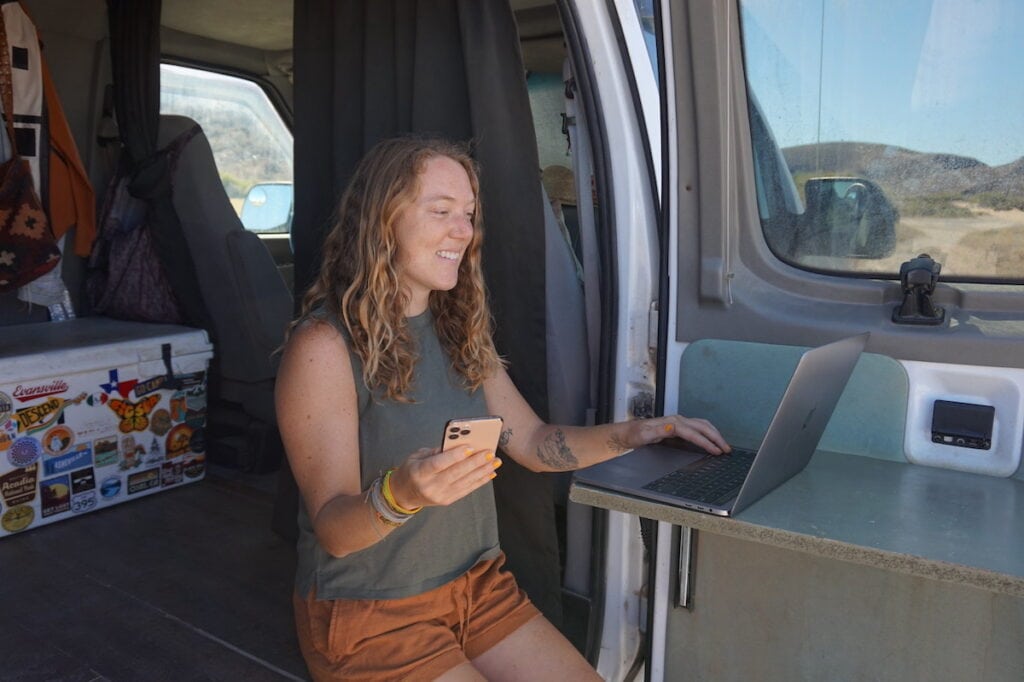
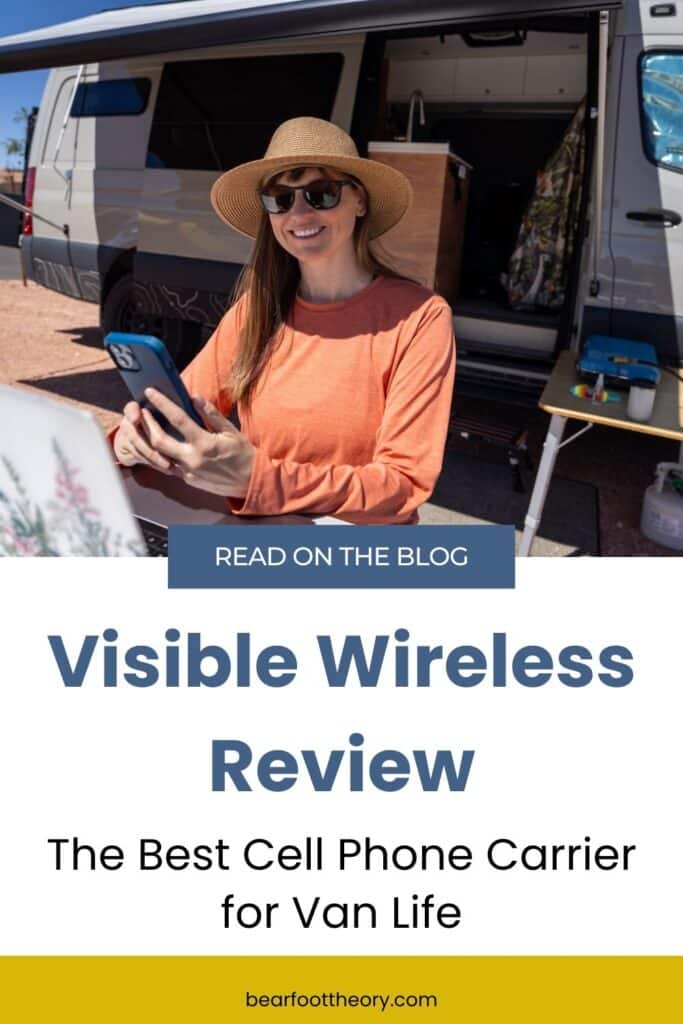

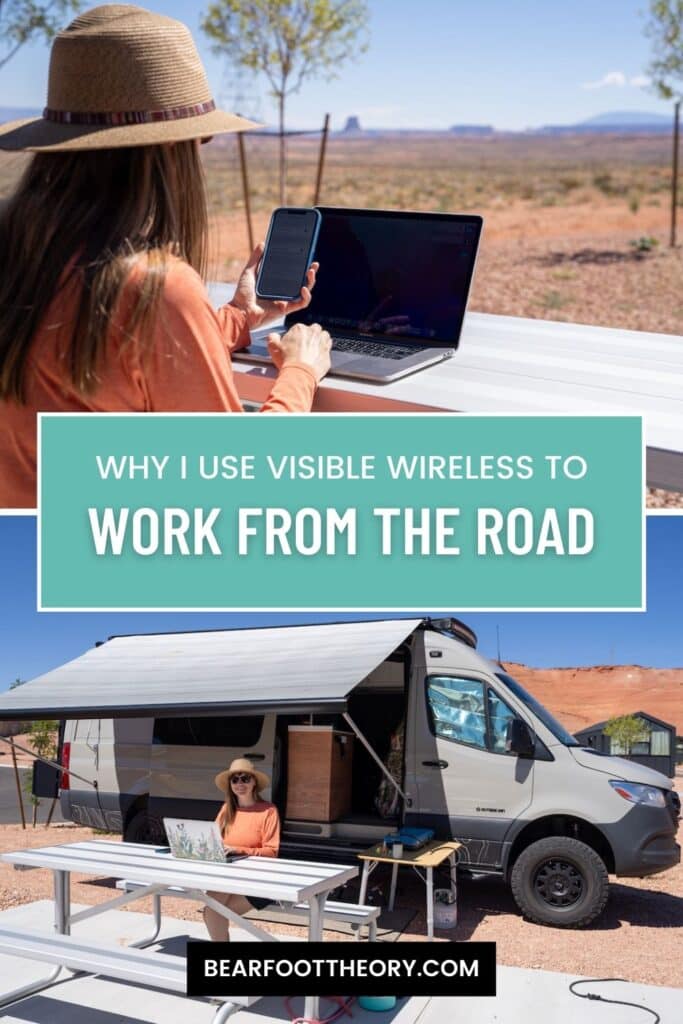


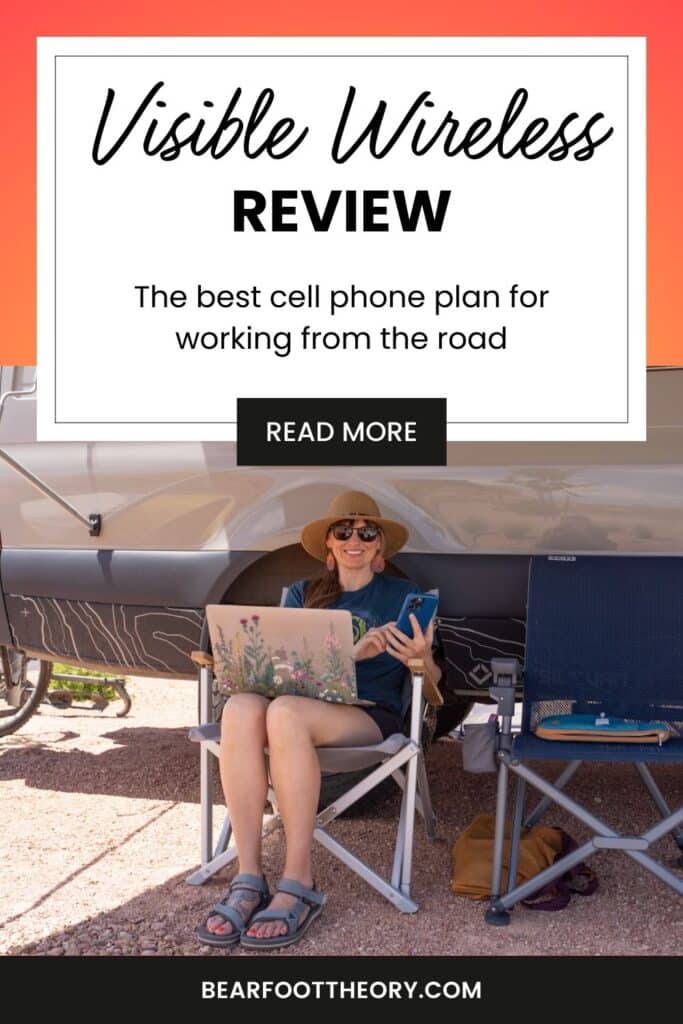


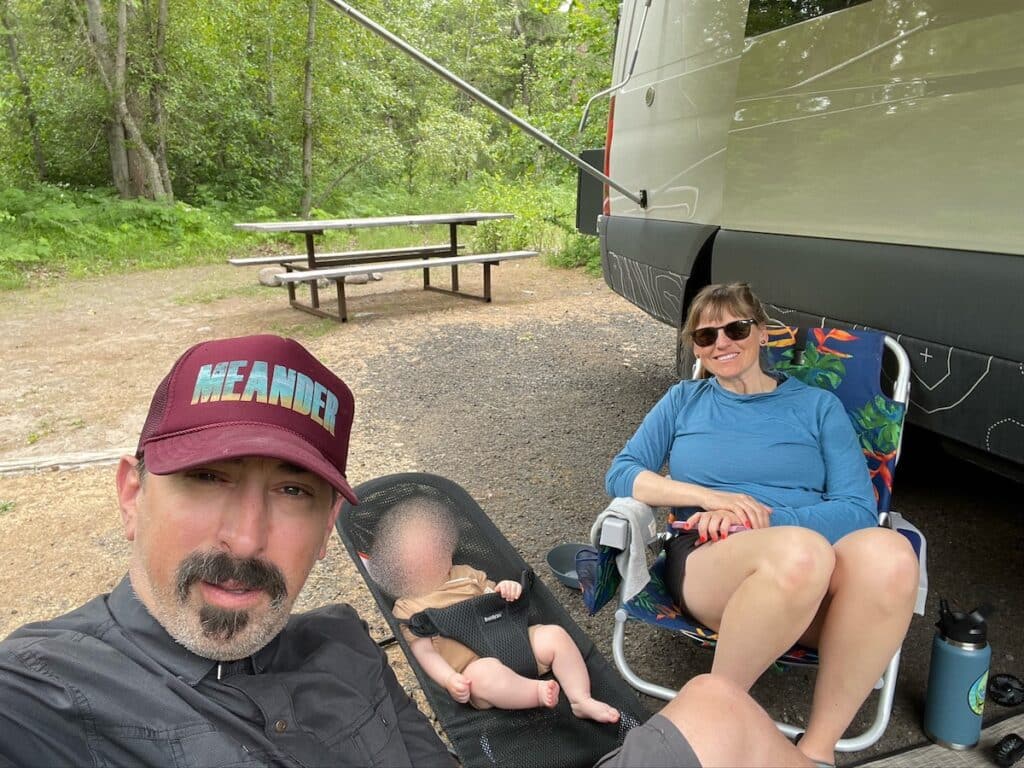
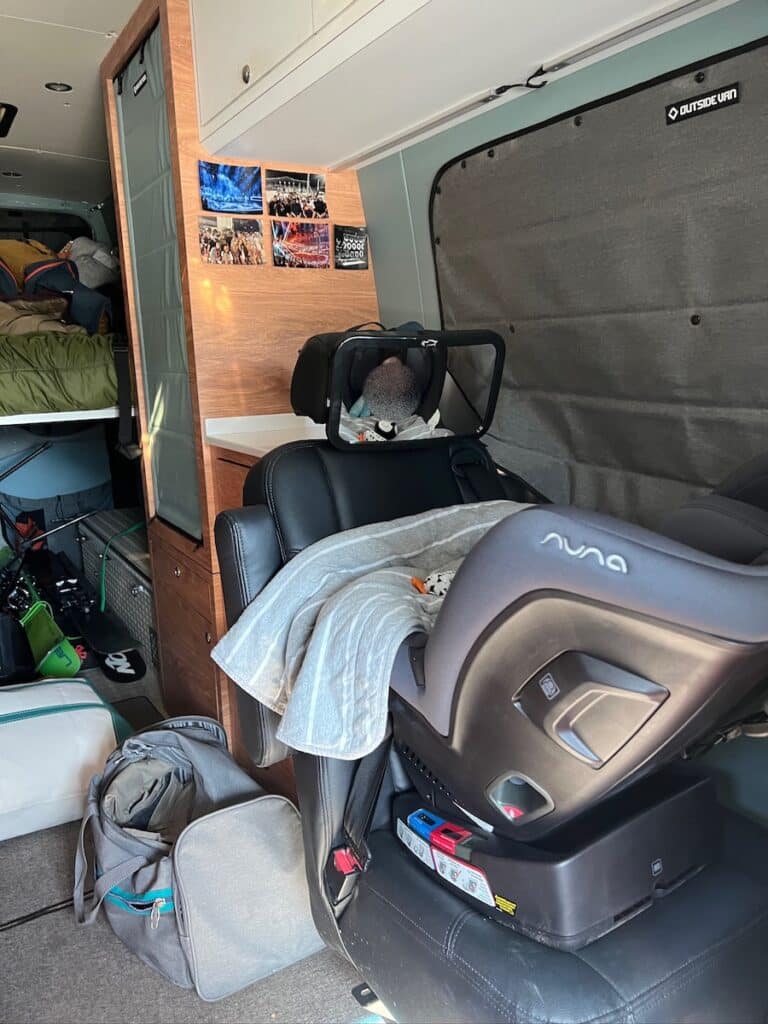
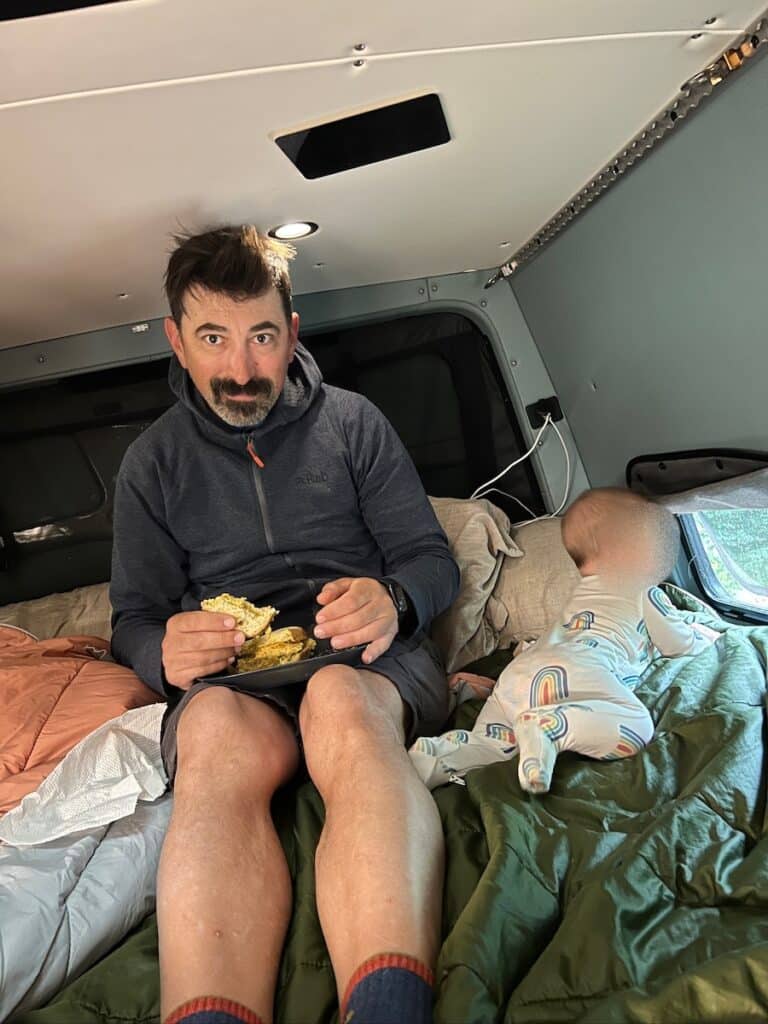
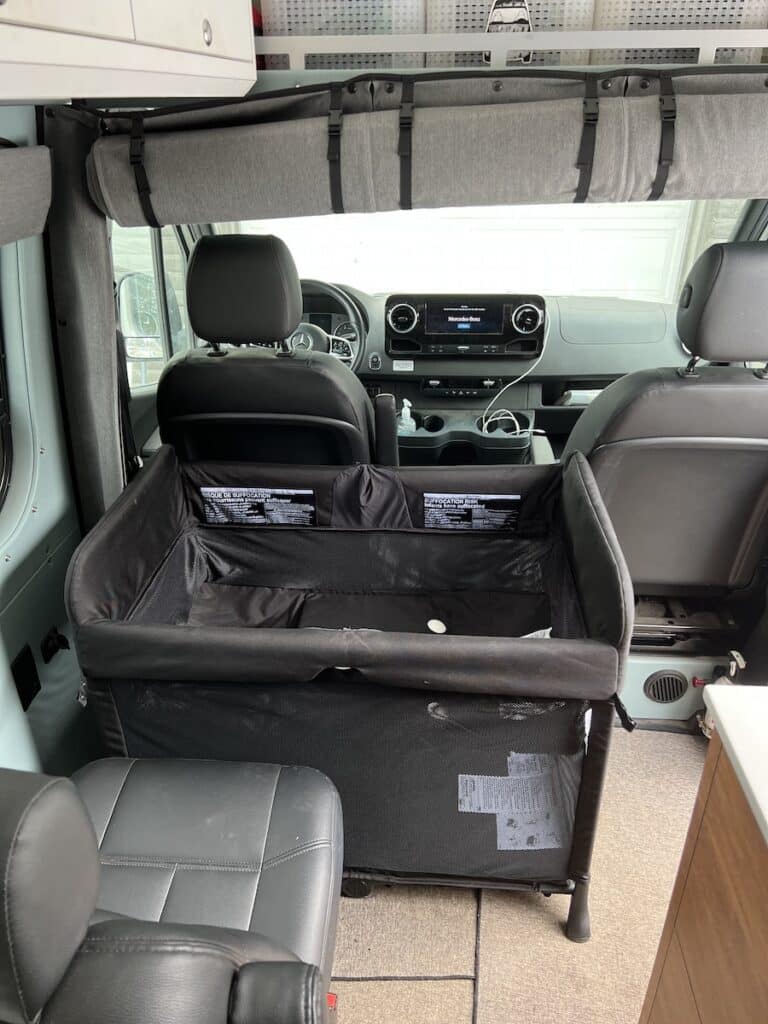


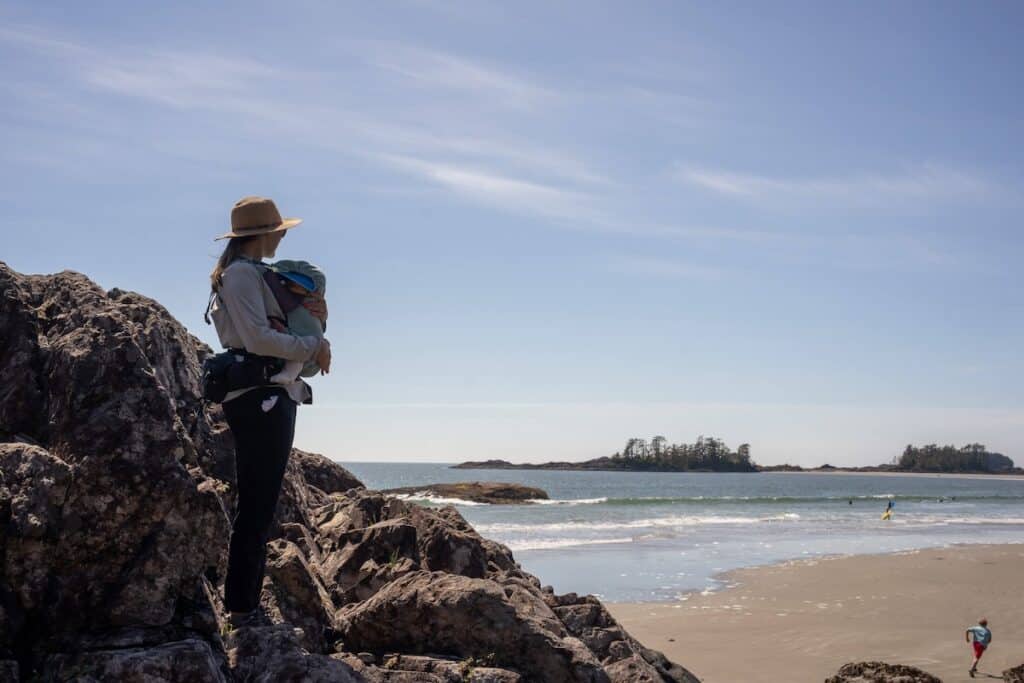


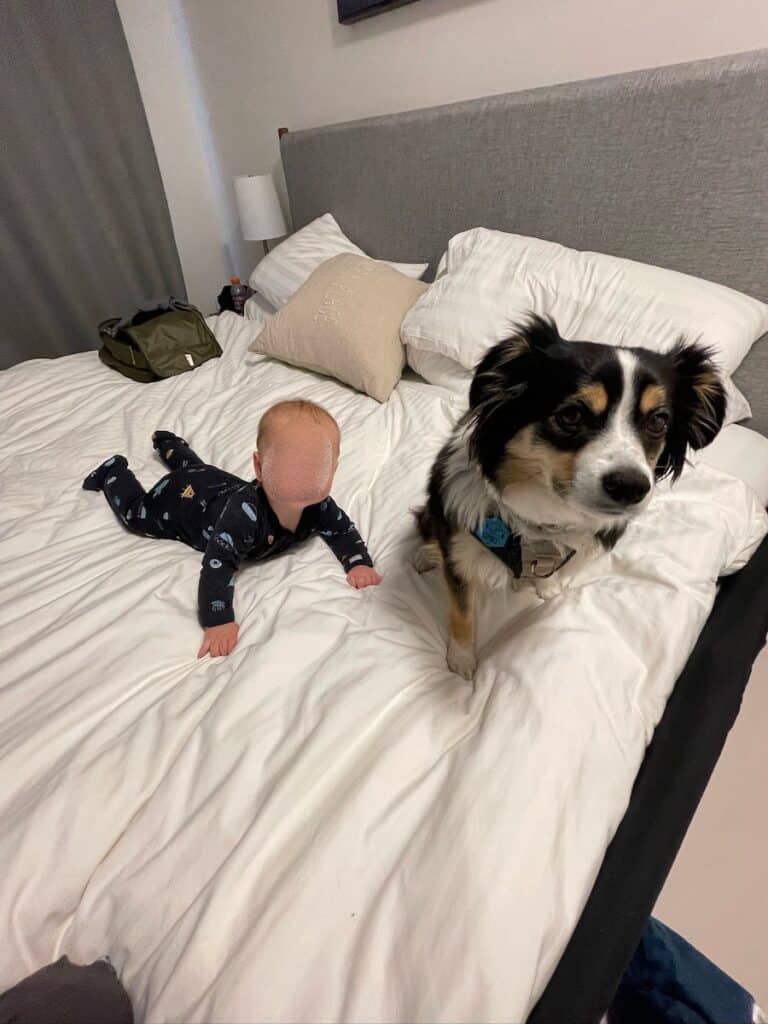

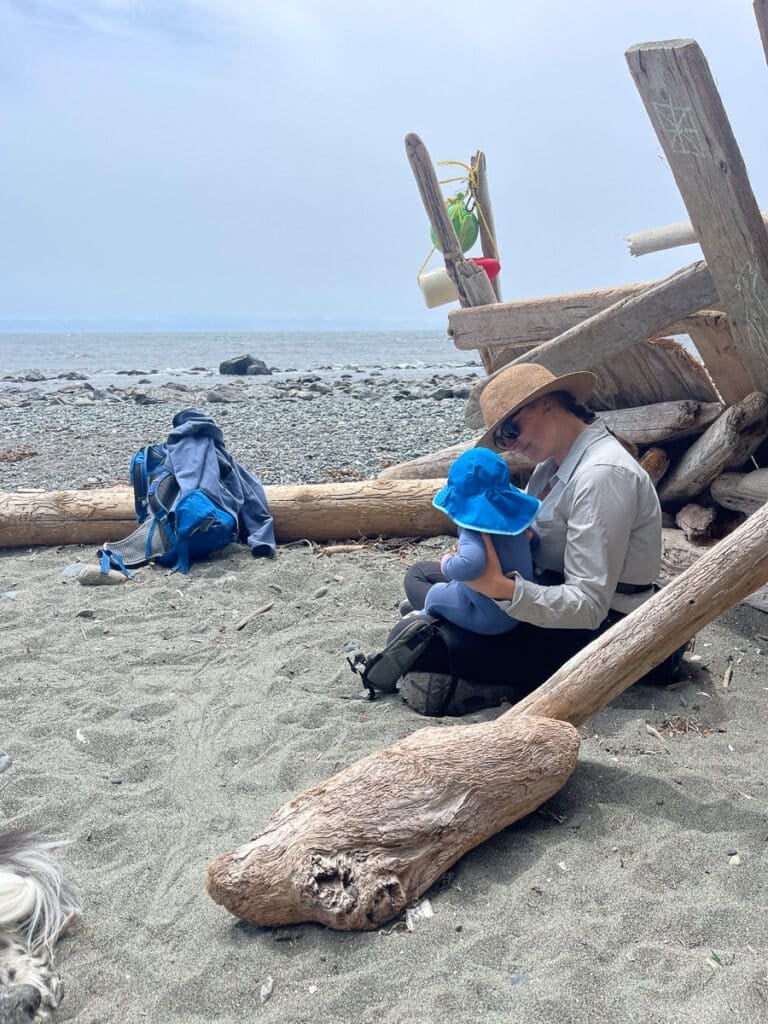
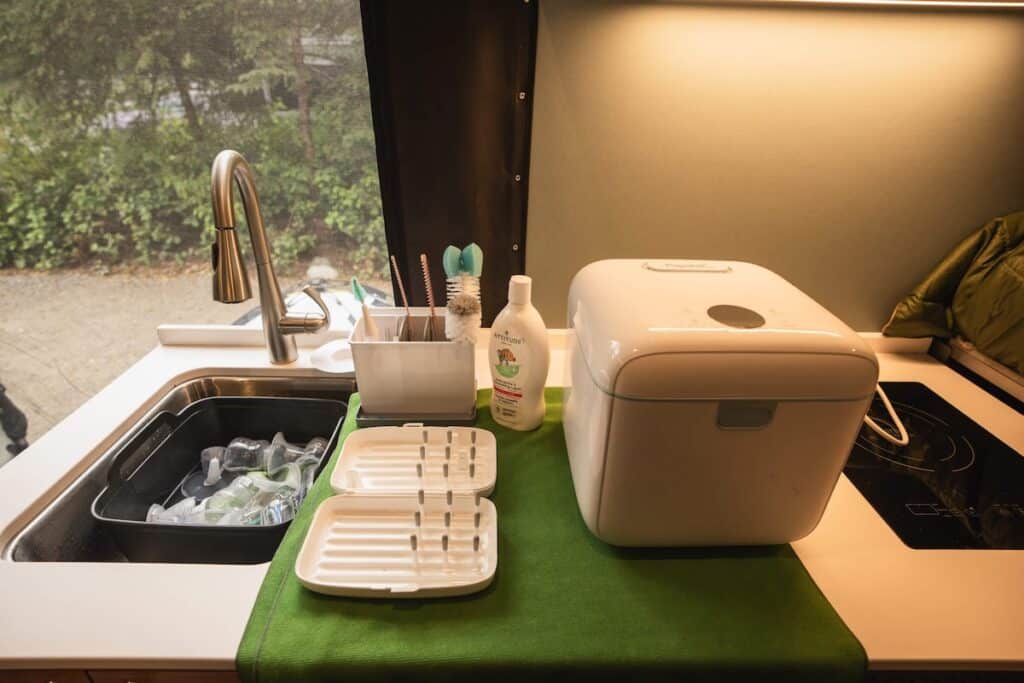
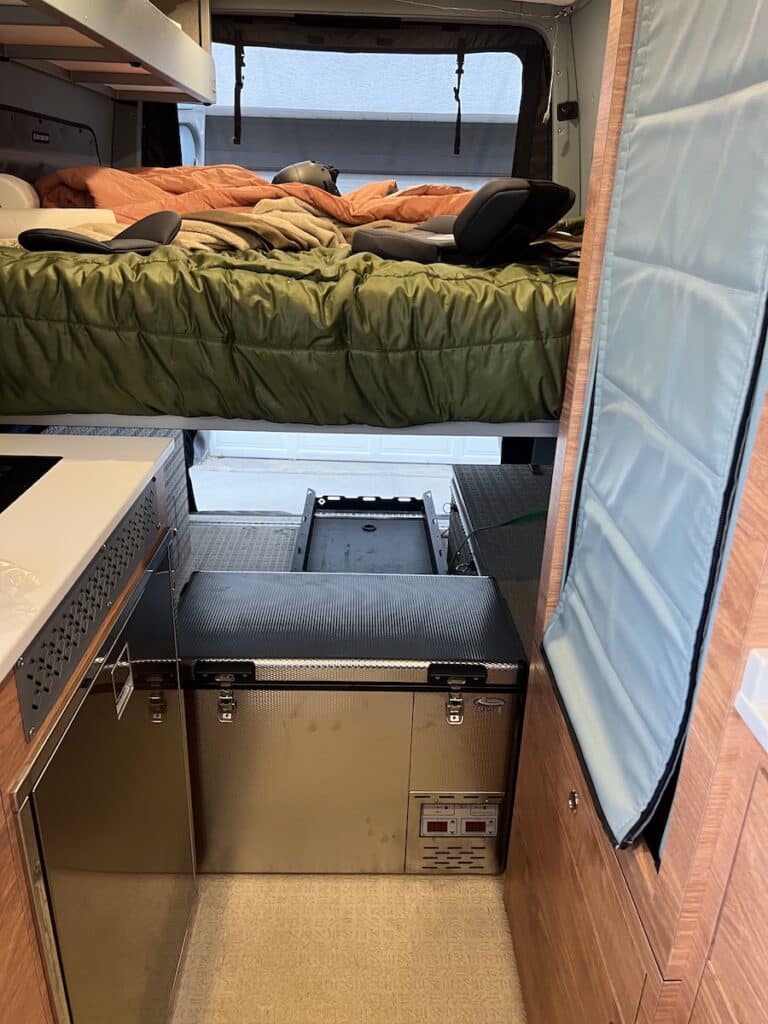


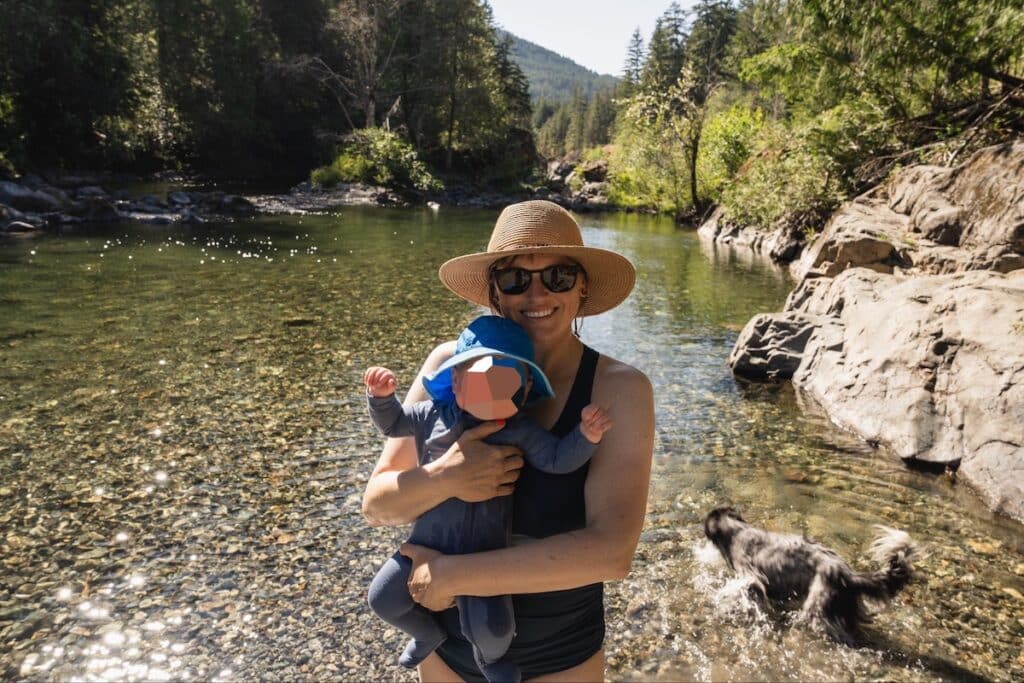


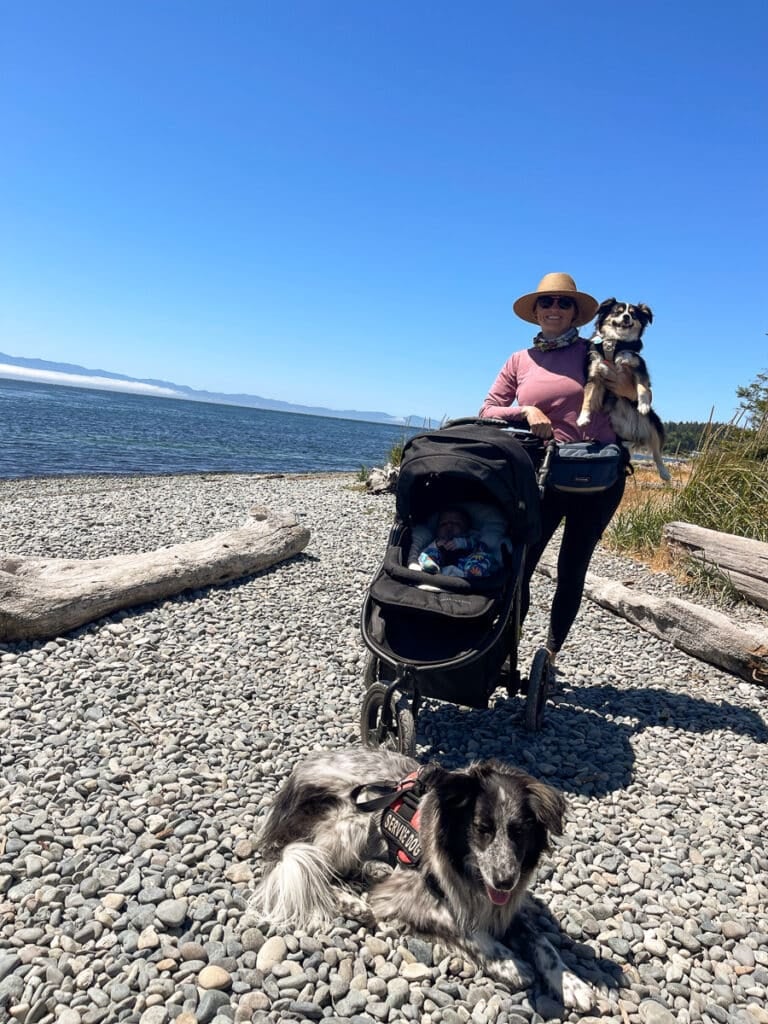

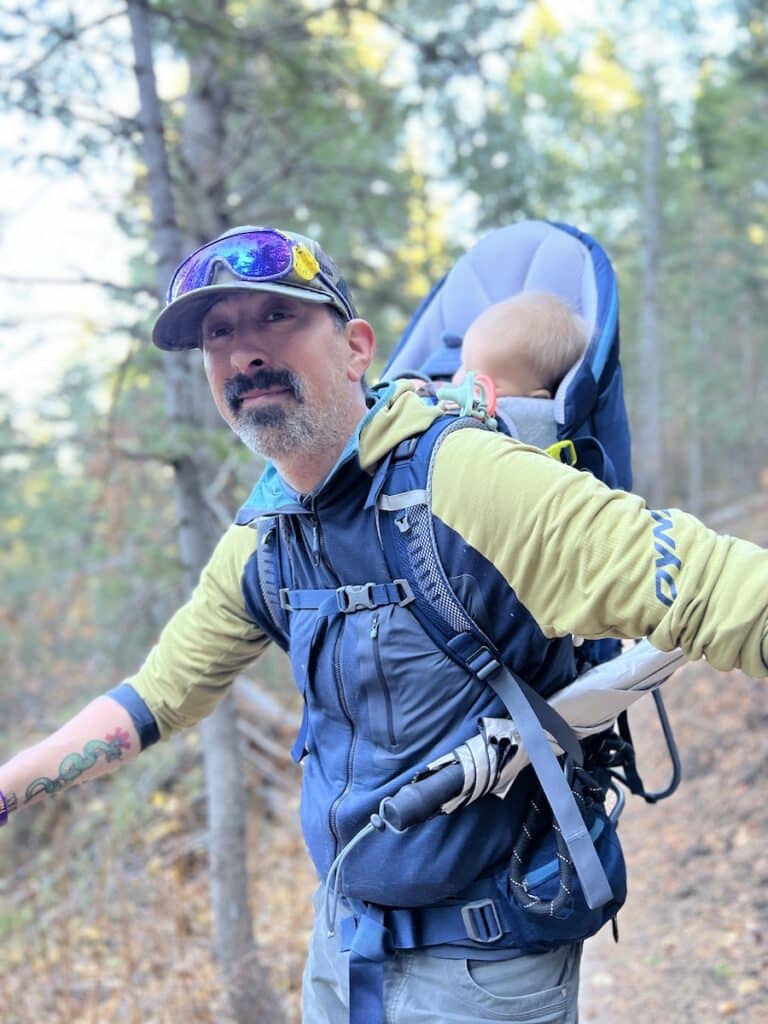
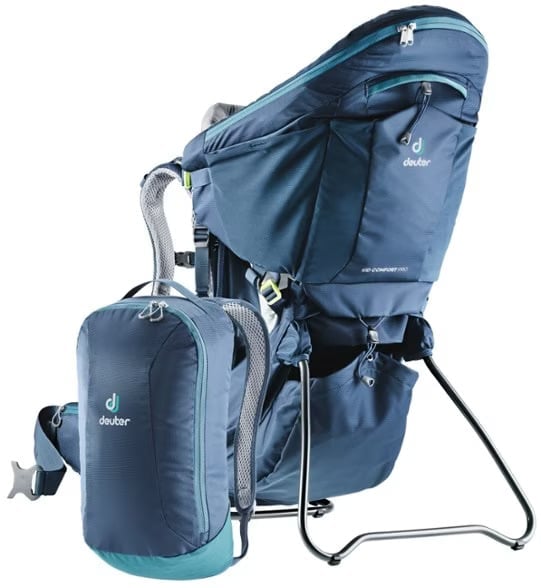


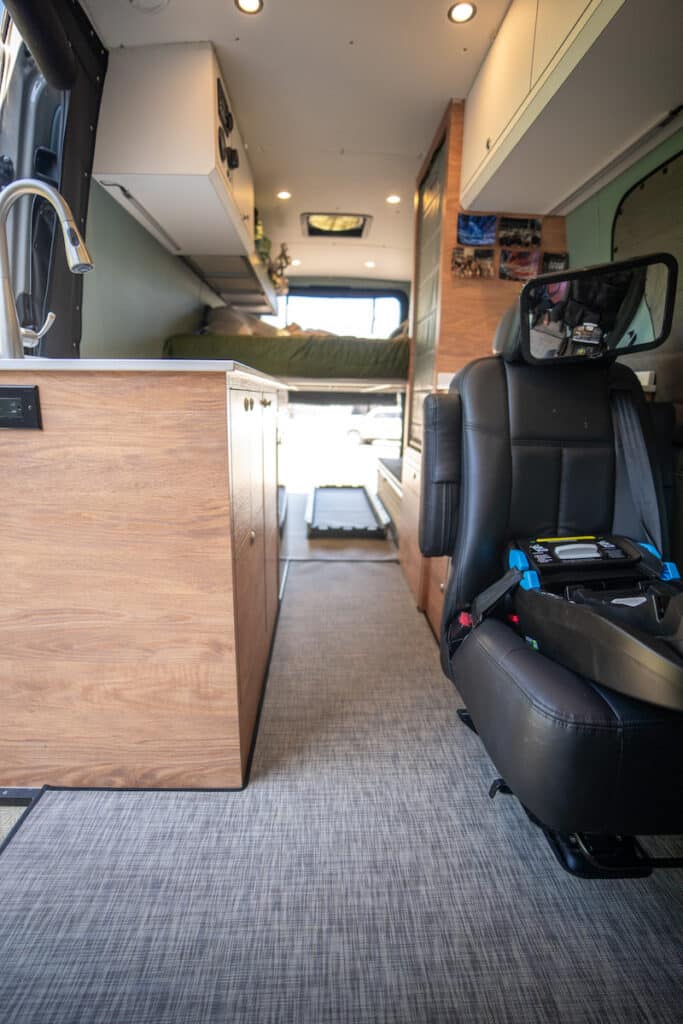


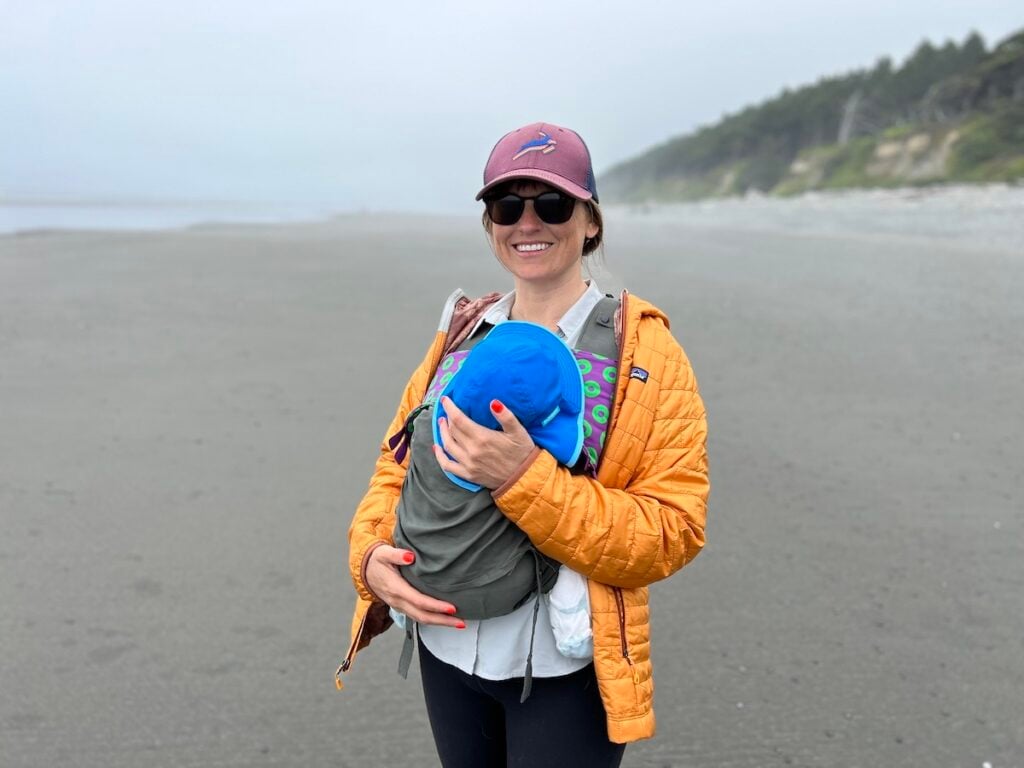
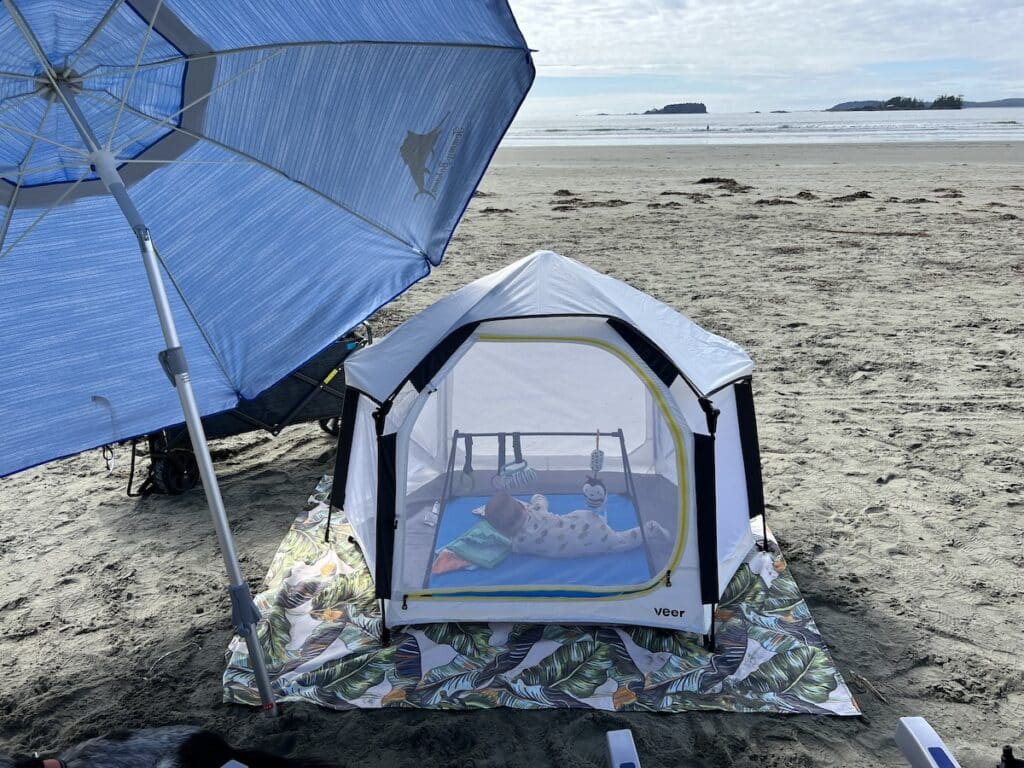

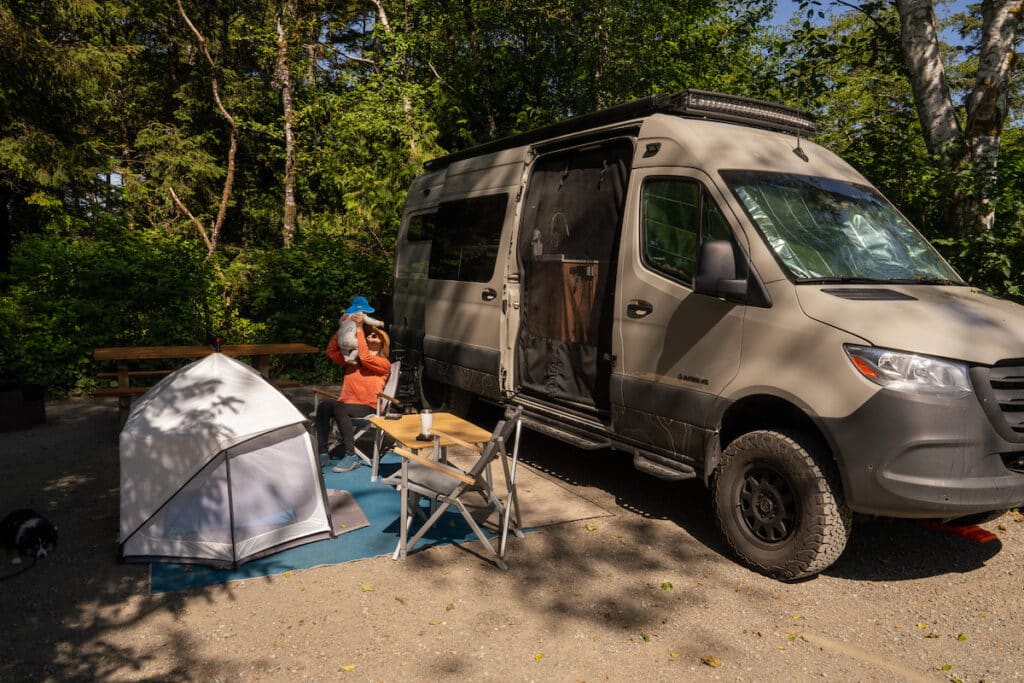


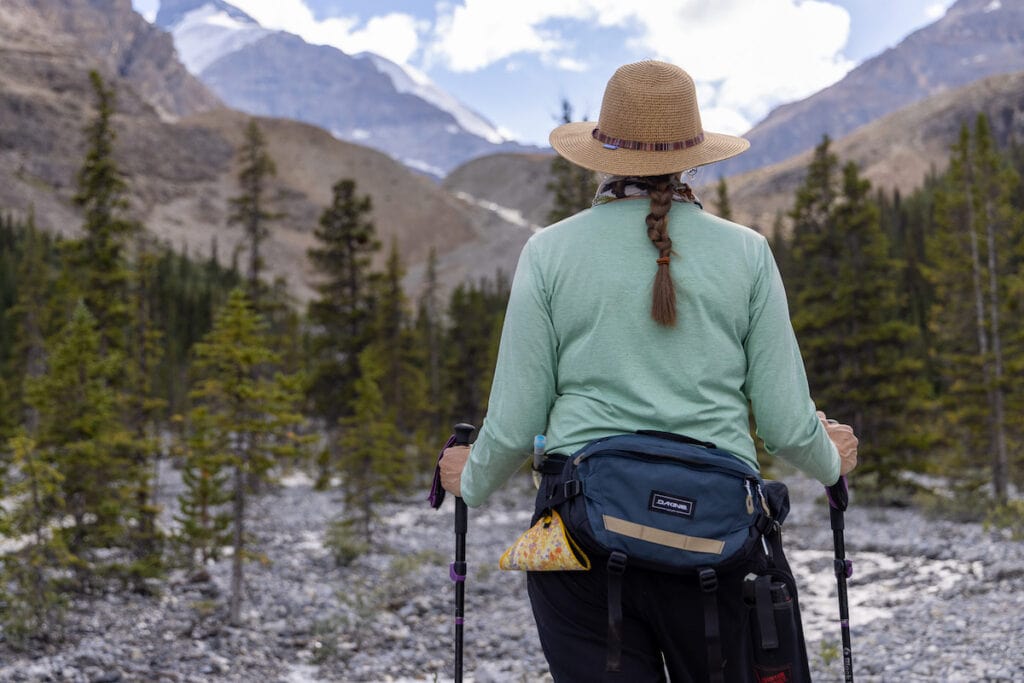
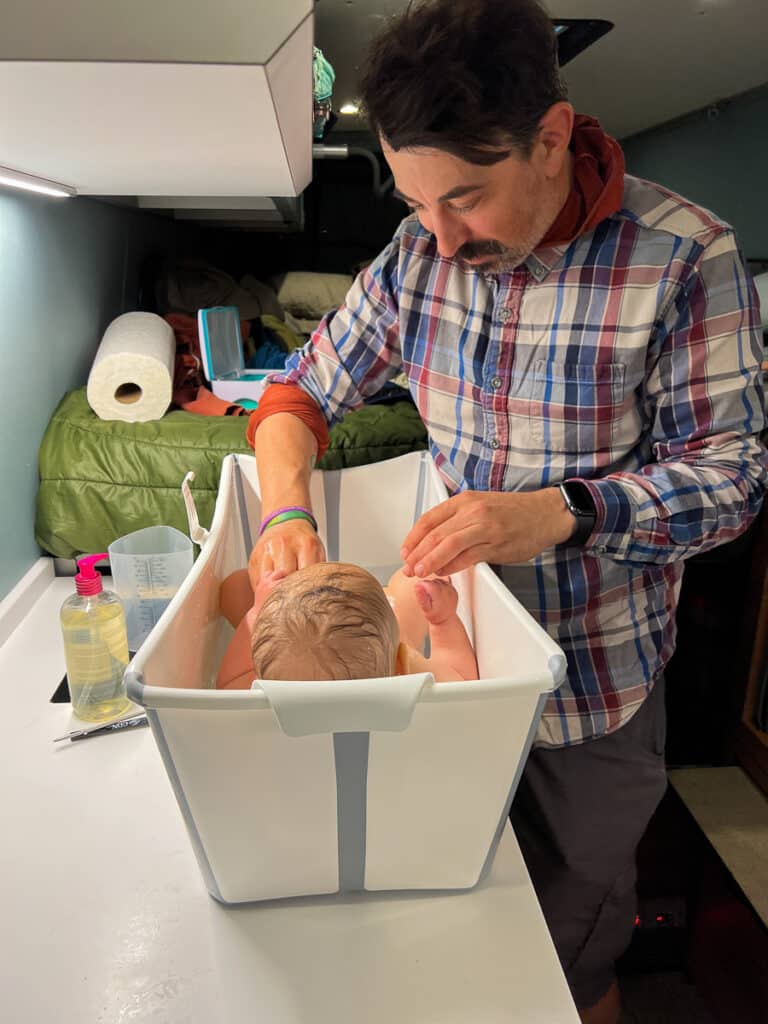


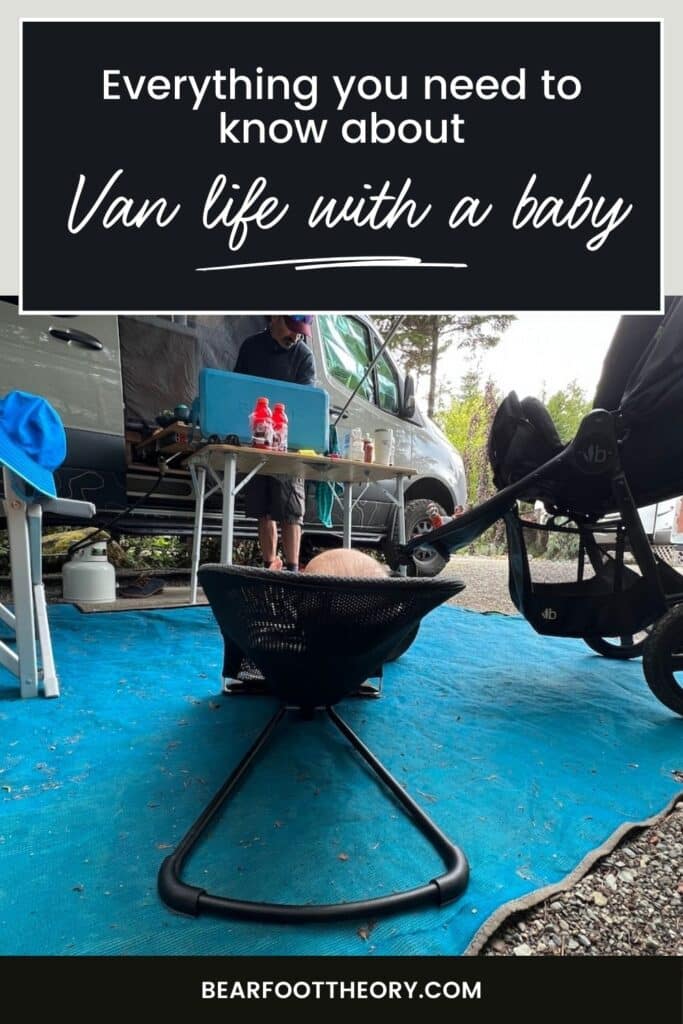


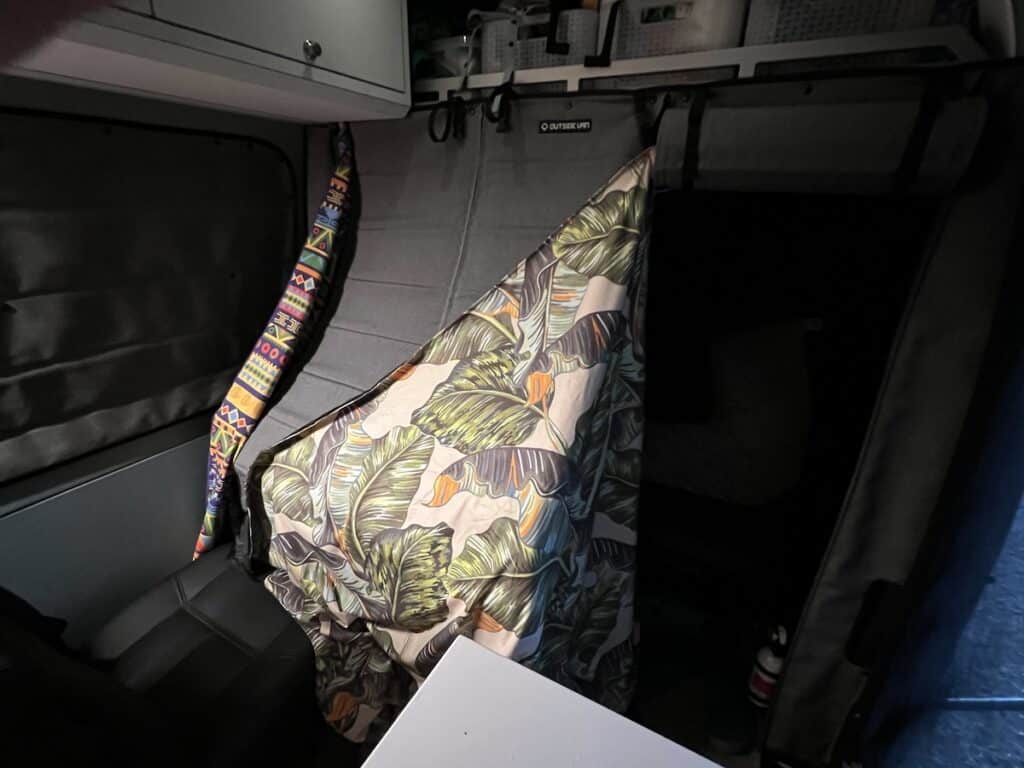
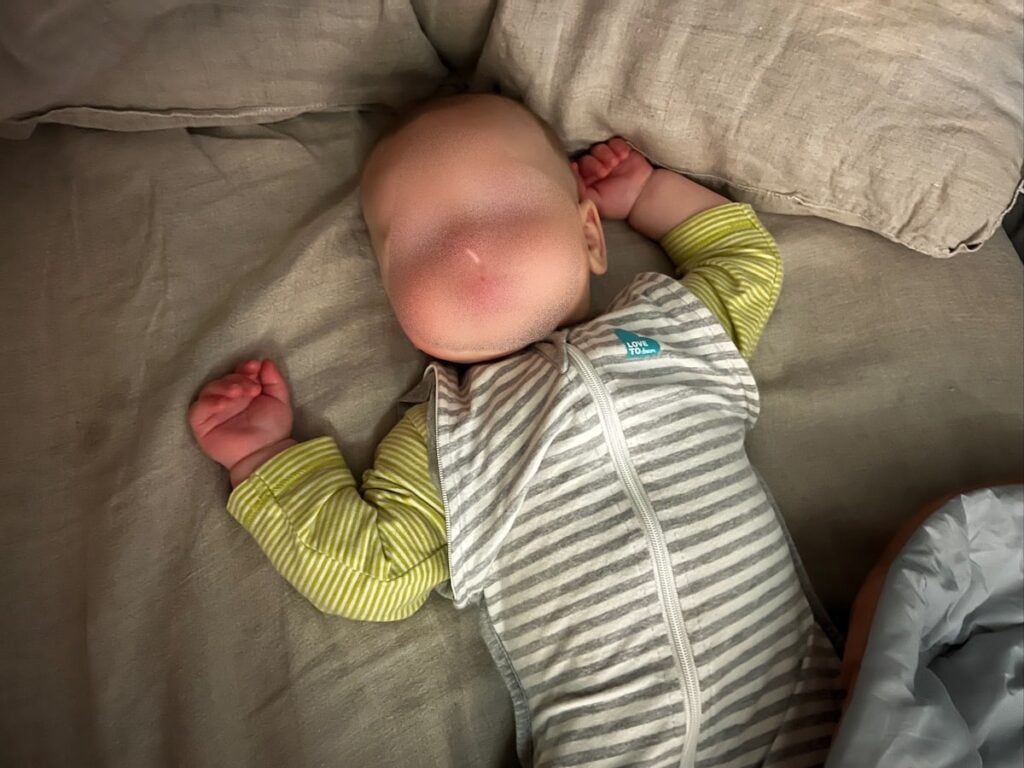
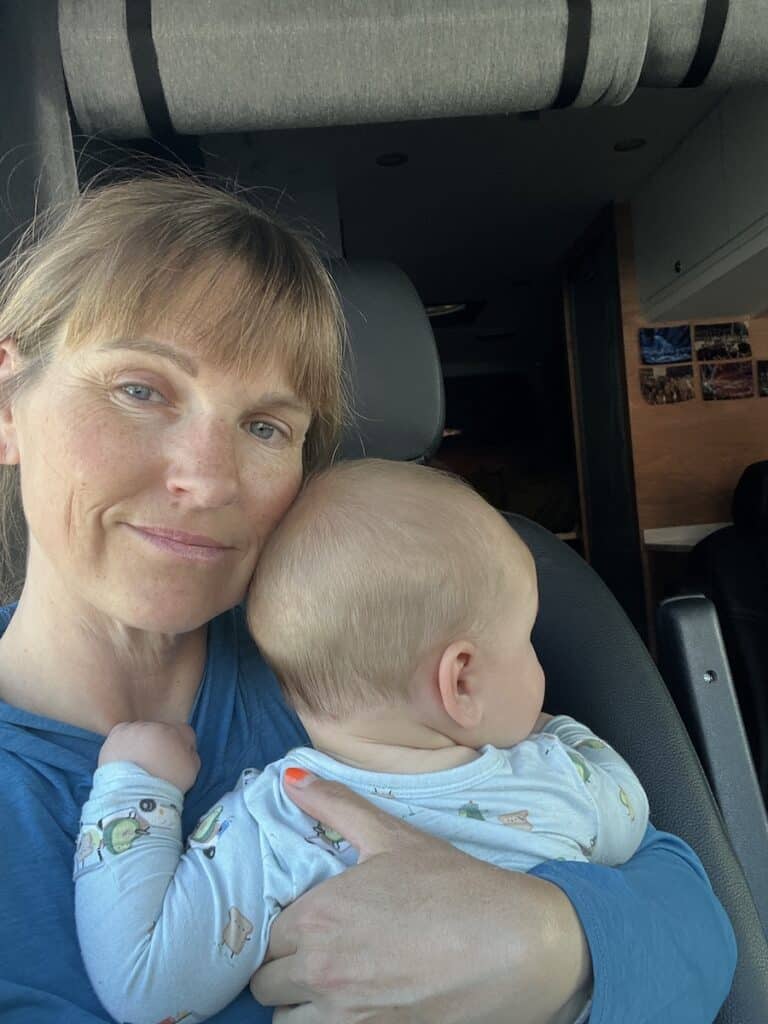
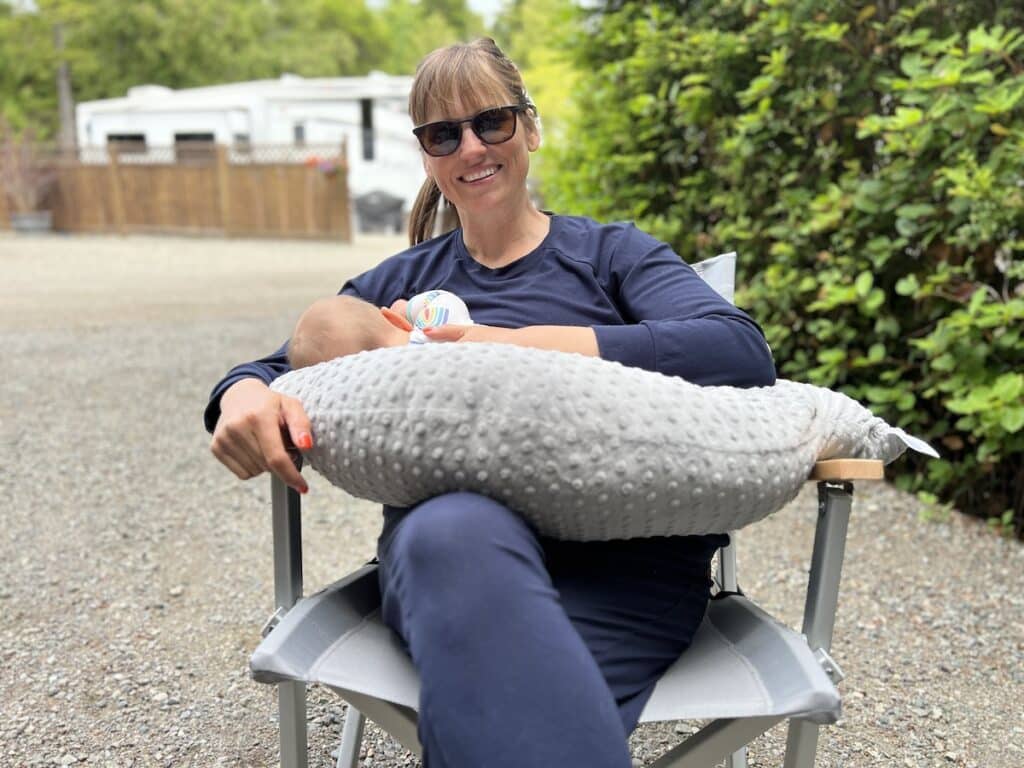
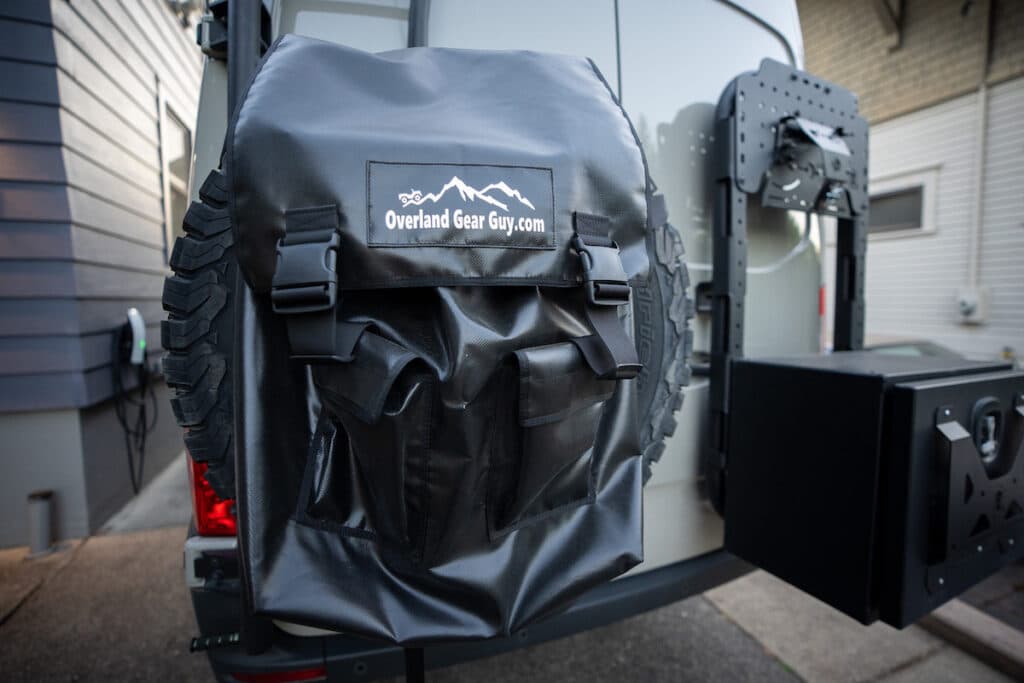
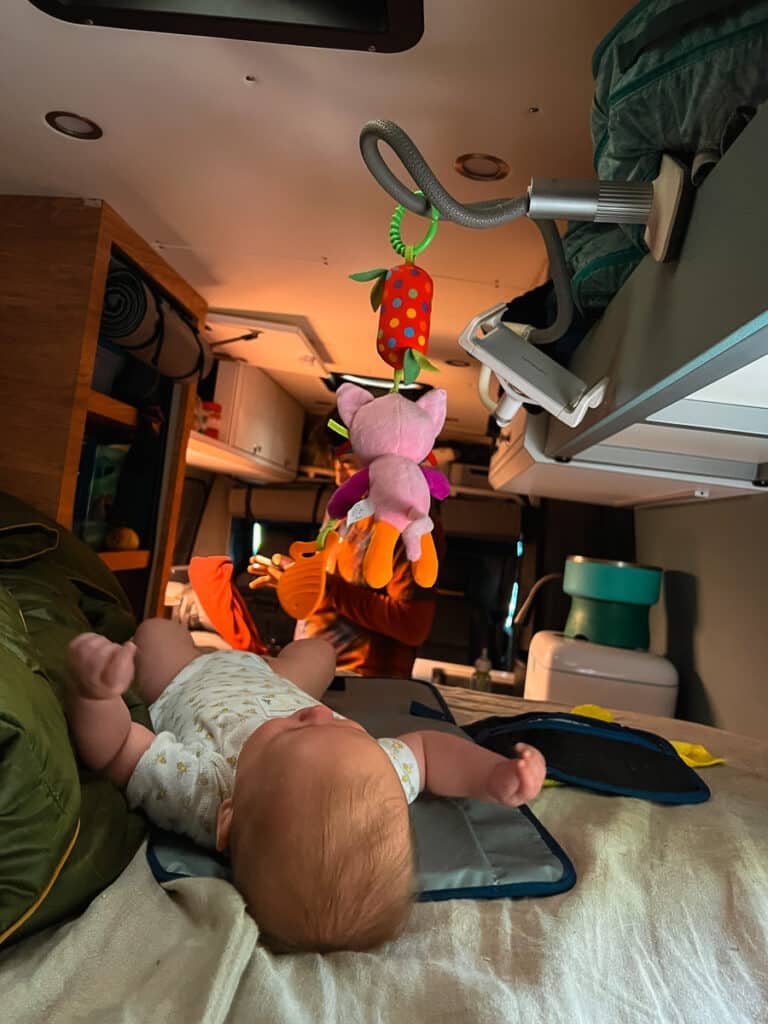


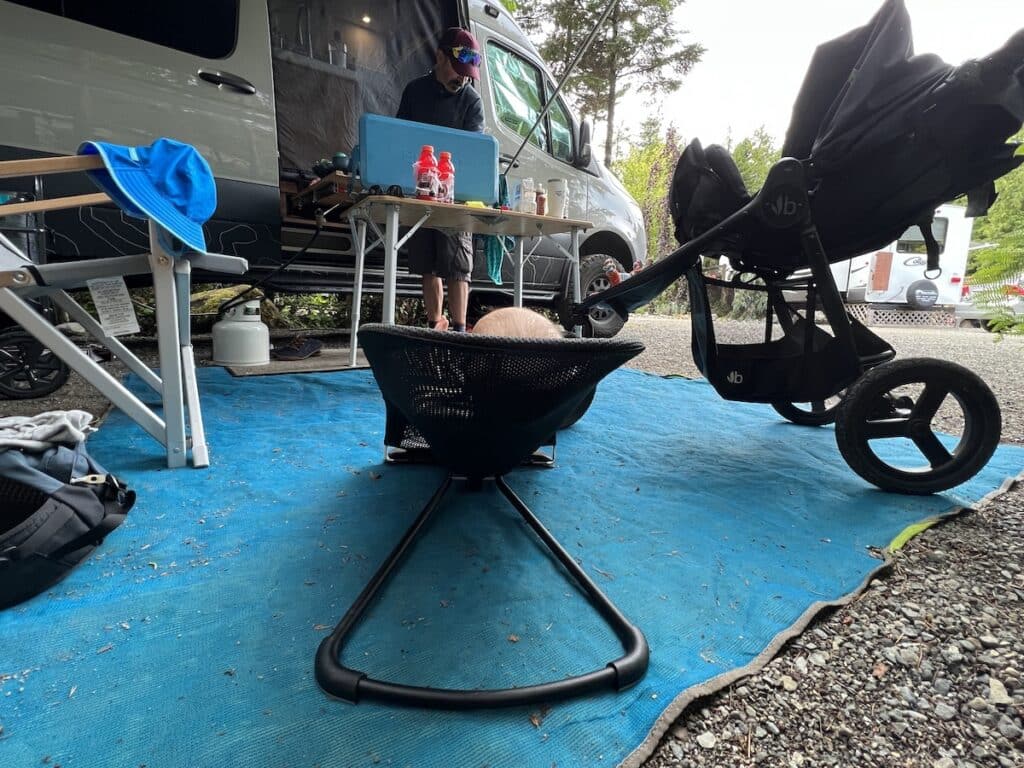


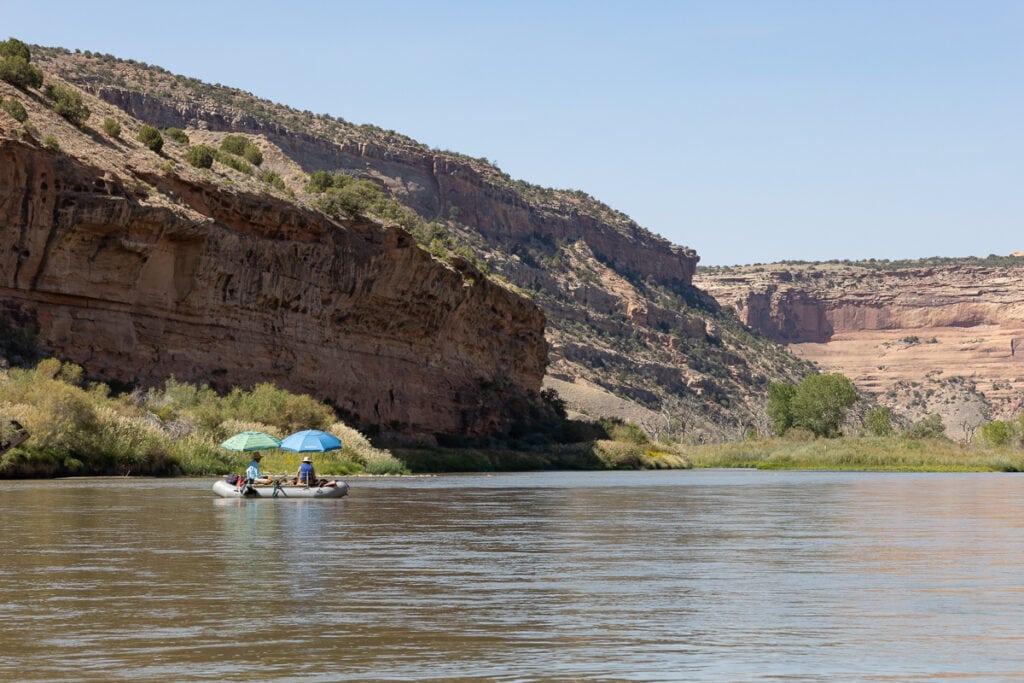

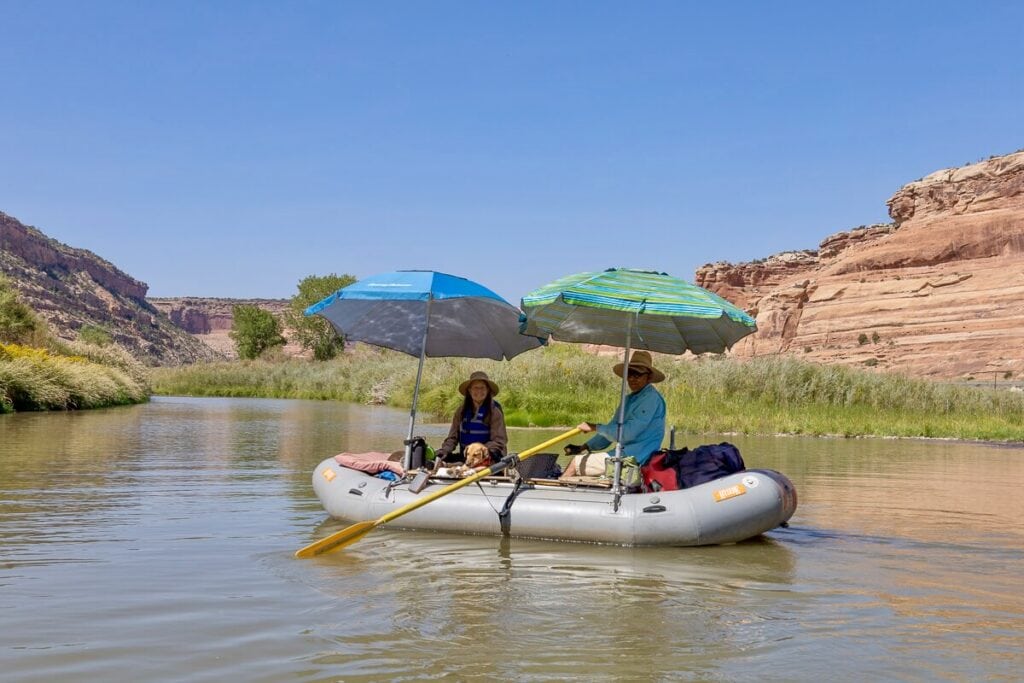


 The Sky Ride is a great way to see Alton Towers
 Ollie loved spotting the sharks at Sharkbait Reef