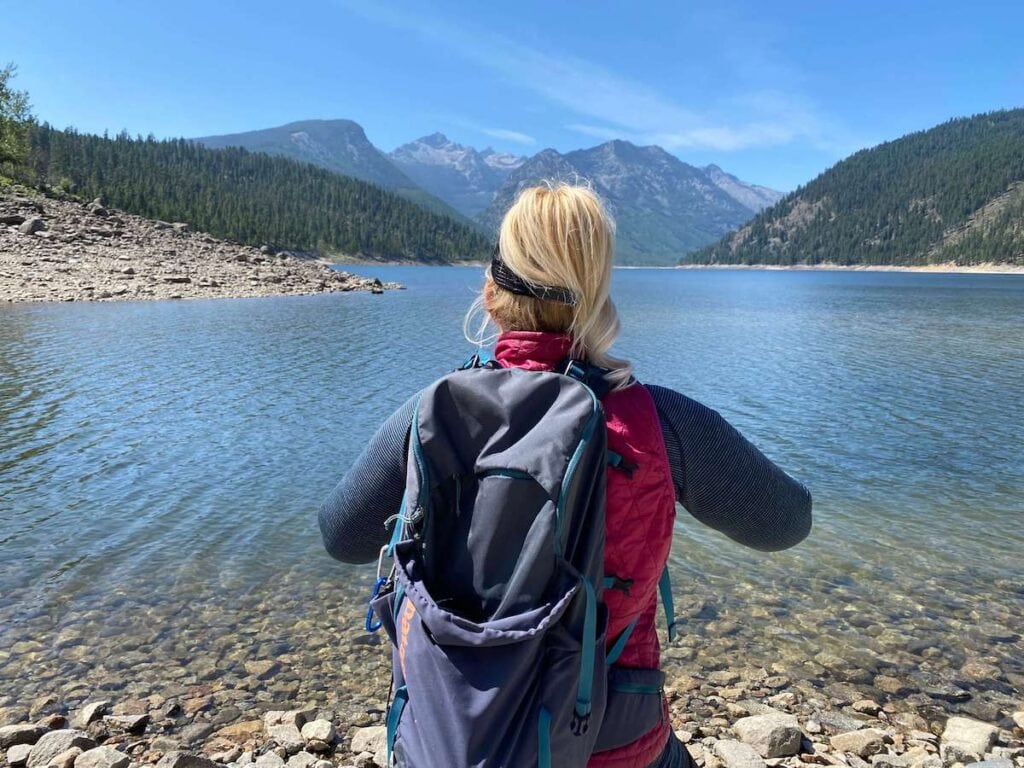
Although Montana’s National Parks get a lot of attention, there are a lot of opportunities for you to experience Montana’s beauty without all of the crowds. Lake Como, Montana is one of those places.
Lake Como is nestled in Montana’s famous Bitterroot Valley. It’s located just a few miles from Highway 93 north of Darby, MT and about eight miles south of Hamilton, MT in Western Montana. The lake encompasses more than 900 acres and sits at an elevation of 4,398 feet.
It’s a hidden gem you won’t want to miss in Big Sky Country. Whether you live in Montana and you’re looking for new places to explore, or you’re visiting Montana for the first time, Lake Como, Montana has a lot to offer for outdoor adventurers.
Here are five of the best outdoor activities in Montana’s Lake Como recreation area.
1. Hiking the Lake Como Trails
Lake Como attracts hikers of all skill levels. The 7.9-mile Lake Como Loop Trail wraps all the way around the lake and offers some unique mountain views. The trail is mostly flat with some sloping up and down, so it’s a good trail even for beginner hikers.
The Lake Como Loop Trail is a mix of pavement, dirt, and rock. You’ll want to wear hiking shoes or boots with good tread, so you’re comfortable and safe on the trail. You can also rest on benches along the trail’s route if you want to take a break from hiking or simply sit and enjoy the views. The best thing about the trail is that you don’t have to hike the entire trail to enjoy the vistas. You can hike in a little way and turn around and you’ll still experience nature’s beauty.
Just like most of the hikes in Montana’s Bitterroot Valley, it’s best to go hiking from June to November to avoid heavy snowpack. There’s also a small seasonal waterfall along the trail on the back end about 3-miles into the hike if you start from the trailhead of the north shore trail. You’ll also find a lot of evergreen trees along the way for some shade — which is especially nice while summer hiking. Of course, as with any trail you hike in Montana, you should be bear aware and watch out for wildlife while you’re hiking around Lake Como.
Other popular trails in the area include the Blodgett Canyon to Waterfall Trail where you can view a seasonal waterfall, the Blodgett Canyon Trail with spectacular cliff views, and the Soft Rock Trail with rolling hills that’s a popular destination for mountain bikers.
Photo courtesy of Suzanne Downing
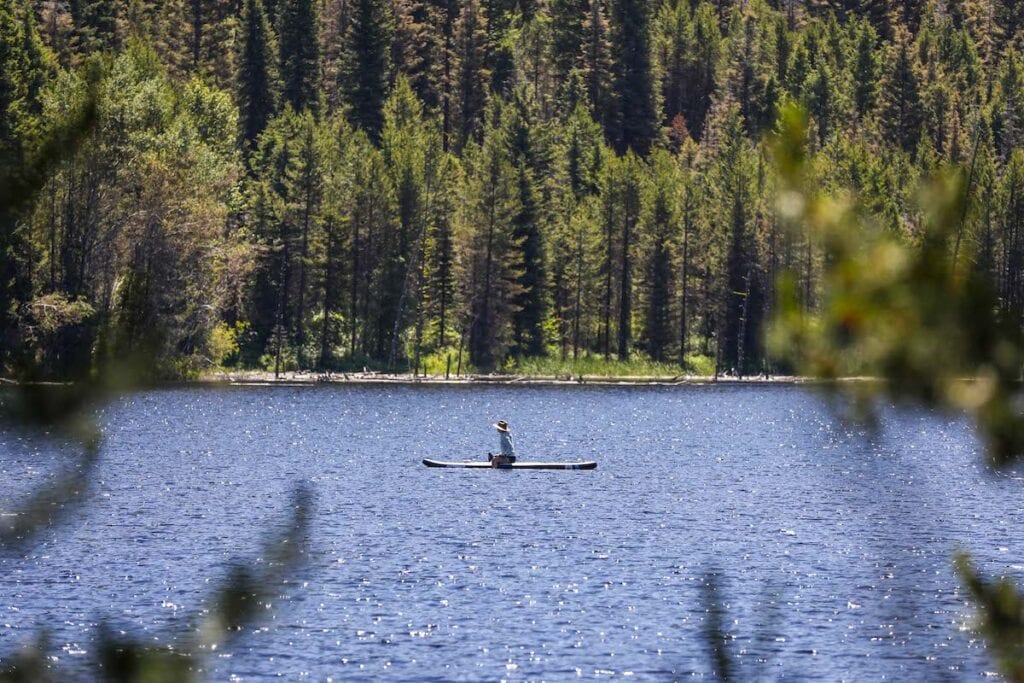
2. Kayaking & Paddle Boarding on Lake Como
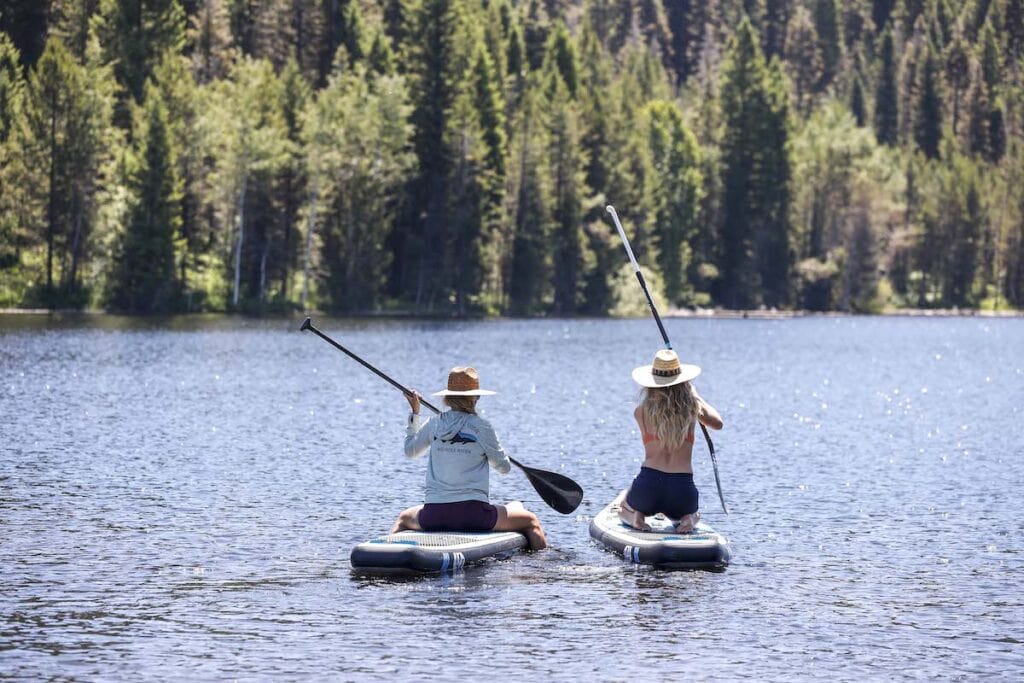
Spending a day on the calm waters of Lake Como kayaking or stand-up paddle boarding is a peaceful way to spend an afternoon. There’s a nice low spot for you to easily drop in your stand-up paddle board (SUP) or kayak at the boat launch. To get there, follow the signs to the boat launch once you enter the Lake Como recreation area.
If you’re coming from the north, you can stop in at The Trailhead — about 45 minutes from Lake Como — and rent an inflatable or hard-shell kayak or paddle board for your adventure.
Once you’re on the lake, the iconic mountain views are your backdrop. If you go early in the morning or on a weekday, you may even have the entire lake to yourself and enjoy some solitude. Summer is the busiest, especially on the weekends, but you won’t encounter crowds like you would at a National Park.
For stand-up paddle boarders, you’ll love the calm waters of Lake Como. The waves are small and offer a calming experience. For all paddlers, if you paddle out to the back end of the lake and pull your kayak or SUP on the bank, you can walk up to the waterfall. There are also seasonal wild huckleberries and raspberries you can pick along the way before paddling back to the boat launch.
Photo courtesy of Suzanne Downing
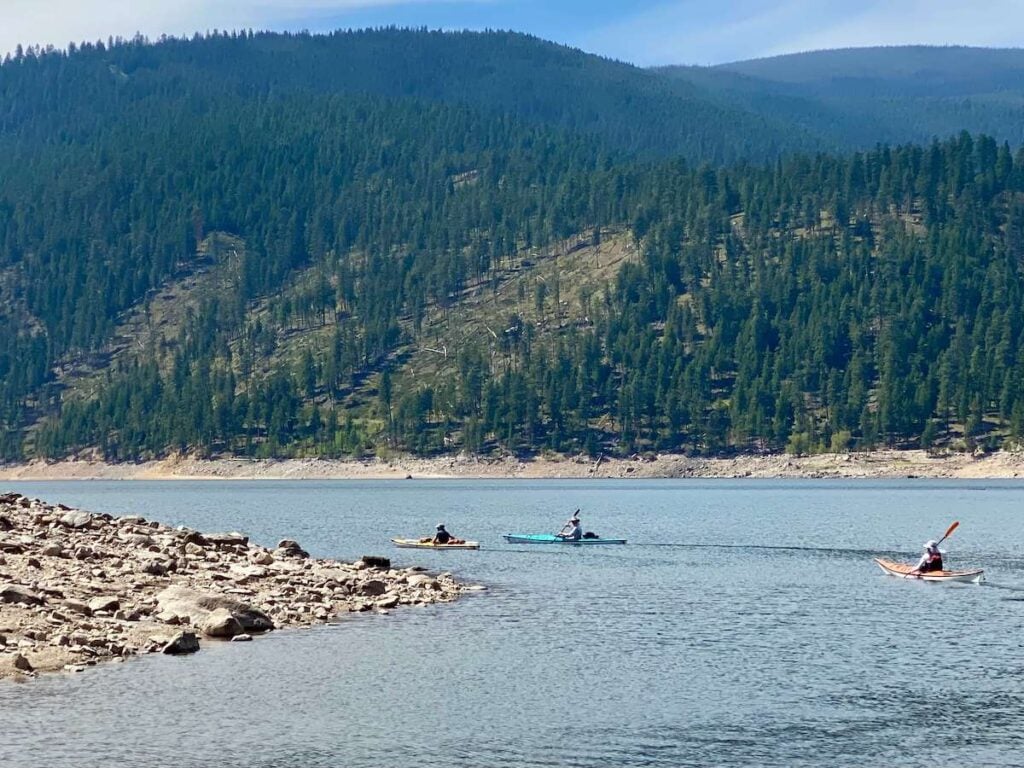
3. Go Fishing
If you’re an angler, you’ll enjoy fishing on Lake Como in early spring through mid-July when the water level is highest. If you want to fish by boat, the boat launch can accommodate parking for 40 vehicles-plus-trailer, so you have a good chance of getting a spot. You can also fly fish in the lake or from the shore.
The Bitteroot Fly Company rents out fly fishing equipment if you need gear. They have fly fishing rods and reels, fishing waders, and boots available. They’re located just 10 miles from Lake Como in Darby, Montana.
You can fish Lake Como for a variety of species like Kokanee, Rainbow Trout, and Mountain Whitefish. Managers who oversee fisheries in Montana stock the lake with fish each year, so you’re sure to catch a bite with the right bait and fishing pole set up. As always when fishing in Montana, be sure to check with the local Fish and Wildlife Parks department for licensing and fishing regulations.
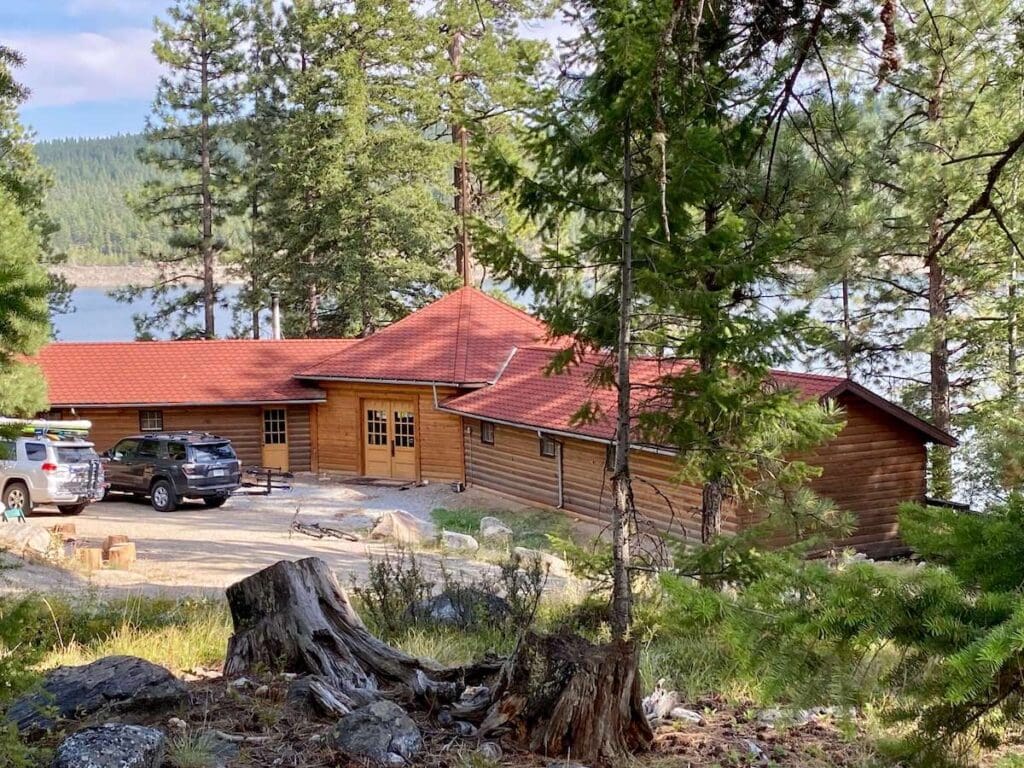
4. Lake Como camping & cabin rentals
If you want to spend a night under the stars at Lake Como or bring your camper van or RV, the Lake Como Campground is a great option. The campground — also known as “Lower Como” has ten 125’ pull-through RV camping sites with both electric and water hookups for less than $30 a night. There are also several tent sites you can stay at for up to seven consecutive days. The campground is easily accessible and has several bathrooms throughout.
If you want to stay in a rustic cabin while you’re visiting Lake Como, you can book the Woods Cabin — a decommissioned U.S. Forest Service cabin — through Recreation.org. U.S. Forest Service workers built the cabin in 1928 and it overlooks Lake Como. The cabin also sits in a forested area, so you have a lot of privacy along with peace and quiet. You can comfortably sleep 12 people in the cabin, so it’s a great option for larger groups or multi-family trips.
You will need to haul in a lot of gear including water, though. Firewood and a splitting maul are provided in colder months so you can stay warm by the fire. Typically, you can rent the Woods Cabin for around $70 a night. This is an extremely popular spot to book, so plan well in advance.
Woods Cabin / Photo courtesy of Suzanne Downing
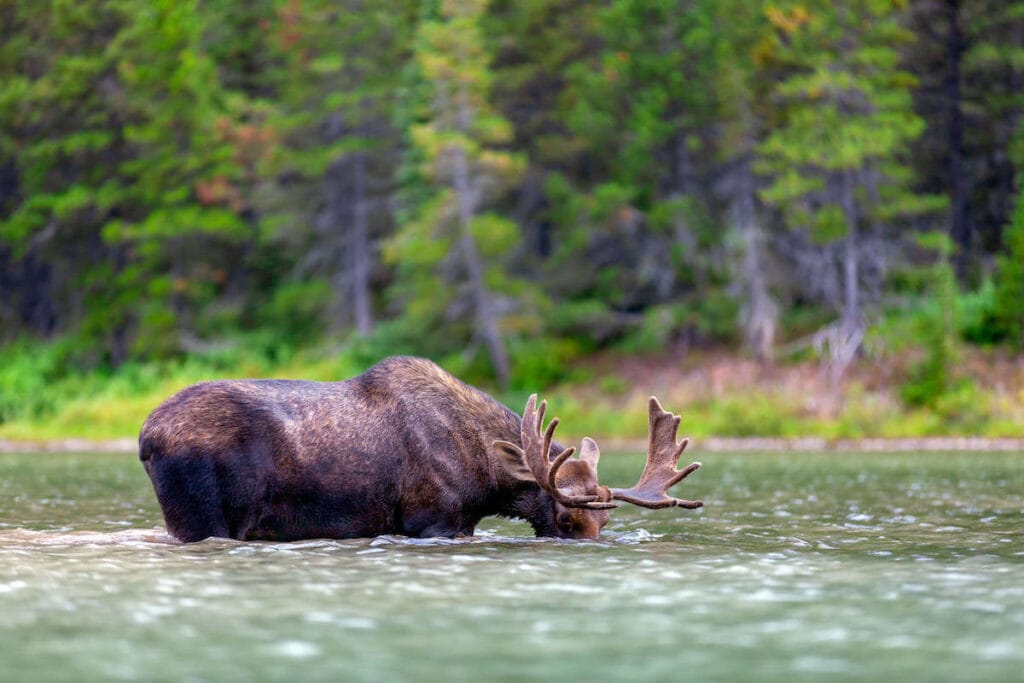
5. Lake Como Wildlife viewing
If you’d like to see a variety of Montana’s wildlife species, Lake Como is a good area for it. Lake Como visitors have encountered bald eagles, elk, moose, osprey, deer and bears to name a few. Remember though that wildlife is wild, and you just never know when a bird or larger animal will pass through, so you’ll want to be on the lookout.
Be sure to pack your binoculars before you go so you can keep your distance while still enjoying wildlife closely through lenses. The area is also a haven for wildlife photographers and landscape photographers as Lake Como — paired with the mountains — creates a beautiful backdrop for a postcard-like image.
Tips for visiting Lake Como, Montana
As a local Montanan, I highly recommend visiting Lake Como the next time you’re traveling through western Montana. The lake offers something to do for all ages and you should leave the lake feeling refreshed and renewed. It’s also a beautiful hidden gem that even some locals don’t know about. And the scenic drive down the Bitterroot Valley to reach the lake is an adventure alone. Here are a few tips for your visit to Lake Como:
Entrance Fee: Lake Como charges a $5 day-use fee
Cell Service: There is no cell service at Lake Como, so be prepared to unplug from technology
Road conditions: Check with the local ranger station to make sure roads and trails are clear before you go. If you’re visiting Lake Como in winter months or even early spring, make sure the roads are accessible before you go since Montana gets a lot of snow.
Water Levels: The water levels of Lake Como vary throughout the year – sometimes you will swim in shallow water and other times the water can be very deep.
Local restaurants: Check out local restaurants before and/or after your outdoor adventure. The nearby town of Hamilton has a variety of restaurants to choose from like Bitterroot Brewing and Suzette’s Organics.
Water availability: Bring lots of water or a water filter for hydration. There are no drinking fountains or stores to get water nearby so you’ll want to be prepared and haul in your own water.
Photo courtesy of Suzanne Downing
Do you have any questions about visiting Lake Como, Montana or have you been there? Leave us a comment below!
If you love kayaking and you also love backpacking, you should add kayak camping to your adventure list! You’ll not only get to experience backcountry wilderness but also the serenity of being on the open water. One of the best parts of kayak camping is that you don’t have to haul a heavy load on your back for miles on end. You’ll still get a workout as you paddle a boat full of gear, however, plus camping with a kayak gives you more flexibility to take breaks and offers a whole new view, even in areas you’ve already explored.
So whether you’re looking to try kayak camping for the first time or you’re planning your next adventure, this guide will give you tips and advice to help you get out on the water and make the most of your trip.
Selecting your perfect kayak camping location will help you determine how and what to pack. The art of loading a kayak with gear can take some time to perfect, so save the whitewater rapids for another trip and start with more of a calm water destination.
I’d recommend starting with a lake or river that has already established campsites. Keep in mind that if you opt for a river, you’ll likely need an extra vehicle to park at the end of the trip. Plan on sticking to one or two nights for your first excursion. Depending on how experienced you are, anywhere between five to fifteen miles per day should give you plenty of time to paddle and take breaks.
If you decide to hunt out your own site, be sure to set up camp at least 200 feet from the water. Camping in coastal areas offers a chance to see different wildlife, but be sure to take the tides into account when selecting the spot to set up camp.
Ultimately, the best kayak for camping is the one you already own. If you plan on renting or investing in a kayak for camping, here are a few things to consider in advance.
Storage will be crucial to your comfort. You’ll need to store almost everything in dry bags, but having a watertight compartment is a nice feature as well. You can use it to protect valuables like your phone and camera. It’s also a relief to get to camp and have at least some things that are dry. Touring kayaks are typically equipped with these watertight compartments.
Comfort is a necessity with long days on the water. My primary kayak, similar to this Perception Joyride 10 Kayak, has a supportive seat and foot braces. It also has thigh pads that help with stability. These are all features that will help you paddle for miles with a full kayak. If your seat doesn’t offer enough support, you can install a separate kayak seat to ensure a comfortable trip.
Comfort isn’t limited to your kayak, however. If your paddle doesn’t have any cushioning, your hands will likely hurt after a day on the water. Adding paddle grips can make a surprising difference in how long you can paddle in a day.
For backpacking enthusiasts, packing for a kayak camping trip will feel familiar. You’ll be bringing most of the same gear, switching out your backpack for a kayak. Since you won’t have to carry all of your gear, you’ll have a little more room for a luxury item or two. Here are some must-bring items:
Kayak Camping Accessories
Dry bags – Aside from a few accessible items like water and snacks, everything should be packed in dry bags. Even if you’re certain you won’t flip, anything stored on the kayak or in the hull will likely get wet. Dry bags will keep essentials dry and organized. I use several smaller Sea to Summit dry sacks to make packing easier.
Personal flotation device – Wearing a PFD, or lifejacket, is not only a good safety protocol, but state laws typically require that you have one on board.
Rope – Bring along a rope to tie up your kayak in case you will leave it close to shore. Paracord is compact and works great.
Kayak repair kit – A repair kit won’t take up much room and can be a lifesaver if something goes wrong
Towel – You’ll be living on the water for a few days, so a towel is key. PackTowl’s UltraLite Towels are easy to bring on backcountry trips and work well for how compact they are.
Binoculars – bring along a pair of binoculars to spot wildlife right from your kayak!
Kayak Camping Gear
Tent or hammock – Kayak camping offers more flexibility than backpacking, but you’ll still want to use a lightweight backpacking tent or hammock to conserve space and weight. If you’re kayaking in warm climates, you may be fine sleeping under the stars or just bringing the fast-pitch option if your tent has that.
Sleeping bag – Car camping sleeping bags can be bulky and heavy, so bring along your favorite backpacking sleeping bag.
Sleeping pad and pillow – A pillow is one of those luxury items I have to bring. Inflatable pillows always have me reaching for some clothes to use instead, so I’m a fan of Therm-a-Rest’s Compressible Pillow when there is room to pack it.
Headlamp – You’ll need to take extra precaution if you head out on a nighttime paddle, but you’ll also need lighting for around camp. The BioLite headlamp is our favorite because it’s a rechargable, energy efficient LED headlamp that lasts a long time on a charge, especially if you use it on low.
Small daypack – One of my favorite things about kayak camping is the ability to explore new areas onshore as well. If you think you may want to explore on land, bring along a small daypack for supplies.
Kayak Camping Clothes
Swimwear – If you’re anything like me, you’ll have a hard time staying out of the water. Investigate the water temperature before your trip if you’d like to swim and then pack accordingly.
Water shoes or sandals – I can’t say I do any fishing, but I love Columbia’s fishing shoes for all watersports. The PFG Tamiami Shoes have enough grip to traverse wet rocks and are comfortable for camp or heading into town.
SPF shirt – Most kayaking spots involve a lot of open exposure, so you should plan on getting a lot of sun. Outdoor Research’s Echo line is my favorite to keep cool and protect my skin from harmful sun rays.
Hat, sunglasses, or both – I go for the combo since the sun reflecting off of the water can be killer. The Wallaroo Sedona hat is a favorite (Use the code BEARFOOT20 for 20% off).
Puffy: kayaking can get chilly, so having a synthetic down jacket packed away is essential so you can stay warm.
Essential Clothing for Paddling
Carve Designs Cruz Rashguard
I prefer wearing a rashguard over sunscreen these days. I own the Cruz in 2 colors and it’s a staple for any water activity because it dries quickly but also keeps you cool, plus the cut is flattering.
Sandals that stay on your feet and can get wet are essential. I like these because they have good grip and can be worn hiking as well, plus they can easily be strapped to your boat when not in use.
You’ll want a wide-brim hat that can get wet and has a chin strap so it stays on in the wind. This Outdoor Research hat is quick-drying, will float if it falls in the water, and comes in a variety of colors.
Polarized glasses are best for the reflection of the water. I like to wear budget-friendly sunglasses paddling and I always wear a retainer so I don’t lose them in the water.
If it’s chilly or windy it can be helpful to have a lightweight rain jacket or windbreaker out on the water with you. I usually pack a jacket like this just in case!
You’ll want a comfortable swimsuit that you can be active in. I like to avoid swimsuits that pull on my neck (like halters) and have been loving Nani Swimwear lately.
Stove and fuel – You can get away with bringing pre-packaged foods, but the best kayak camping food for me needs to be hot. I rarely go camping without my Jetboil Flash stove.
Mug or bowl and utensils – I usually keep it simple with a single mug and spork. If I can’t eat it with those, I don’t need it.
Food storage – Even if you are not in bear country, you should bring along a separate canister or bag for food with rope. A dry bag is easiest as it’ll offer more storage flexibility in the kayak compared to a canister.
Food – This is where a lot of people will opt for a luxury item or two. I stick to dehydrated foods, but like to bring along a fancy beverage. I wouldn’t carry the weight of an extra drink on the backpacking trail but will indulge when the kayak is doing all of the work.
Water bottle – Keep your water bottle handy as it’s easy to get dehydrated when paddling in an exposed area. A Hydroflask is nice as it keeps water cold throughout the trip and is less of a hassle than a bladder.
Water filtration – I’ve struggled with pump or squeeze filters in the past, so I solely rely on a Platypus GravityWorks filter now.
Maps – Navigating a lake or river can be a little more difficult than a marked trail. Snag a local map and compass, and download the information on your phone before your trip to keep track of your location.
Bug spray – Campsites near the water are notorious hotspots for bugs, so bring along some insect repellent to keep the bugs at bay.
Hygiene kit – Bring along everything that you’ll need for a few days including a toothbrush, toothpaste, sunscreen, SFP lip balm, toilet paper, hand sanitizer, and a poop kit. If the place you are visiting requires you to pack out all of your waste, be sure to bring a few wag bags and dispose of them at the end of your trip.
First aid kit – Ensure your kit also includes a knife or other multitool along with some matches.
Bear spray – This is a must if you are heading into bear country
Emergency communication device – I always carry a Garmin on all outdoor adventures so I can easily call for help in case of emergency. Since many areas of the backcountry don’t have cell service, don’t rely on your phone in case things go sideways.
Packing a kayak for camping is a unique form of art. On a typical backpacking trip, you can pack your bag at home so it’s ready to go when you hit the trail. You won’t have that option when it comes to packing your kayak, so you may want to practice at home before your first trip.
Once you’ve gathered all of your gear and are ready to pack, you’ll need to keep three things in mind. You’ll need to pack strategically to ensure everything stays dry, the kayak is balanced, and certain items are easily accessible. Here are a few tips for loading your kayak for camping:
Use Dry Bags
Almost everything you are bringing should be kept in dry bags. It’s easier to get everything to fit in the kayak if you use smaller or medium size bags (like 35-65 L).
If you’re able to color-code them in some way, it will also help you locate items easier. I’ve learned from experience that it is nearly impossible to find anything when all of your dry bags are the same color. Alternatively, see-through dry bags allow you to see all your gear without having to open up every bag.
Know How to Distribute the Weight
To get the right weight distribution, keep the heaviest items like food, water, and fuel closest to your center of gravity. Ideally, your kayak will have space directly behind the seat for some of these items. You can also keep a small bag at the bottom of the boat between your legs if it won’t interfere with paddling.
Then store lighter items, like your sleeping bag and clothes, on either end with mid-weight items somewhere in between. While aiming to balance the kayak from front to back, you should also try to balance the weight from side to side as well. The heaviest items should go in the center.
Keep Your Essentials Accessible
Anything that you won’t need to access through the trip should be stored in a sealed compartment or strapped down in some way. While you of course don’t want to flip, everything should be secured in case it happens.
A waterproof fanny pack is a great way to keep your gear (like phone, sunscreen, compact camera, etc…) easily accessible while still being able to keep everything waterproof and secure. You may also want to keep another layer of clothes handy as well.
Kayak camping can feel a little intimidating at first, but it is easier than it seems. You’ll love the serenity it provides without feeling like you’re carrying the weight of the world on your back. With the right preparation, you’ll be enjoying the healing power of water in no time.
Do you have any kayak camping trips planned or any questions about this? Let us know in the comments below!
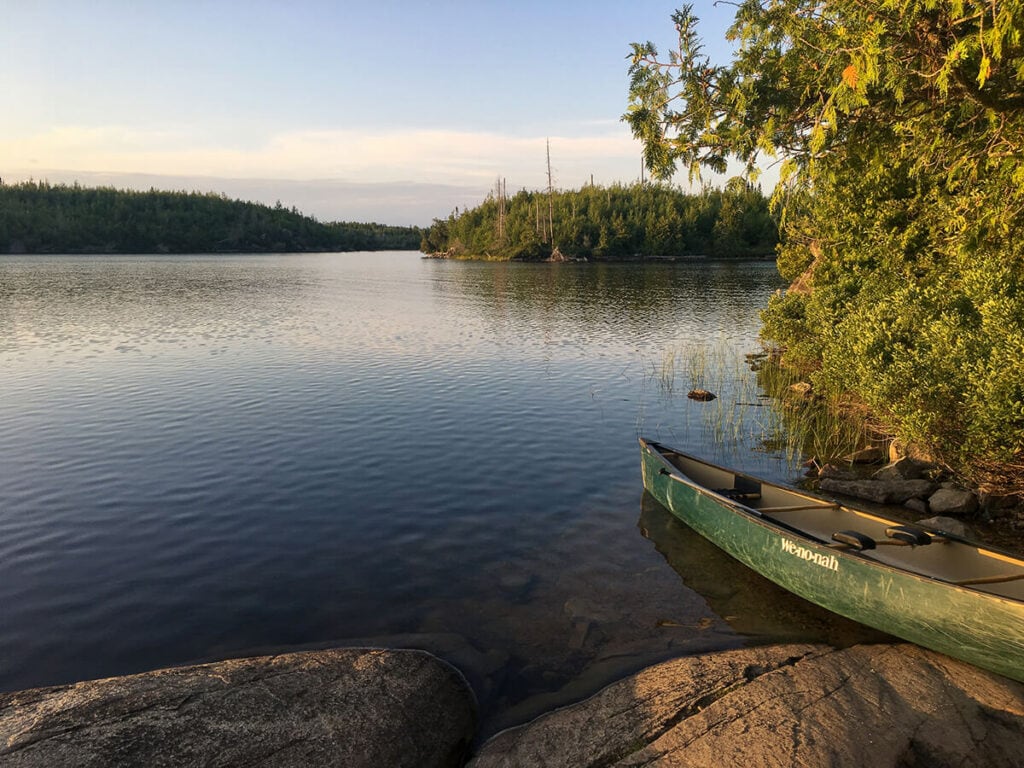
Planning a Boundary Waters canoe trip in the Boundary Waters Canoe Area Wilderness (BWCA) involves navigating a labyrinth of over 1,000 lakes and islands. Located on the Minnesota/Canada border, I’ve made countless trips to the BWCA ever since I was a kid and it always delivers when I want a quiet week filled with great views and adventure.
The BWCA is the most-visited wilderness area in the U.S. and for good reason. From short overnight trips to multi-week remote adventures, the BWCA offers a unique camping experience for all skill levels. Like most remote camping trips, though, canoeing the BWCA requires planning in order to secure permits, learn how to navigate lakes and make portages, and assemble the right gear for a successful trip. I’ve made many trips to the BWCA, so in this post, I’m sharing all the important tips and guidance you’ll need to have a successful trip in Minnesota’s great north woods.
In this Boundary Waters canoe trip guide, I share everything you need to know to plan your own canoeing adventure to this amazing and remote area.
Best Time to Canoe the Boundary Waters
Since the lakes freeze over in the winter, the best time to canoe the Boundary Waters is between spring, summer, and fall. Typically May through October is the canoeing season.
The summer months are the popular time to go, especially the back half of August. The water is warm enough to swim in and the weather gets up into the 70s and 80s. The main downside to canoeing in the summer months, however, is that mosquitoes and biting flies can put a huge damper on your trip. Bugs peak in mid-June and while the black flies last a week or two, the mosquitos stick around all summer. People share horror stories about the mosquitos, but truthfully they’re not much different than anywhere else in the Midwest.
Visiting during the spring is constrained to the month of May since the lake ice usually doesn’t melt until then. It’s a great month for fishing, solitude, and returning animals and birds, but it can be cold — lows are typically in the 40s.
Fall is one of the best times to visit the BWCA. There are fewer or no bugs, the crowds are basically gone, the fish are returning to the shallow water, and the fall colors are changing. Camping from mid-September to mid-October is the best time to visit if you want to catch the fall foliage as the aspen, birch, and maples leaves begin turning red, orange, and yellow. Make sure to check out these fall camping tips if you plan to visit during this season.
No matter what time of year you visit, it’s important to be prepared for cold temperatures, rainy weather, or submerged and wet gear. Always pack extra warm layers and don’t use cotton.
Photo courtesy of Isak Kvam
Planning Your BWCA Route
BWCA entry points
There are two main BWCA entry points to start your trip: Ely and the Gunflint Trail. In general, the Ely area is quite wooded and has old-growth tree stands you can camp near. Visitors starting in the Gunflint area are likely to see the effects of fires and blowdowns, but while some forests in this area seem more sparse, there’s a more remote, rugged quality to this terrain.
I’ve done a handful of canoe trips out of Ely, but I prefer the Gunflint area for starting a trip because you immediately enter into wilderness with a rugged character.
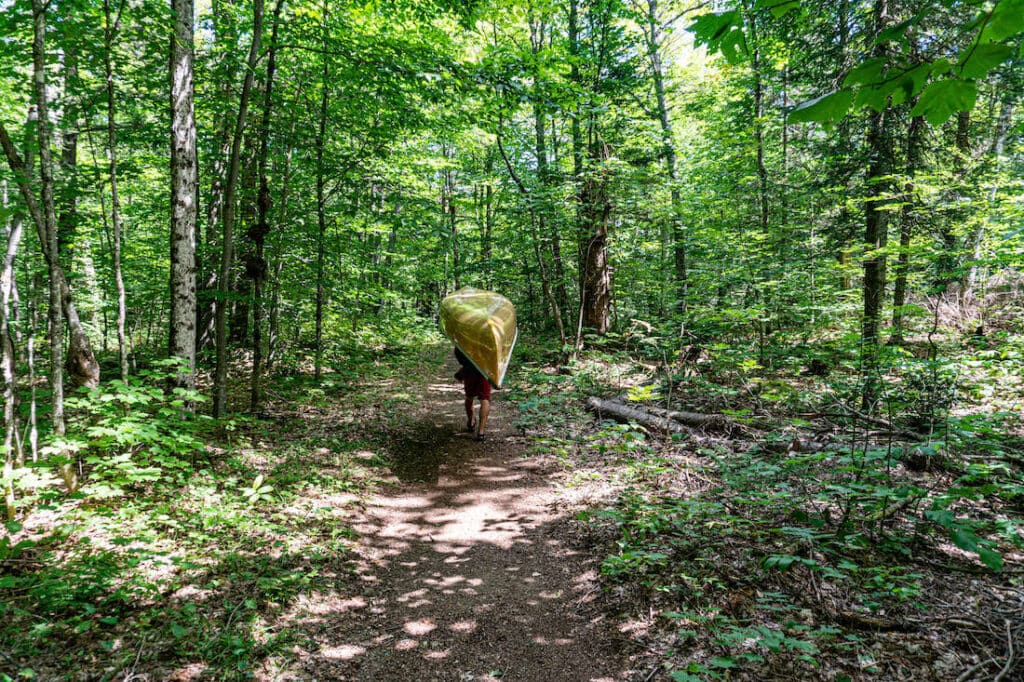
BWCA Portages
If you’ve never been to the Boundary Waters before, it’s possible you’ve never had to portage a canoe before. Simply put, a portage is when you pick your canoe up and move it overland from one lake to another. The BWCA has over 1,000 lakes connected by portage paths of varying lengths — the shorter and fewer of them on your route, the easier it will be.
Portages are typically measured in rods, which is 16.5 feet long, roughly the length of your canoe. Portaging a canoe isn’t as hard as it seems and it’s actually easy to pick up and carry a canoe by yourself. It has more to do with skill than strength — forget the methods that have you quickly lift the canoe overhead like a powerlifter. Simply follow this method for picking up and carrying the canoe. I’ve seen retired folks do this in the BWCA with no problem at all.
Boundary Waters Route Options
My favorite BWCA route is starting off at the Gunflint Trail at Saganaga Lake and canoeing to Red Rock Lake, Alpine Lake, and Sea Gull Lake to loop back to the start.
There are lots of different route options, though, and you can’t go wrong using the Trip Planner from the Friends of the Boundary Waters Wilderness (more on them later) to cater the route to your trip. You can choose different routes depending on your timeframe, how many portages you’d like to take, how long you want to paddle each day, and your current skill level.
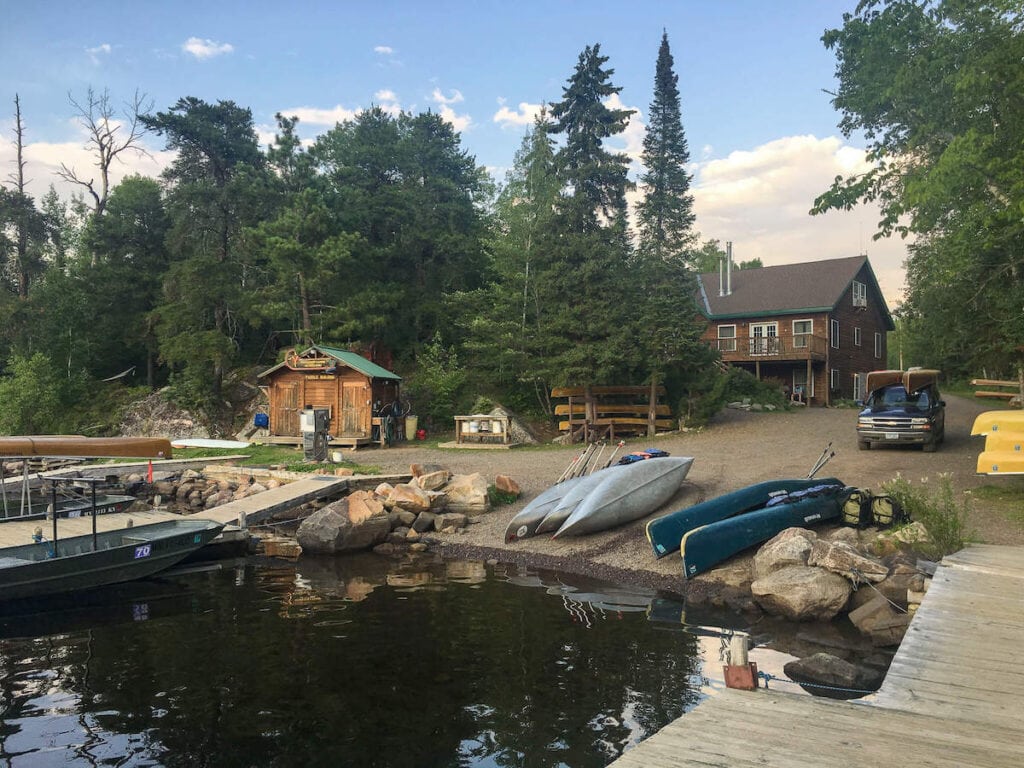
Boundary Waters canoe rentals & Outfitters
While some people bring their own canoes to the BWCA, there are plenty of Boundary Waters canoe rental outfitters in both Ely and the Gunflint Trail. Not only are they inexpensive, but the guides here are a wealth of knowledge for planning your trip, asking questions, and getting some great beta on the best swimming spots and fishing holes. I’ve had great experiences with Voyageur Canoe Outfitters.
Keep in mind that the BWCA is a very large wilderness area, and with so many lakes and islands, you could spend a lifetime exploring different routes. No matter if you choose Ely or Gunflint as your Boundary Waters entry point, you’re going to have a blast.
Photo courtesy of Isak Kvam
BWCA Permits
Once you’ve decided on where you want to start your trip, you’ll have to secure a BWCA permit. Permits are required for overnight trips from May 1 to September 30. Walk-up permits are available the day of and the day before your trip, but their availability is not guaranteed. Keep in mind you don’t need to know exactly how many days or how many people are in your party to reserve a permit.
One Boundary Waters permit allows a group of up to 9 people and 4 watercraft to enter the wilderness. You can’t exceed the group limit at any time on water or land. Fees are $16 per adult per trip ($8 per kid per trip), and there’s also a non-refundable $6 reservation fee.
If you plan on fishing, obtain your fishing license before your trip either online or at any gas station/bait shop across the state. If you’re a Minnesota resident, an annual fishing license is $25 or $14 for 72 hours. If you’re a non-resident, it’s $51 annually, $43 for 7 days, or $36 for 72 hours.
The reservation system for Boundary Waters permits opens up at 9 a.m. CT on the last Wednesday of January every year on the BWCA recreation.gov website. If you plan on canoeing outside of the May-September season, you do not need a permit. BWCA canoe rental businesses can also provide permits.
You’ll need to pick up your permits in person at either a Superior National Forest district office or a BWCA outfitter in order to complete the mandatory Leave No Trace & Tread Lightly education session. This is a relatively short video/Q&A session that ensures visitors understand how to minimize their impact in the backcountry and stay safe in the remote wilderness.
While you don’t need a permit to bring a dog into the BWCA, you should bring a current rabies certificate and rabies tag on their collar. Dogs are welcome in the wilderness if they have good voice control, don’t bark or chase wild animals, have experience in a canoe, and are not left unattended. Always be prepared to clean up after your dog.
Photo courtesy of Isak Kvam
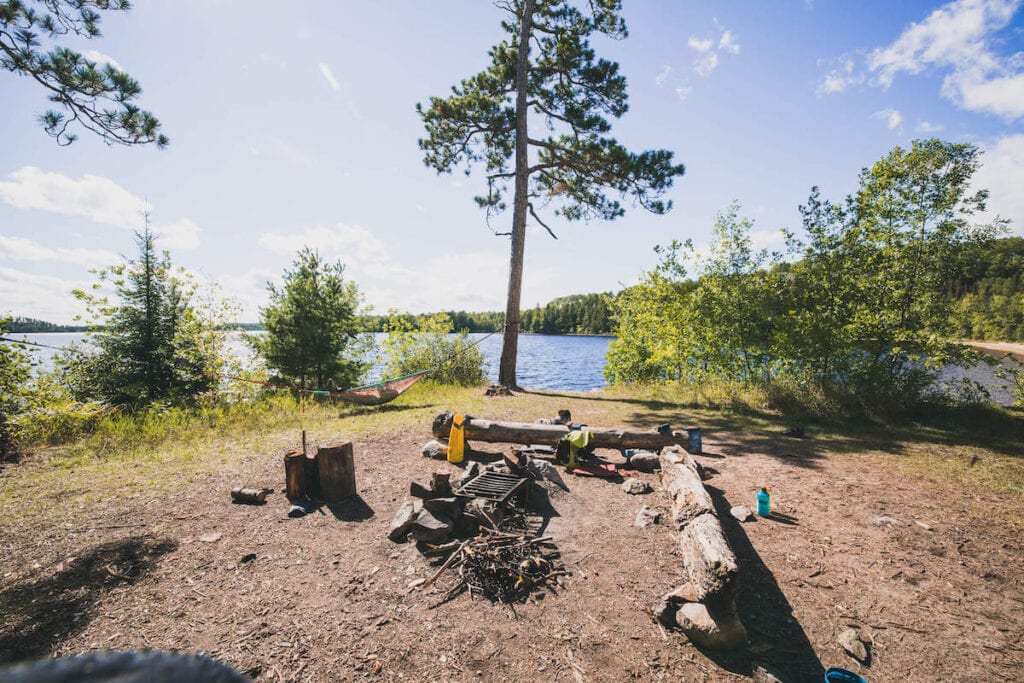
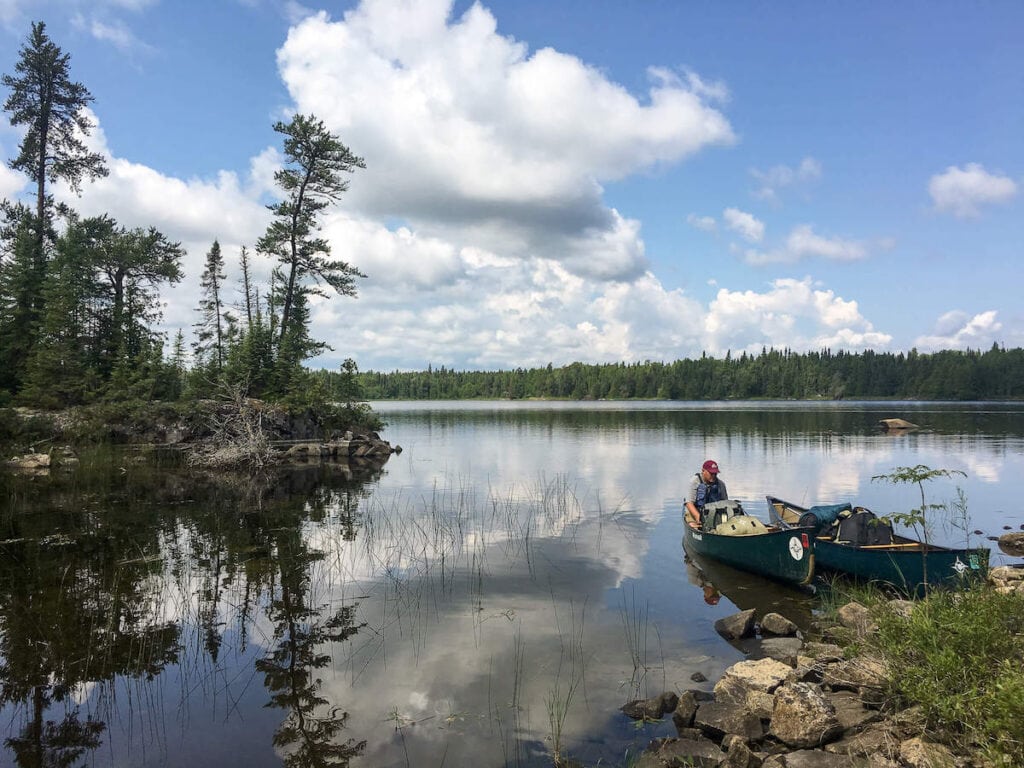
Boundary Waters Campsites
Boundary Waters campsites are spread throughout the wilderness area and tend to be on wooded shorelines. It’s pretty obvious where most of them are, and they are clearly labeled on BWCA maps. An easy way to tell if a campsite is occupied or not is to look for canoes on the campground shoreline. You can only camp at existing campgrounds in the BWCA and the campgrounds are first-come, first-serve.
It’s a good idea to break camp early and snag the campsite you’d like by early afternoon so you get the one you want. I once slept in and paddled during the afternoon instead and found every campsite was already taken at the lake I had planned to stay on. That meant a much longer day of paddling for me since I had no choice but to canoe on to the next lake and find the next empty campground.
My main consideration when choosing a campground is the view. Do you want to be on a peninsula surrounded by water, in a thickly wooded area, or do you want to make sure you have a great view of the sunset? Take your priorities into account when choosing your spot.
BWCA campsites have fire pits
Boundary Waters Canoe Trip Gear
One of the best parts about canoe camping is that you only have to lug your gear on portages.
You can read our 3-day backpacking checklist to get a general idea of what you’ll need. It goes without saying that the Boundary Waters is a remote area; be sure to pack warm clothing and rain gear so you can stay safe in the event of storms, submerged and wet packs, or days or rainy weather.
Shoes for the BWCA
You’ll want good footwear for the Boundary Waters that can deal with water and rugged portages. I recommend water sandals whenever you’re in the canoe or getting in and out. Check our review of the Teva Universal Trail Sandal. These would be a great choice for a BWCA trip.
For portages, you’ll want hiking shoes or boots that have a closed-toe and closed-heel. These will keep your feet and ankles protected while carrying heavy packs and the canoe. Portages in the BWCA are filled with rocks, tree roots, and slippery mud so plan accordingly.
Dry Bags and Canoe Packs
While you can technically use a backpacking pack to carry your gear, using canoe packs from Duluth Pack, Frost River, or Granite Gear has its perks — it’s also what you’ll get from your outfitter if you rent a canoe. You can also invest in a few lightweight dry bags to keep your items dry and separated, like these Sea to Summit Lightweight Dry Sacks.
For a cheaper option, simply line your pack with a garbage bag and arrange your gear inside.
Navigating the Boundary Waters
You’ll need a compass, map, and map case (outfitters will provide these) for a Boundary Waters canoe trip. Fisher Maps, McKenzie, and Voyageur make the best BWCA maps or National Geographic also makes a detailed BWCA Map Pack. There’s little to no cell service in the BWCA, so don’t rely on your phone for navigation and pack or rent a satellite communication device for safety.
To navigate the Boundary Waters, your best bet is to orient yourself using portages, campgrounds, and prominent features of the shoreline like points, islands, bays, etc. It’s normal — and a right of passage — to get pretty confused about exactly where you are since the lakes and islands can make it seem like a maze. Don’t worry, it’s rare for visitors to actually get lost!
Water Gear & Equipment
Aluminum canoes are heavier to carry on portages, but they’ve got one big benefit: they’re bombproof. No need to worry about scraping a rock in these! Kevlar canoes are more fragile and require extra effort when using them, but they’re much lighter to use while paddling and portaging.
You’ll also need a fair amount of gear for your canoe (outfitters will provide all of this): paddles, life jackets, duct tape, sponge and bailer, and cords to tie in your packs. If you’re planning to fish, bring a pole and tackle box. And don’t forget a swimsuit!
Clothing
Essential Clothing for Paddling
Carve Designs Cruz Rashguard
I prefer wearing a rashguard over sunscreen these days. I own the Cruz in 2 colors and it’s a staple for any water activity because it dries quickly but also keeps you cool, plus the cut is flattering.
Sandals that stay on your feet and can get wet are essential. I like these because they have good grip and can be worn hiking as well, plus they can easily be strapped to your boat when not in use.
You’ll want a wide-brim hat that can get wet and has a chin strap so it stays on in the wind. This Outdoor Research hat is quick-drying, will float if it falls in the water, and comes in a variety of colors.
Polarized glasses are best for the reflection of the water. I like to wear budget-friendly sunglasses paddling and I always wear a retainer so I don’t lose them in the water.
If it’s chilly or windy it can be helpful to have a lightweight rain jacket or windbreaker out on the water with you. I usually pack a jacket like this just in case!
You’ll want a comfortable swimsuit that you can be active in. I like to avoid swimsuits that pull on my neck (like halters) and have been loving Nani Swimwear lately.
There are bears that live in the BWCA, but they rarely bother people. Most visitors opt to hang their food from a tree instead of bringing a bear canister. To hang your food bag, find a tree limb about 15-20 feet off the ground. Attach a heavy item to the end of your rope and throw it over the branch so that the rope is 4 feet away from the trunk. Now attach your bear sack to the rope, pulley your bag into the air, and tie off your rope. With a little searching, you can usually find a popular tree limb that’s used near each campground.
Water Filtration
Luckily, obtaining water in the Boundary Waters is much easier than most backpacking trips. While old-timers may still drink straight from the lake, it’s safer if you boil or filter the water. Simply paddle out away from your campsite and fill your containers from the lake, then purify or boil the water before using. While I used to drink straight from the lake, it’s not worth risking a Giardia infection.
The Platypus GravityWorks filter system is simple to use without needing to pump it. I’ve also used a Katadyn Hiker Microfilter in the BWCA, too, which I like because you can filter water straight into your water bottle while you’re canoeing.
I recommend filling and treating a 1- to 3-gallon water container when you arrive at your campsite to use for dinner, breakfast, and filling smaller 1-liter Nalgenes for the next day’s paddle.
Fire, Camp Stoves, and Cooking Gear
BWCA campgrounds have a fire pit area that can be used for cooking as long as there isn’t a fire ban in the area. The fires must be small and be put out completely when you’re not in camp. Firewood is available from the surrounding forest, but remember to only take dead and downed wood — live wood doesn’t burn well, anyway. If there is a fire ban, bring a camp stove for your cooking.
Sun Protection
It’s easy to get sunburned on a Boundary Waters canoe trip. Not only are you spending a lot of time out under the sun, but it’s also reflecting upward from your canoe and the water, too! Use sunscreen, a sun hat, and consider UPF clothing to keep the sun at bay.
The BWCA is a unique, special place. But that doesn’t mean it always will be. Consider supporting the Friends of the Boundary Waters Wilderness to ensure this national treasure stays protected. Proposed copper-sulfide mines like Twin Metals risk contaminating and permanently polluting the Boundary Waters.
Taking a canoe trip through Minnesota’s Boundary Waters is a trip unlike any other, and thanks to its massive size and undeveloped character, it’s a wilderness you can return to again and again for new adventures. Whether you’re a seasoned paddler or new to canoe camping, the BWCA will not disappoint!
Have you done a Boundary Waters canoe trip or are you planning one? What questions do you still have? Let us know in the comments!
Colorado is a land of plenty, offering some of the most scenic places to hike, bike, and ski in the United States. With all the great opportunities to SUP in Colorado, it’s time to add stand-up paddle boarding to that list!
I tried stand-up paddle boarding for the first time a few years ago and I had such a blast that it has since become one of my favorite summer activities, especially in beautiful Colorado. It’s a relaxing way to get out on the water and take in your surroundings, all while getting a good workout.
If you find yourself in the Rockies this summer and want to see a different side of the Centennial state, here’s a list of some of the best places to SUP in Colorado.
Important Reminder: As outdoor recreationists, it’s our responsibility to know how to recreate responsibly on the water whether we’re kayaking, paddleboarding, canoeing, rafting, or boating. Learn how to prevent the spread of aquatic invasive species with 3 easy steps that have a huge impact on our ecosystems.
Best Places To Stand-Up Paddle Board in Colorado – Mapped
*Note: Toxic Algae Blooms have been detected in Cherry Creek Reservoir in 2023. Pay attention to signage and avoid swimming or letting your dogs come in contact with the water in affected areas.
First, an awesome spot to SUP in Colorado is right in Denver’s backyard – Cherry Creek Reservoir. With 880 acres of paddle-ready water, this local spot has tons of activities for the whole family to enjoy even if you’re not in the water.
In addition to paddle boarding, in the summer months, there are a variety of other activities at Cherry Creek like model airplane flying and horseback riding (check out the park’s website for a full schedule).
There is a fee of $11/day per vehicle and overnight camping is available.
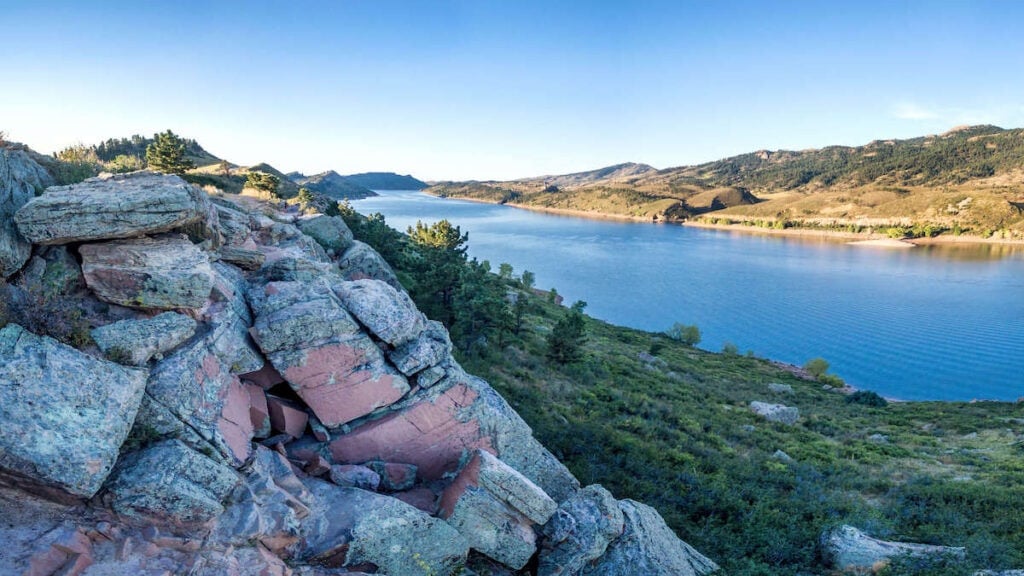
While Horsetooth Reservoir isn’t exactly quiet and secluded, its proximity to Fort Collins makes it a super convenient place to SUP in Colorado. The Satanka Bay at the northern end of Horsetooth Reservoir is reserved for paddlecraft use only, so you don’t need to worry about motorized boats while you enjoy the views that look over Lory State Park and its rolling hills and rock outcroppings.
The entrance fee for Horsetooth Reservoir is $9/day per vehicle (plus an additional $9 if you bring a trailer).
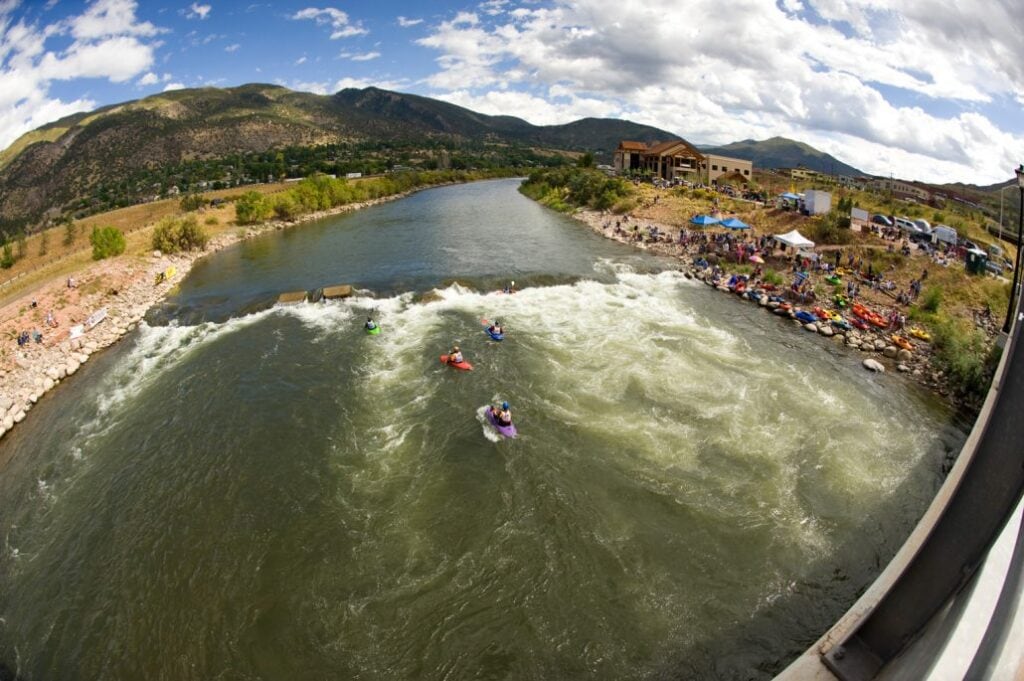
3) Glenwood Whitewater Park
Looking for a little more of a challenge? Check outGlenwood Whitewater Park, in Glenwood, CO, the first of its kind on the Colorado River. This is a great place for advanced-level paddle boarders to practice in a relatively controlled environment.
The water park is a three-hour drive from Denver but it provides a great place to test your skills and it’s free for users. After beating yourself up for a bit, check out the Iron Mountain Hot Springs just down the street. The hot spring resort boasts freshwater family pools, sixteen natural hot springs pools, and an elevated whirlpool spa with a calming waterfall where you can relax, restore and rejuvenate in the iron-rich thermal waters.
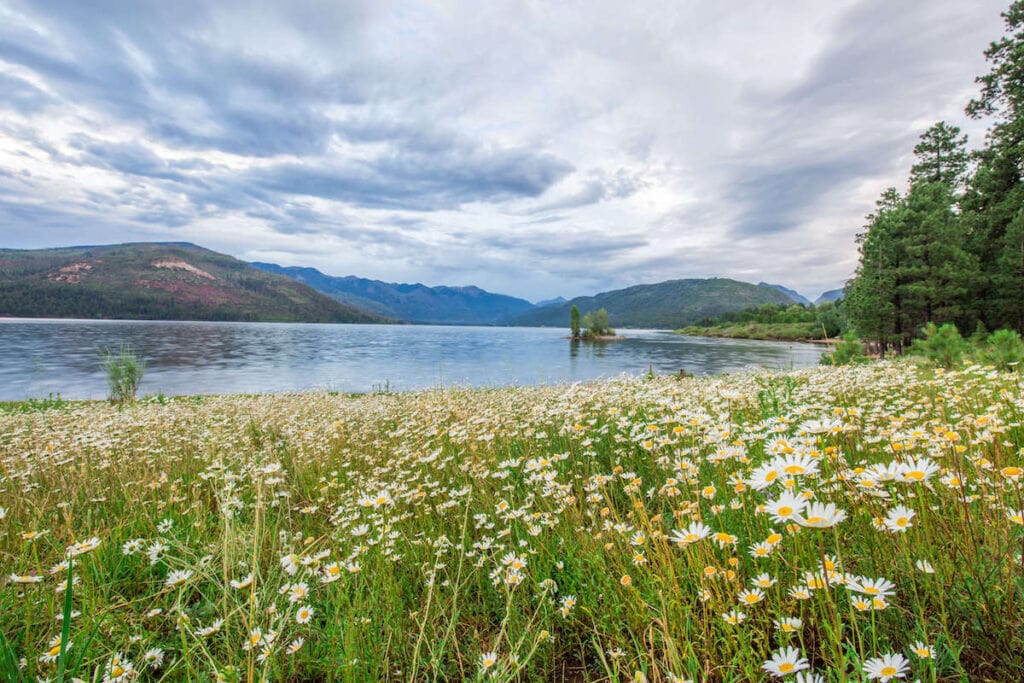
If you find yourself down in southwest Colorado be sure to check out Vallecito Lake. This little gem located about 25 miles north of Durango is a great option for those looking to do some open water paddling.
Located in a beautiful valley with views of the surrounding peaks, this is one of the best places to paddle board in Colorado that you won’t want to miss. There are some big fish in here too so don’t forget your fishing pole! The public launch is free to use.
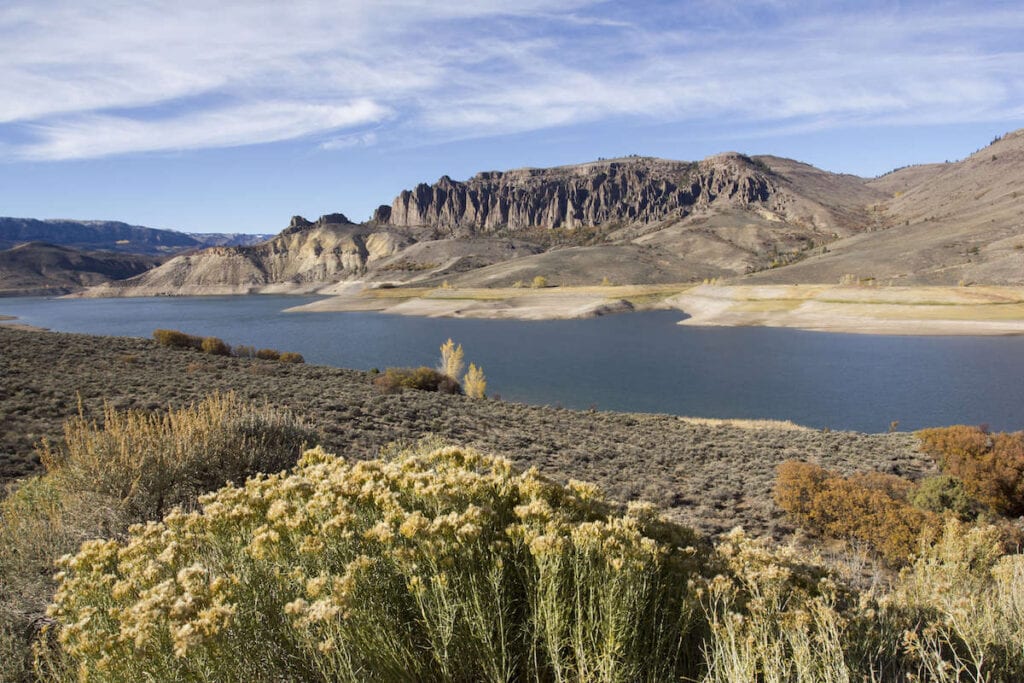
5) Blue Mesa Reservoir
Ready for a real workout? Check out Blue Mesa Reservoir. Located east of Montrose near the town of Gunnison, this is the largest reservoir in Colorado at 20 miles long with 96 miles of shoreline.
Like Vallecito Lake, there are trophy fish here and it’s well worth bringing your fishing gear. A good place to launch your paddle board is the Elk Creek Marina & Visitor Center which is free to the public.
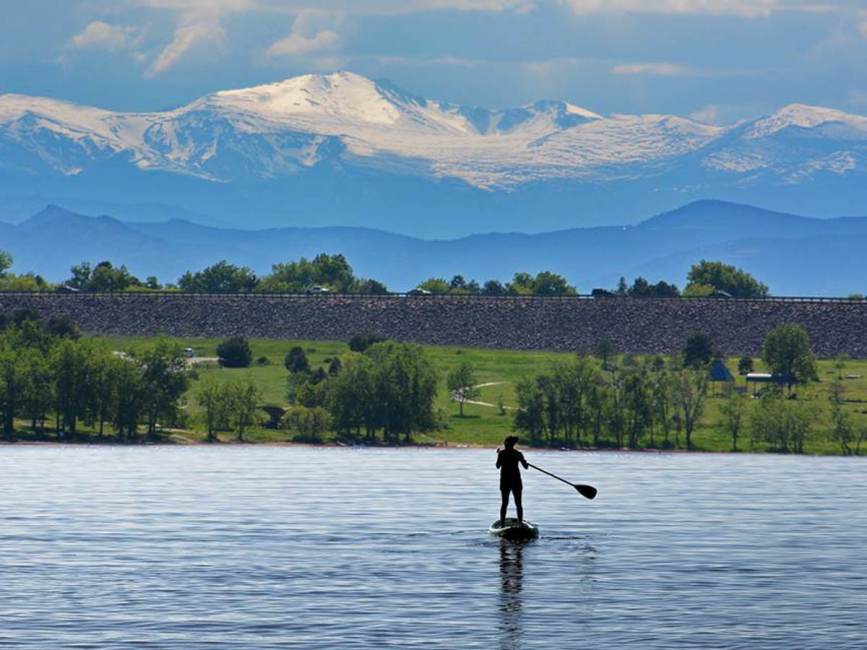
6. Barr Lake
Barr Lake in beautiful Barr Lake State Park just outside of Brighton, Colorado a short drive northeast of Denver. It’s a great place to SUP in Colorado, especially if you don’t want to travel far outside the big city. It also offers amazing views of Long Peak and Colorado’s famous Rocky Mountain range.
In addition to paddle boarding, Barr Lake State Park is also home to 12 miles of trails including an 8.8-mile path that circles the lake, fishing, bird watching, boating, camping, and more.
There is an entrance fee of $9 per vehicle or $4 for individuals.
Well, there you have it! These locations represent some of the best places to stand up paddle board in Colorado – they’re accessible, inexpensive, and provide fun for the whole family.
Essential Clothing for Paddling
Carve Designs Cruz Rashguard
I prefer wearing a rashguard over sunscreen these days. I own the Cruz in 2 colors and it’s a staple for any water activity because it dries quickly but also keeps you cool, plus the cut is flattering.
Sandals that stay on your feet and can get wet are essential. I like these because they have good grip and can be worn hiking as well, plus they can easily be strapped to your boat when not in use.
You’ll want a wide-brim hat that can get wet and has a chin strap so it stays on in the wind. This Outdoor Research hat is quick-drying, will float if it falls in the water, and comes in a variety of colors.
Polarized glasses are best for the reflection of the water. I like to wear budget-friendly sunglasses paddling and I always wear a retainer so I don’t lose them in the water.
If it’s chilly or windy it can be helpful to have a lightweight rain jacket or windbreaker out on the water with you. I usually pack a jacket like this just in case!
You’ll want a comfortable swimsuit that you can be active in. I like to avoid swimsuits that pull on my neck (like halters) and have been loving Nani Swimwear lately.
I was gifted a backpack, a top and a fleece by TOG24 to help me enjoy our days out this summer. All views and words are my own.
This year, more than any other has been a time to explore our own country and enjoy some days out. With foreign travel still a difficult proposition, we spent a few days in Norfolk at the start of the summer holidays, and had some amazing days out at the beach and a lovely trip to Bewilderwood.
We enjoyed some lovely days out while on holiday in Norfolk, including a day rockpooling at West Runton
Since then we have explored closer to home, and had some more local days out, for example Warwick Castle (so good I will have to write a whole post about it), Emberton Country Park and Wicksteed Park. There’s an element of making up for lost time, and it’s been great to finally spend some quality time with our family.
Organising and knowing what to pack for a family day out can be minefield, especially when you are catering for different ages and then factor in the Great British weather!
So what do you need for the perfect day out? Here are my top tips to make everything go smoothly, and ensure you make memories for the right reason!
The Right Backpack
If you’re heading out on a family day out, chances are you’re going to need a fair bit of stuff. With two young boys, I often end up feeling like a pack horse as I trudge along carrying everything we need. It’s so important to get a good quality backpack, and make sure it is adjusted correctly so it fits. It will make a big difference if it isn’t sitting right, I would definitely advise to only use a backpack with a waistband and padded shoulder straps.
A decent rucksack is a must for successful family days out
I have been using this backpack from TOG24 recently and it has made life so much easier. Firstly, it is a spacious 35l, which is bigger than my old one. It also has handy side and front pockets for bits and pieces that you need to be easily accessible. It also has a raincover and a mesh backing to keep you cool (no one likes a sweaty back!)
The Right Clothes
Even if you’re heading out in the height of summer, the good old Great British weather can make it hard to know exactly what to pack for a family day out. My advice is be prepared for every eventuality. So you’ll need sunhats and suncream, plus lightweight waterproofs that can be rolled up are ideal. I am also a massive fan of a thin fleece jumper. Again, they are super lightweight, quick drying and can be rolled up in the bottom of your bag.
You might need sunhats, you might need waterproofs. A UK day out is never dull!
The Right Fuel
The success of a family day out can rely on making sure that no one at any point tips into the hangry zone. Making sure you’ve got enough snacks and drinks for everyone is vitally important. High energy fuel like flapjack is perfect, I also take bananas, dried fruit and things like mini cheddars and babybel to keep my kids happy. I often freeze yoghurt pouches, which then act like ice blocks and keep things cool. Once they are defrosted the kids can eat them.
I always carry a reusable water bottle with me, plus extra drinks for the children. If it’s hot I add ice to keep them cool or use my insulated Hydro Flask (also good for hot drinks in the winter).
Don’t forget…
If you want to capture your days out, remember your camera, plus a spare battery, If you’re using your phone, a portable power bank is a great idea to make sure you don’t run out of battery at the vital moment. They can be very small and take up next to no room.
It can be overwhelming remembering everything, so I’ve done the hard work and made this snazzy printable list that you can use to plan your family days out.
Paddle boarding (also known as SUP-ing) is a great way to get outside and enjoy the sun and water. It’s also an excellent form of exercise, especially for the core. But paddle boarding for beginners can be daunting to know where to start.
This blog post will give you SUP tips and gear recommendations for beginners. So whether you’re looking for your first board or just want to know how to stay safe on the water, read on for some essential SUP advice. Happy paddling!
Looking to try out SUP? Read our complete paddle boarding for beginners guide below!
Important Reminder: As outdoor recreationists, it’s our responsibility to know how to recreate responsibly on the water whether we’re kayaking, paddleboarding, canoeing, rafting, or boating. Learn how to prevent the spread of aquatic invasive species with 3 easy steps that have a huge impact on our ecosystems.
Stand-up paddle boarding is a water sport that allows you to explore and enjoy the water without necessarily swimming in it (although you can definitely do that, too!). Unlike canoes and kayaks, paddle boards are completely flat boards that you can stand, kneel, or sit on to paddle.
SUP paddles are similar to canoe paddles with a blade on one end and a handle on the other, but they are longer than your typical canoe paddle so you can fully stand comfortably.
Paddle boarding has gained popularity in the last few years because it’s a relaxing, fun, and engaging way to paddle across various waterways including lakes, oceans, bays, rivers.
You can also do other activities on a paddle board like SUP yoga or surf some waves.
How To Paddle Board
Learning how to paddle board properly is essential for maximizing power and torque out of each stroke as well as improving your balance. This will increase your paddling speed and give you more of a workout. By learning the proper technique, you will also have better control of the board and be able to maneuver more effectively. Below are a few paddle boarding beginner basics:
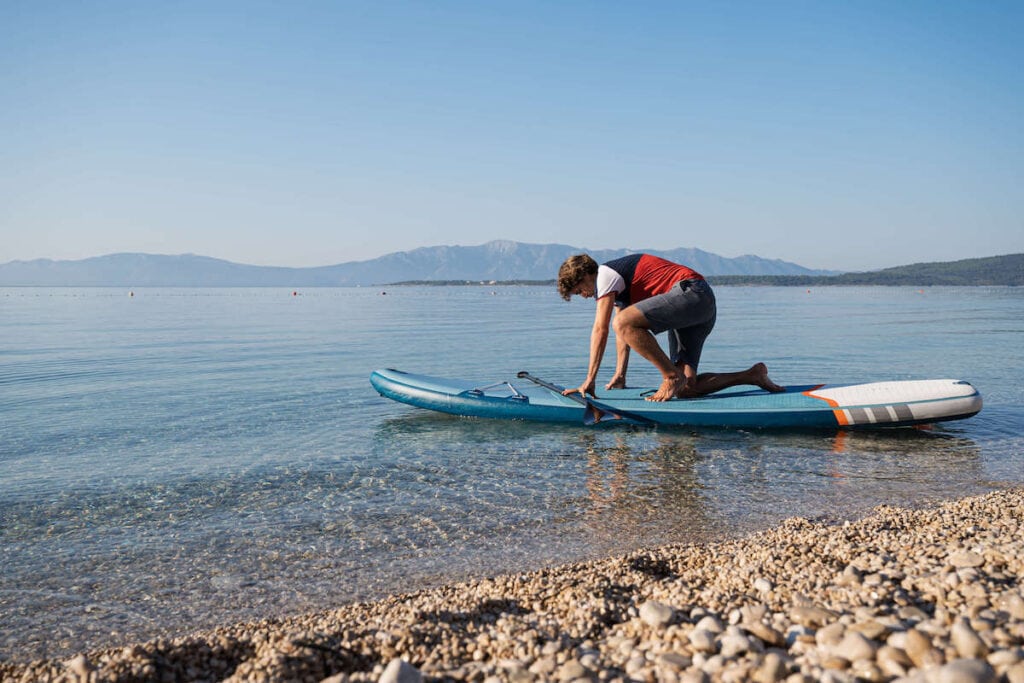
How To Stand On a Paddle Board
Stand next to the board in shallow water. Keep an eye on the fin so it’s not dragging on the bottom.
Place your paddle down across the board
Attach the ankle leash if there is one
Plant your hands firmly on the paddle and kneel on the board just behind the board’s halfway point
When you feel like you are balanced, slowly stand up
Position yourself so you’re standing at the center of the board – it should be flat on the water with neither the nose or tail lifting up or pushing into the water
Your feet should be facing forward about hip-distance apart or wider with knees slightly bent
Take your time getting onto your paddleboard and slowly stand up when you feel balanced
How to hold a paddle board paddle
Grip the T bar at the top of the paddle with one hand and place your other hand at a comfortable distance about halfway down the paddle
The angle in the paddle blade should face away from you, which is the opposite of how you would hold a kayak paddle.
The angle of the paddle blade should face away from you
How To Paddle a SUP
Keep your core engaged to help with your balance
Keep your arms straight as you extend the paddle forward for each stroke
Make 4-5 short, close strokes on each side of the board and then switch sides and reverse your hand positions
To turn, keep paddling on one side (paddling on the right will cause you to go left). Or for a quicker turn, drag your paddle backward on the side you want to turn in the direction of
The best thing about paddle boarding versus kayaking or canoeing is that you have many options for how to paddle. While we outline how to stand up on a paddle board above, you can also paddle board while kneeling or sitting on your board.
Beginner paddle boarders can feel out what works best for them or what is most comfortable. Once you’re out on the water, you can even lie down on your paddle board to relax! Another helpful option is a packable chair that you can use to sit on a paddle board and paddle kayak style if you feel fatigued or are struggling with balance while standing.
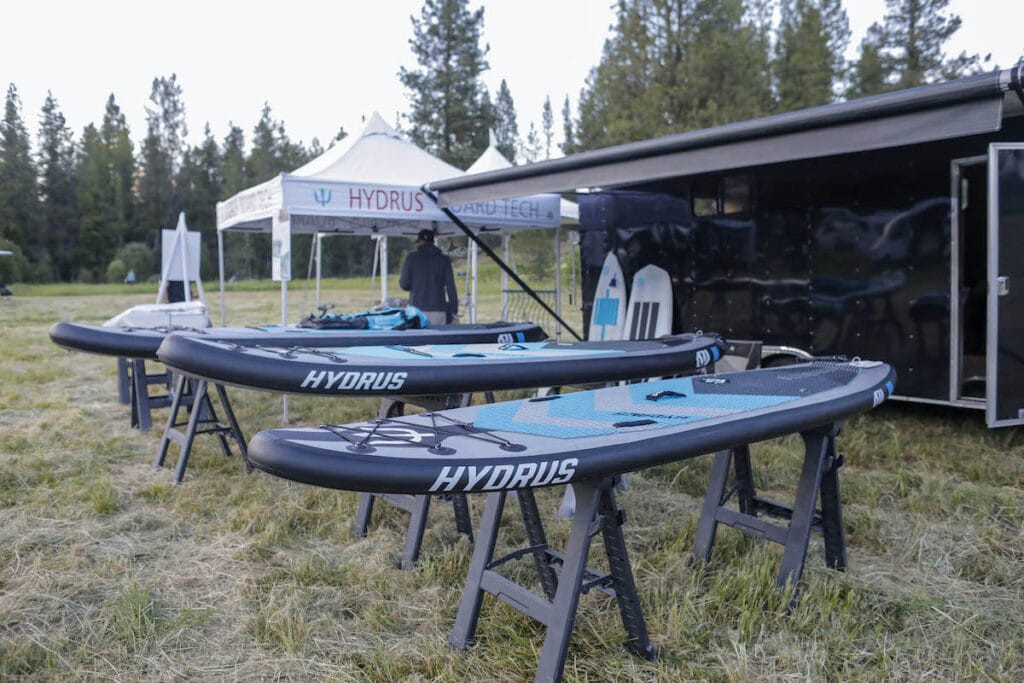
There are two types of paddle boards: solid and inflatable. If you are renting a paddle board, it will likely be a solid SUP. However, inflatable paddle boards are gaining popularity for their affordability, packable size, and versatility. Here are a few key differences between solid and inflatable paddle boards:
Solid Paddle Boards
Pros: best performance on the water, no time to set up, more stable, less effort to paddle, easier to custom fit
Cons: More challenging to store and transport
Bearfoot Theory Pick: Surftech Bark Catalyst Tuflite V-Tech Stand Up Paddle Board
The Surftech Bark Catalyst Tuflite V-Tech Stand Up Paddle Board is a great choice for entry-level paddlers because it is super stable, durable, and versatile. Whether you want to take it out on a lake, down a river, or even in the ocean, this board will keep you feeling comfortable and secure.
Pros: easily stored and transported, softer and more comfortable to sit or do yoga on, can paddle more places (like a short hike to a lake), better suited for rapids
Cons: inflating and deflating is time-consuming, less stability
Bearfoot Theory pick: Bote Breeze Aero Inflatable Stand Up Paddle Board
The Bote Breeze Aero Inflatable Stand Up Paddle Board is our top choice for an inflatable SUP. Designed to be packable and lightweight, it’s the perfect board for water-focused adventures. When packed away in its own backpack, it weighs just under 22 lbs and can easily be carried on a short hike or stowed in the back of your car.
You should choose your paddle board based on the kind of activities you plan to use your board for and what kind of water you will be paddling on. There are two body types for SUP boards:
Planing Hull: wide, flat body with a rounded nose. Best for leisure paddling, SUP yoga, surfing, and whitewater.
Displacement Hull: narrower body with a pointed nose. Best for fitness paddling, long-distance or overnight paddling, and racing
For most beginner stand up paddlers, finding a board with a planing hull is best because the wider width gives more stability so you can focus on the correct paddling stroke without the constant concern of falling in the water.
Weight capacity & length
Other factors to consider when renting or buying a paddle board are weight capacity and length. It is important to calculate the total weight on your board (including gear, any pets, food, etc.) to ensure your board will sit high in the water and you will be able to paddle easily.
Paddle boards usually come in 3 lengths: short boards (under 10′) are best for children or surfing, medium boards (10-12′) are best for leisure and everyday paddling, and long boards (over 12′) are best for long-distance and fitness paddling.
Beginner Stand Up Paddle Boarding Tips
Now that you have a better understanding of what paddle boarding is, the different types of paddle boards, and how to choose the right one for you, let’s dive into some paddle boarding tips:
1. Check Conditions
This is an important step before venturing out for any SUP adventure. Make sure that conditions are safe and fit for your ability so you can have an enjoyable time. Flatwater (a lake or a bay) is best for beginners versus moving water in the ocean or on a river.
I also recommend picking a calm, sunny day with little to no wind – mornings and evenings usually have calmer waters. If you are planning to paddle board in windy conditions, pick a spot where the wind will be at your back on your way back in so you are not fighting against the wind when you are more tired. If you ever get caught in a windstorm, lay down on your stomach with your paddle underneath you and paddle like you are on a surfboard.
Flat, calm conditions are ideal for learning how to paddle board
2. Take a Buddy
If you are brand new to paddling, bring a friend! This will not only enhance your enjoyment out on the water but also creates a safer learning space. Try to pick a spot that is not crowded by boats, buoys, or other obstacles in the water.
Do not plan a long trip for your first outing – paddle boarding is a full-body workout, and you may be surprised at how sore you are the next day!
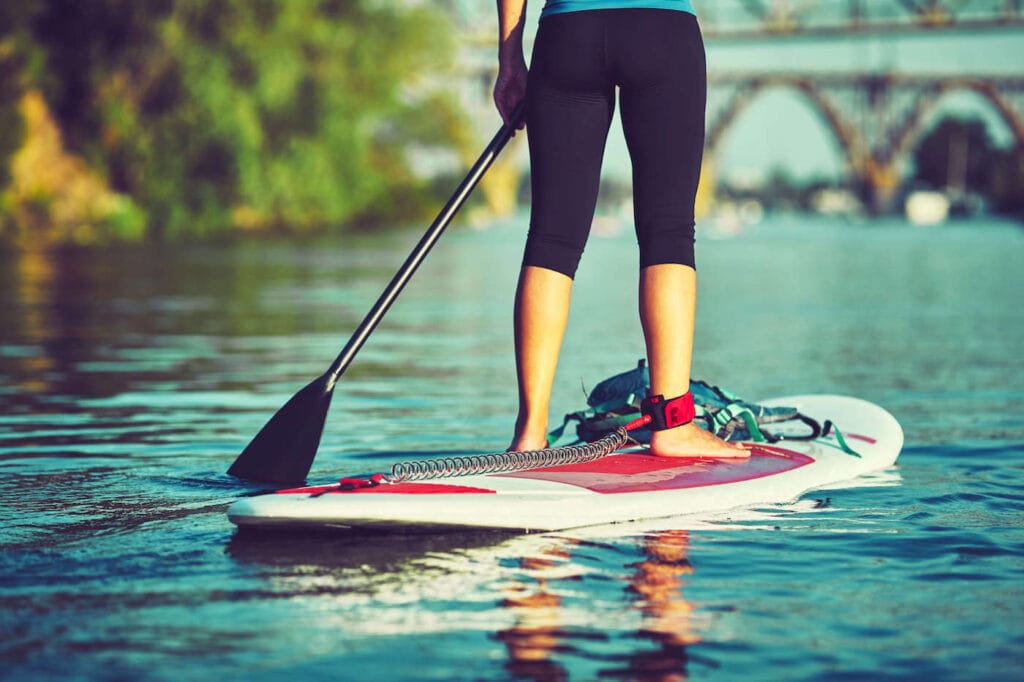
3. Always Use a Leash
A paddle board leash loops around your ankle and keeps you attached to your board. Let’s face it – at some point, you might fall off your paddle board (and that is part of the fun of water sports!). To ensure you stay close to your board and can easily retrieve it, always use a leash.
There are different leashes for different types of paddleboarding activities, so be sure to buy the correct leash.
4. Use Your Core
Don’t rely on your arms to do all the paddling – this is the quickest way to tire yourself out! Be sure to keep your core muscles engaged to even out how hard your body is working while paddling. Stand up tall while on your SUP. Your large back muscles should be doing the bulk of the work and be sure to also dip your blade fully into the water with each stroke to get the maximum resistance.
5. Consider Taking a Paddle Boarding Lesson
Whether you are just learning or an experienced paddler, there are always new techniques that can be picked up to enhance your paddling experience. Guided paddle boarding trips mean more structure, less planning, and a safe group to explore with.
I highly recommend taking a lesson before paddle boarding in the ocean or if you plan to do long distance SUP trips.
Paddle Boarding Gear
What to Pack for Paddle Boarding
If you are just beginning to learn how to paddle board, it’s best to rent gear or borrow from a friend. Paddle boards are an investment, so you should make sure you enjoy it before pulling the trigger on buying one.
Here is our recommended list on what to pack for paddle boarding:
Carabiners – some paddleboards have bungee straps so you can easily strap down your gear. We also recommend attaching a carabiner to anything important (like your dry bag, portable speaker, etc.)
Waterproof Portable Speaker – who doesn’t love listening to tunes while on the water? Just be respectful of other people and remember that sound carries over water.
Garmin inReach Mini – I always recommend carrying an emergency communication device if you are out of cell range
What to Wear Paddle Boarding
Since you’ll likely be getting wet, you want to stay away from anything cotton which will leave you dripping and soggy all day. Assuming it’s warm and you don’t need a wet or dry suit of any kind, you’ll want lightweight, quick-drying layers – like a rash guard and boardshorts – which also provide sun protection.
Here is what we recommend you wear while paddle boarding:
Essential Clothing for Paddling
Carve Designs Cruz Rashguard
I prefer wearing a rashguard over sunscreen these days. I own the Cruz in 2 colors and it’s a staple for any water activity because it dries quickly but also keeps you cool, plus the cut is flattering.
Sandals that stay on your feet and can get wet are essential. I like these because they have good grip and can be worn hiking as well, plus they can easily be strapped to your boat when not in use.
You’ll want a wide-brim hat that can get wet and has a chin strap so it stays on in the wind. This Outdoor Research hat is quick-drying, will float if it falls in the water, and comes in a variety of colors.
Polarized glasses are best for the reflection of the water. I like to wear budget-friendly sunglasses paddling and I always wear a retainer so I don’t lose them in the water.
If it’s chilly or windy it can be helpful to have a lightweight rain jacket or windbreaker out on the water with you. I usually pack a jacket like this just in case!
You’ll want a comfortable swimsuit that you can be active in. I like to avoid swimsuits that pull on my neck (like halters) and have been loving Nani Swimwear lately.
We hope these beginner paddle boarding tips inspire you to try SUP for the first time this summer. What questions or tips do you have? Leave them in the comments below!
With so many walking trails in the UK, it can be hard to decide where to start from. There are many attractive paths that you can enjoy trekking on as you unwind. Are you tired of having to travel miles to a hiking trail? Here are the nine best hiking trails you can visit.
Trelissick Cornwall
This Trelissick circular walk is a great trail to start with. What’s more thrilling than taking a walk through historic parkland? Trelissick Cornwall is chilled by an oak fringe creek, a fort, and an eightieth-century quarry.
If you would like to take your dog along, this trail is dog-friendly, and it’s easy to use. Walking through the trail takes between thirty to forty minutes. The best thing about using the trail is that you start and end at the same point.
Regardless of the season, you can enjoy your lunch under an oak tree and chill without caring what’s happening in the world. If you feel so tired after trekking for the whole day you can check for a list of inspiring films at Lottoland to get inspired.
2. Stowe Buckinghamshire
Remember when you were a kid and spent hours trying to find secret gardens? Taking a walk here will let you remember those memories. The journey is about three miles long, and you’ll take around two hours to complete the adventure. Along the way, you can explore many secret hidden holes and lakes.
You’ll also get an opportunity to take a walk around Stowe’s house. While enjoying the fantastic breathtaking views of nature, you can also take up some history. The trail is dog-friendly and very easy to use.
3. Sizergh’s Castle Cumbria
This walking trail is a perfect way to start your Lake District holiday. Along the way, you can enjoy the breathtaking views of Morecambe Bay Lake. The paintings along your way will make you discover a fantastic array of natural history. The trail is suitable for everyone, young and old.
If you’re looking for a trail with a bit more wildlife, Attingham is the place to be. The two-and-a-half-mile circular trail is in the deer park, and you can have an amazing view of many animals roaming around. The trail is dog-friendly, and it takes around an hour to complete your journey.
The trail offers lots of open fields to walk in. You can also pass through the woodlands and enjoy the serene environment. Hikers like the trail because it’s an excellent place to end in a place where you started from. You can also order a map to find out more about what is in the area.
5.Sheringham Woodland, Norfolk
This woodland trail is truly breathtaking. The trail is seven miles long, and you will take over two hours to complete your adventure. The trail offers impressive views of woodlands, parklands, and a cliff at the end.
You also get an opportunity to climb a treetop gazebo to enjoy the fantastic views. You will also see all types of plants, wildlife, and other incredible views. To know what to view along the way, you can get an Explorer two v two maps to guide you.
Walking along this trail will give you the best experience. The trail is twelve and a half miles long. You can decide to walk through a sacred village full of history. Before going to the hills, you can first visit the Robert Burns Birthplace Museum.
You can take pictures while climbing along Carrick hills. Burns Trail is the best place to be if you want to unwind and be away from the city. The best part is your dog and friends can accompany you.
7. St Cuthbert’s Way, Northumberland
This trail is among the best trails that will give you incredible and unique scenery. The journey begins at Wooler and ends at Holy Island. Walking along Till river, your will enjoy interacting with nature and viewing adorable arable fields.
You can learn more about history by visiting the St Cuthbert’s Cave. Afterward, you can climb on top of the hill and watch the North Sea coast.
8. Flatford and Constable Country walk
Want to take a walk and interact with nature? Flatford trail will fulfil your desires. Passing through the Stour Valley, the trail is surrounded by beautiful vegetation and incredible landscape.
If you’re a paint lover, learn more about the history of John Constable’s paintings as you take your favourite refreshment. You don’t have to be lonely as your pet or friends can accompany you.
9. Ashridge Estate
Ashridge Estate is a place to be if you’re looking forward to trying something different. During autumn, the trees change their colour, making the place appear magical. You can get a chance to see wildlife roaming across the woods and parklands.
If you’re a history lover, pass by the historic Ashridge Estate owned by the National Trust. You can take your lunch as you interact with people living there.
Final Thought
Sometimes, it’s worth taking a break from the busy metropolitan life and take a holiday or adventure. If you’re looking for something different, visiting the most beautiful walks in the UK will be a great choice. Don’t have a plan on where to visit? You can pick from the list provided above.


 A decent rucksack is a must for successful family days out
 You might need sunhats, you might need waterproofs. A UK day out is never dull!